I'm travelling into a new way of working, a new country, a new language, and a new hobby which I'm passionate about. Come with me for some of the journey...

Showing posts with label lights. Show all posts

Sunday, 14 November 2021

Monarchs of the Ice

Hello all!  I'd like to invite you to go hopping over to the PaperArtsy blog where I've been busy playing with the current Stamp Mash Up theme.  This fortnight we've all been combining stamps by Lynne Perrella, Ellen Vargo, Gwen Lafleur and me, Alison Bomber!  Here's a sneak peek of what I came up with... may I introduce you to the Monarchs of the Ice?

You can see stamps from all the designers in the mash-up except me in this sneak peek... To find the words, you'll just have to hop over to PaperArtsy.

Of course, there are also lots more photos and plenty of information about the making-of process - it wasn't all smooth skating! - as well as some more close-up angles.  And it's really worth having a scroll around while you're there to see the different projects this combination of designers' stamps has inspired.  There are even a couple more to come after this one.  

In any case, I hope you enjoy your visit to the sparkling kingdom of ice shards and snowflakes, and that it inspires you to combine your stamps in new ways too.

Thanks so much for stopping (and for hopping), and I'll see you again soon... or not, given that my laptop may be about to die on me as I write this - which is a week before you're reading it.  Please keep your fingers crossed for me!!  Either way, happy crafting all!

It is the life of the crystal, the architect of the flake, the fire of the frost, the soul of the sunbeam. This crisp winter air is full of it.
John Burroughs

Sunday, 30 July 2017

Neutral Blues III


Today's blue and brown tag is a slight hop out of kin as far as this series of Neutral Blues goes, but I think it's definitely still part of the group.

There's no paper doll involved but we are continuing to play with the Oxides, as well as also using my PaperArtsy quote stamps again.

The nature collector of Neutral Blues I and the many pairings of Neutral Blues II were gently Oxided.  This tag is full on Oxide!

The background was part of some playtime right at the start of my time in New York, and then it sat like that for the whole three months before travelling home again with me.


I started out just playing with combinations of Distress Oxides and Distress Inks again, layering up a wrinkle-free distress background.


There's endless delight in the variations you can get from dripping and spritzing and dabbing the inks and water.


I also did some stamping in Walnut Stain DOX - love how the pigment component means it will layer over the top so beautifully.


And then that was that for three months...

It wasn't until I was back at my craft table that I worked out what to do with it next.

The inspiration really came from this Walt Whitman quote from EAB02 Darkness and Light.


There's already lots of light and dark to be found in the inky splotches and splashes, but I thought I could go a step further by adding a more substantial reference to light.


It took some heavy duty gel medium to get the lightbulbs to stay in place, but I'm very happy now they're there.


As well as artificial light, we have some starlight too... (another connection to the previous pair of tags, with their tiny metal star accents).


And the clock picks up the thought about the hours of light and dark.


I mounted it on some bits of cardboard to give it a bit more dimension and presence.  And it was originally one of the pewter coloured clocks, but I used Mushroom Alcohol Ink to help it tone in with the rest of the tag.


I glued a piece of white-washed vintage book page across the tag (covering up a previous quote-stamping which I decided I didn't really like!), and the quote itself is simply stamped in Potting Soil Archival.


Some rusty mesh (from the new supplies - yay!) sits behind the quote, adding a bit more interest and detail.  I do love my rusty mesh.


And a bit of rusty wire at the top (the rusty wire which was wound round the new rusty mesh as packaging - waste not, want not) finishes the whole thing off.


So that's today's blue and brown tag - I hope it pleases you as much as it pleases me.  Sometimes it's the simple things which make me happy!

Thanks so much for dropping in today.  There's one more tag in this Neutral Blues series (back to the Paper Dolls with the next one) before I offer you something completely different (and I do mean completely!).  Hope you're all enjoying a lovely weekend, and I'll see you again soon.

The dance between darkness and light will always remain— the stars and the moon will always need the darkness to be seen, the darkness will just not be worth having without the moon and the stars.
C. Joybell C.


Since we're still on my much-loved blue and brown combination, I'm going to share this with Tag Tuesday again, where the lovely Chrissie has chosen My Favourite Colour Combination as the theme.
At Mixed Media Monthly they would like to see Altered Embellishments this month.  My bulbs and the clock have all been altered with alcohol ink to get the colours to tone in.
And at Try It On Tuesday they would like us to Let It Shine - lightbulbs and starlight and the magic of light and dark should do the trick, I hope.

Tuesday, 28 March 2017

Encore - Steam Pipe Trunk Distribution Venue

Encore Posts
Projects which made their first appearances elsewhere for Design Team duties or Guest Designer opportunities, but which only had a sneak peek here, are being gathered together in the pages of my virtual scrapbook.  I'm calling them "Encore" posts and they're formatted differently (all the way down the centre), so you can spot them easily.
Please don't feel that you have to comment all over again!

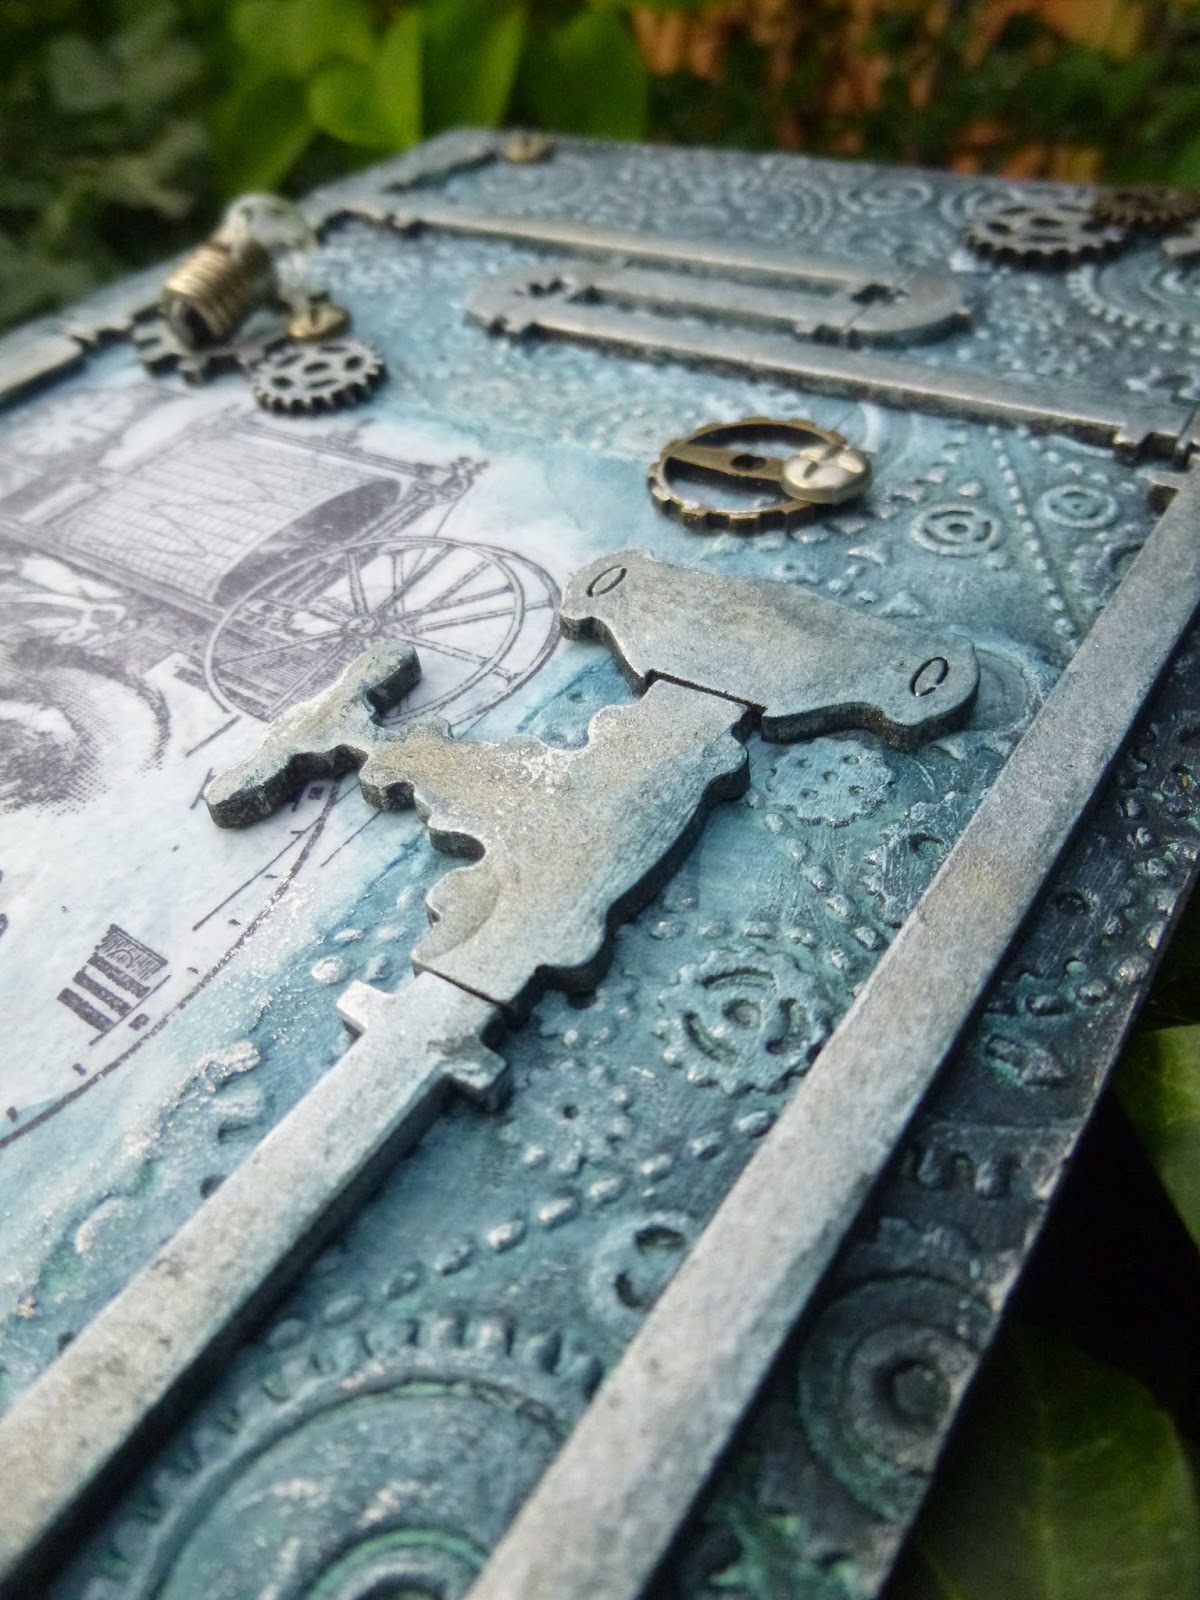
This is a Calico Craft Parts DT piece from the end of August 2015 and you'll see that I was ahead of the (Tim Holtz) loop with my suggestion to Calico Craft Parts that it would be nice to have some pipes and connectors to play with.  Oh, and what's more - this plaque is almost exactly the size of the medium-sized new Etcetera tags.  Just goes to show there is "no new thing under the sun"!  This is what I wrote back in 2015...
_______________________________

Steampunk fans will be excited to hear that the latest additions to the Calico Craft Parts range offer a wealth of Steampunk inspiration.  There are fantastical cogs and flourishes, quirky characters and vehicles, as well as the pieces I've been playing with... a set of pipes and connectors (I'm proud to say they were my suggestion, though the actual design details were all in CCP's hands).  They're so much fun to play with, and here's what I've cooked up on my first go.


It's not where I meant to go, but I rather like where it ended up.


(The post title is there for any West Wing fans - you'll know what I'm talking about with the Steam Pipe Trunk Distribution Venue!  It just seemed the right title for this piece.)


The whole thing is on a large plaque, so there's plenty of room for one of my favourite steampunk-style stamp images as well as lots of the pipes and taps and screws from the Pipework Maze set.


The base is one of the Birch Plywood Plaques - the large Rectangle, 30x15cm (12x6 inches for those in old money!).  I had a little play with the pipes and the image to get a rough idea of where I might be headed.


Next step was to cut and emboss some card to fill the plaque around the area for the image, and then I covered that with black gesso from the edges and white gesso from the centre, so that we'd have a nice glowing light at the centre of things.


Then I started adding colour - some ink and mica sprays and some DecoArt Traditions Prussian Blue Hue - before dry-brushing with white gesso to highlight the texture.  (It's all a sort of combination of things learned from Andy Skinner and Finnabair.)


I spent a while playing with the pipes, trying out various finishes.  Thankfully, the Calico Craft Parts are more than sturdy enough to take several changes of mind.  Here's one that didn't make it - too dark against the background, but a look I'll be playing with again soon!


In the end, I've got DecoArt Dazzling Metallics Silver paint with some mica sprays over the top, and a shading wash of the DecoArt Prussian Blue applied with the fingertips down the "dark sides" of the pipes and washer heads and taps.


In places, there's also some Pewter Treasure Gold providing highlights along the inner sides of the pipes, shining in the light cast by our beautiful Steampunk woman (a La Blanche stamp).  I love all the stopcocks and pumps and taps (I'm sure there are proper names for them all... I just don't know them!).


And I love that you can pretty much create any map or maze of pipes that you like.


I altered some of the Mini Cogs, Styles 3 and 4, in the same way, and added them to the steam pipe maze...


... along with some metal cogs of various sizes.


I was lucky enough to be given some tiny lightbulbs by a friend of Cestina's.  I've been hoarding them, but finally some of them have a home of their own.


So the glow of the woman at the centre is not the only source of light in the piece!  She's stamped on tissue paper and glued into place.


You'll probably have noticed that the Pewter Treasure Gold made its way onto the background cog texture too.  It adds a great metallic lustre.


The sentiment is stamped on watercolour paper, tinted around the edges with the same ink and paint colours to tie it in with the rest of the piece.


I can see so many possibilities for these steam pipes.  They'll work on layouts (they make a great framing feature for an image or photo), or on masculine cards or tags.


You could go all out grungy and rusty, but for this particular creation I'm going to claim the Glampunk label again.  I'd intended to go for rust and verdigris, but that just wasn't where it took me this time around.  There's always another day!


I hope you like my Glampunk plaque, and do check out the new Steampunk offerings over at Calico Craft Parts.  You might just find yourself setting out on a Steampunk adventure of your very own. 
__________________________________

So there you go - if you don't fancy cutting your own pipes with Tim's new die, then Calico have got it all sorted for you!  Thanks so much for stopping by today, and I'll see you again soon, once I've got the current bit of dashing about done.

I never drink water.  That is the stuff that rusts pipes.
W.C. Fields

Friday, 6 November 2015

Remember, remember...

Hello all!  It's time for a new challenge at A Vintage Journey and the fabulous Nikki would like to see the explosive side of things with Baby, You're a Firework!  Grab your glasses of mulled wine - it's a photo-heavy post!  Yesterday, November 5th, was what's known as Bonfire Night in the UK, when we commemorate the near-destruction of Parliament in 1605.

Remember, remember the fifth of November,
Gunpowder, Treason and Plot
I see no reason why Gunpowder Treason
Should ever be forgot.


Given Guy Fawkes and his conspirators failed to ignite their gunpowder beneath the Houses of Parliament, I've always found it a bit strange that we celebrate the failure by setting off fireworks... it seems to me that in that explosive symbolism there's a hidden wish that he'd succeeded!


In any case, with our Bonfire Night and with Thanksgiving in the US coming up at the end of the month and with the darkening evenings, November is the perfect time to play with fireworks (always reading the safety instructions first of course!).  So these are my fireworks, in various lights - because once again I've managed to give myself an almost impossible photographic task!!


I wasn't at all sure what I wanted to do for this challenge until I had the bright idea of getting some tiny lights.  A conveniently timed trip to Ikea meant I was able to grab a little £3 set of battery lights so then I had to set about working out how to do what my head had come up with!


I decided to use a reverse canvas so that I could create a dimensional scene - it's a 12x12, so the internal space is about 10x10.  I remembered I would need to gesso the internal canvas since it's not prepped like the front side.  Then I applied Distress Paints in Chipped Sapphire, Wilted Violet (yup, it's here again!) and Stormy Sky to create my graduated twilit skyscape.


I added some of my favourite Tim Holtz wild meadow grasses (and you can see the early stages of the crackle on the frame in these photos - more on that below - as well as some of the clouds I brought in from the edges to create a darker sky).


I had some wrinkle-free distress tags around which were mainly Ground Espresso and Wilted Violet so I used those to cut some of the Artful Dwellings.  There was also some shimmery inky card left from Underneath the Undertakers so I used that too (for the building on the far right of the scene).


I'm absolutely in love with all the new tree dies - so many gorgeous new arboreal die-cuts to play with.  These delicate outline fir trees made a nice addition to the village I thought.


And along the bottom are the tiny trick-or-treaters but with most of the crazy hairstyles cut off, so that they become simply children at the fireworks display.


So what do I "remember, remember..."?

Some of us haven't always enjoyed such things... At my first firework display it took only the first explosion for me to let go of my mother's hand and hightail it out of there.  I was eventually found some distance away, inside the stately home that was hosting the display, cowering (with my little brother) under one of the tables where they were serving hot drinks!


It's well known that pets can become very distressed on Firework Night, so I'm impressed that this cat has managed to stick around, even though he is halfway off the frame - perhaps he's heading for cover as I did!


Around the frame of the canvas I used DecoArt Chalky Finish paints and crackle medium, as I mentioned earlier...


I used the dark grey Relic underneath, then the crackle, then Lace over the top (you can see those first stages in the earlier photos above).


Finally I layered Distress Paints over the top - Chipped Sapphire and Ground Espresso chiefly, so that it would echo the colours of the interior scene.

I love the results.


So much for the scene-setting... now for the fiddly bit.  There are 12 lights on the garland, so I decided to cluster them in groups of three to create the explosive heart of each rocket.


These days I love fireworks - but my preferred colours by far are the white ones, with a few gold ones thrown in occasionally.  I've not much time to spare for all the bright colours, so I make no apology for going for the all-white look here.


I used a bodger to make the holes for each bulb and then removed them so that I could add spatter to create the showers of sparks around the main explosion.


Some of the spattering was done with Picket Fence Distress Paint and a splatter brush (I don't have Tim's new one... I went off and got a Liquitex one when he used it for a tag some time last year!).  I tried to concentrate the splatter around the light-holes.


Then I thought it would be nice to have something which would pick up the light from the bulbs so I used some Liquid Pearl droplets.

You get glossy light-reflectivity and some extra dimension.  I can't remember now whether they are Platinum or White Opal, but those are the only two colours I have the Liquid Pearl in, so it must be one of them!


Once the pearls had set, there then followed a period of much foul language and fiddling with glue and tape and all sorts to try to get the lights to stay in place!


The problem was that the bulbs sticking through were nice and small, but then the body of the lights sticking out of the back were large and cumbersome by comparison, and trying to get them to stay straight in their clusters was a struggle to say the least.

In the end, I gave up trying not to get glue on the bulbs themselves, and went for some Matte Accents (yup, like Glossy Accents but matte - so it wouldn't make the sky all shiny) to glue them in place and some tape to hold the backs in place while it dried.


I also glued down the battery pack - but don't worry, you can still get at the switch, as well as open it up to change the batteries when necessary.

I used some pieces of strong chipboard and a piece of leftover cardboard packaging to create some "housing" for the electrical parts so that they would a) not look so ugly (yes, I know, but even when you can't see it, I know it's there) and b) be somewhat protected so that the lights wouldn't wobble.


You'll notice for once that there aren't any words, but if you look closely at the houses, you'll see that there are at least some letters, and you'll just have to imagine the sounds this one makes...


... the whistle of the rockets as they head skywards, the crack as they explode, and then of course the ooooohs and aaaaaahs from the spectators... There you see - it's Sounds and Pictures today!!


And although there are no words, I'm really rather pleased with the result.  The colours please me no end - that Wilted Violet/Ground Espresso/Chipped Sapphire combination seems to have hit a nerve somehow.  Even in daylight, you get the idea of the fireworks.


But of course it's with the main lights off and the tiny lights on that it really comes in to its own.

It's another project that it's really hard to capture without taking lots of photographs... so much for the simpler life I'd planned for.  We're back to War and Peace length for this post!

But the effect is really pleasing.  I'm so happy I had the brainwave about the lights, though it was somewhat painful making the dream into a reality!


If you hop over to A Vintage Journey you'll find lots more inspiration from my wonderful team-mates for Baby, You're A Firework! - and there are even some new faces on the journey with us, so be sure to offer them a warm welcome.  We're so happy to have them on board!


Thanks so much for stopping by today.  I'm off enjoying a very crafty weekend in Coventry so I'll do my best to catch up with you all soon.  Happy Crafting all!

Perhaps all romance is like that; not a contract between equal parties but an explosion of dreams and desires that can find no outlet in every day life.  Only a drama will do and while the fireworks last the sky is a different colour.
Jeannette Winterson

Blooming under a cold moon, we are like fireworks... rising, shining and finally scattering and fading.  So until that moment comes when we vanish like fireworks... let us sparkle brightly, always.
Tite Kubo

"We thought the fireworks were marvellous," said Mort.  "And I expect they'll soon be able to rebuild the outer wall."
Terry Pratchett


I'd like to enter this in Let There Be Light, the new challenge theme at Frilly and Funkie
With the Liquid Pearl gleaming in the light, I'd like to enter this in So Glossy over at the Simon Says Stamp Monday Challenge
The story of that first ever firework display is not so much a favourite memory as a much-laughed over one, but even so I'd like to enter this at Stamps and Stencils where their theme is Remember, remember...
And at Mixed Media Monthly they are looking for Texture as you can see from the image - there's plenty of that here!