
Hello all! It's the beginning of the week and time for another challenge to start at the Simon Says Stamp Monday Challenge. I'm delighted to be in the Designer Spotlight there this month, and so happy to be creating alongside some of the best makers in the game.

The new theme is Not A Card. Well, regulars here will know that's not really a stretch for me - I've only made maybe 8 or 10 cards in eight years of crafting! But I wanted to get into the spirit of the thing, so I decided I wouldn't make a tag either (too similar to a card - those are my rules, not Simon's!).

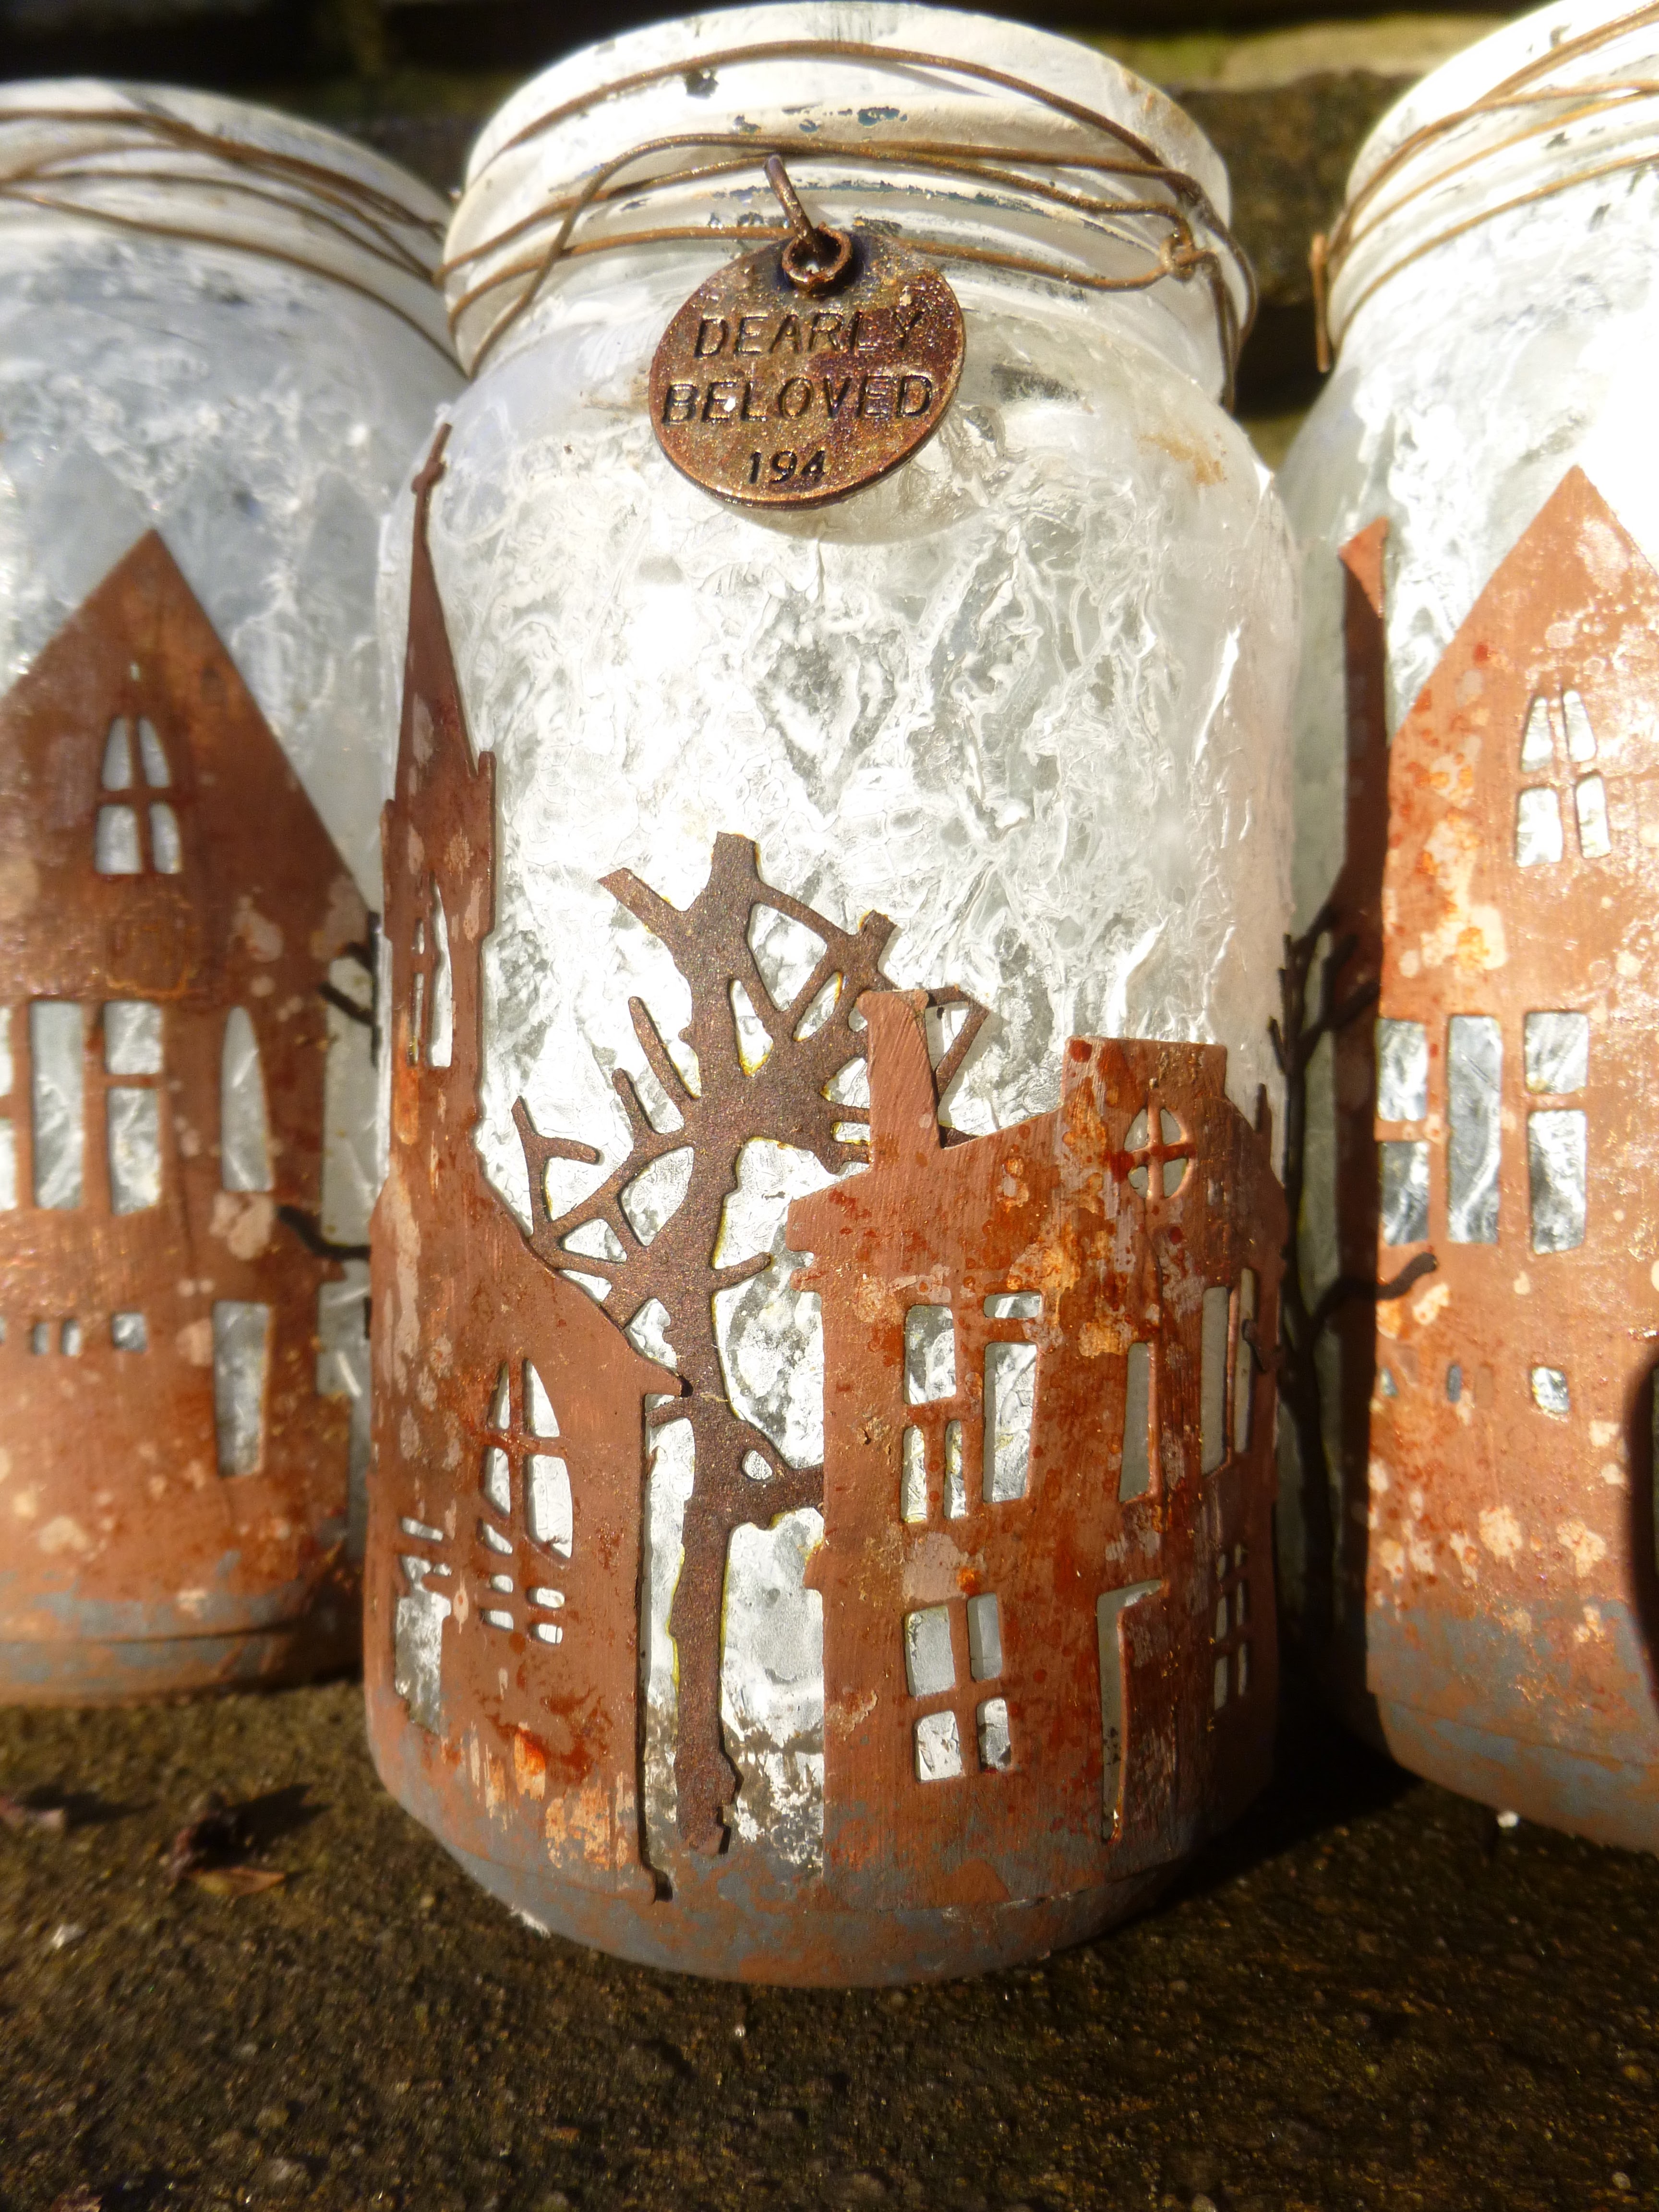
Instead, I went the fully dimensional route and, given the nights are drawing in, I thought it was just the season for adding a bit of candlelight. So here are my altered jar candle lanterns to set an autumnal mood...

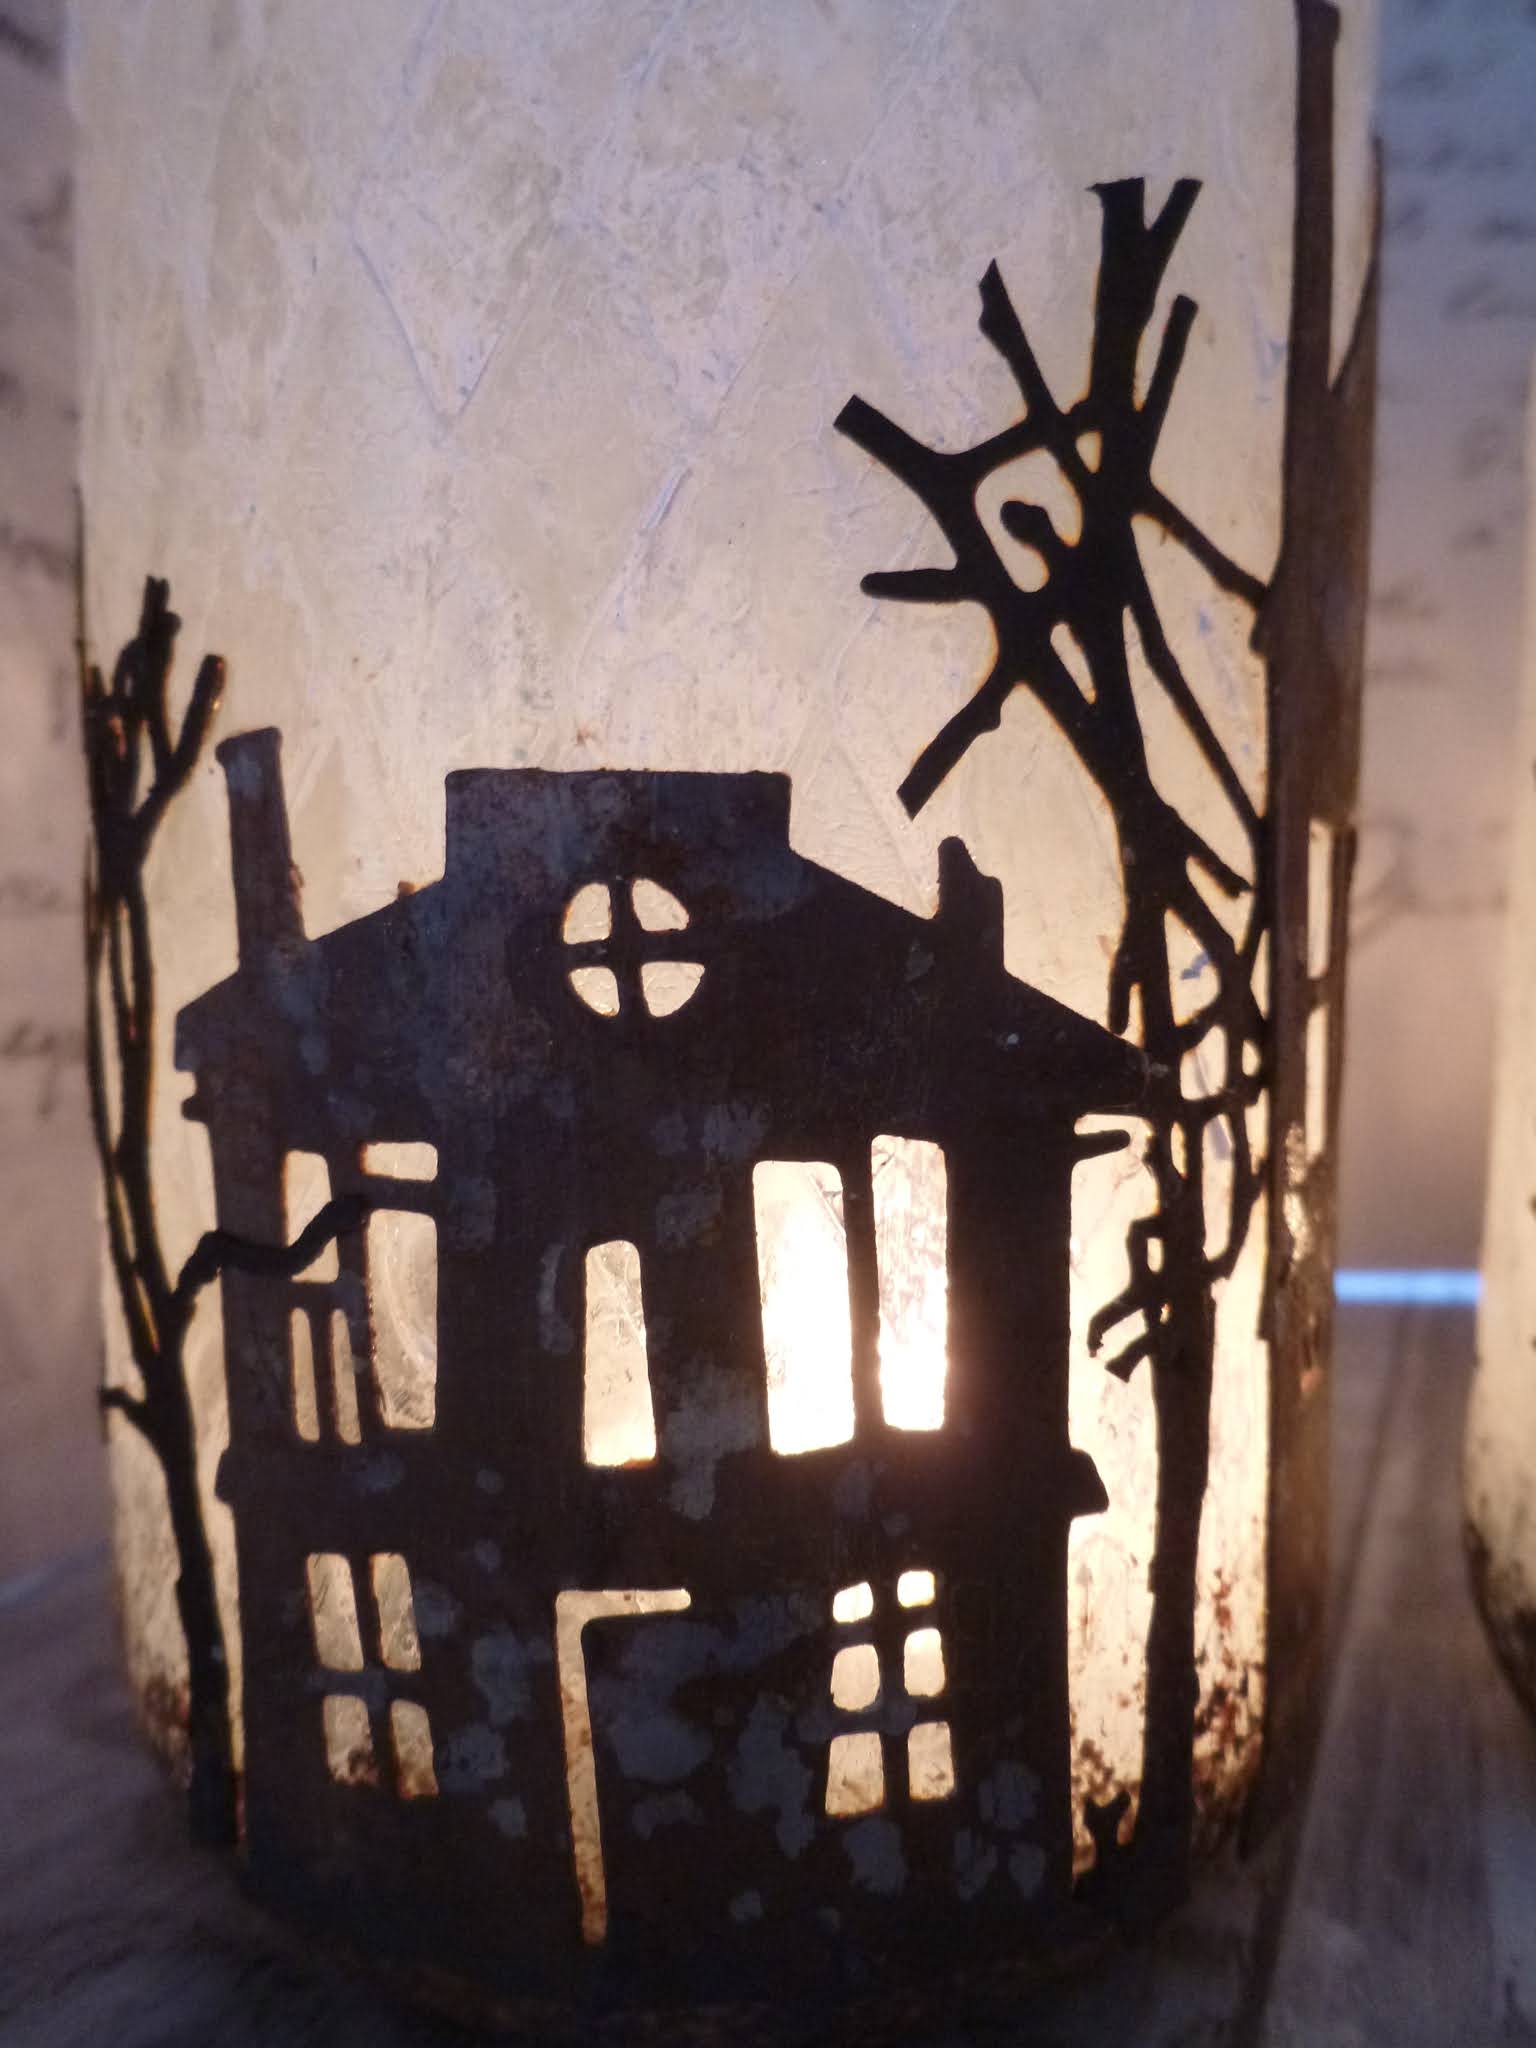
They are a slightly chameleon kind of a project. How they look all depends on the light falling on them. So in full sunlight, as above, you can see my faux rusty tin finish on the houses really well. But if the sunlight comes from behind, then the jars light up and the buildings become more shadowy silhouettes...

... and of course if you go the whole hog and light the candles inside, then you get a whole other look to enjoy. It's pretty much three sets of jars for the price of one!

Let me quickly take you through how I created my misty, textured backgrounds...

... and that decaying rusty tin finish on the paper Ghost Town Thinlits die-cuts. Sadly, Ghost Town seems to have been discontinued - that's the trouble with the seasonal dies, you've gotta grab'em while you can - but you could create something very similar with the newer Haunted house, or any other dies in your stash. I've made quite a lot of these jar lanterns now, and I haven't used the same die twice!

I started by putting some Transparent Matte Texture Paste onto the jars through the Tim Holtz Harlequin stencil.

You have to do it in stages to get all the way round the jar, letting a section dry before doing the next one, otherwise you get very grungy Harlequins, smudged out of all recognition!

Over that, I sponged and spritzed some gesso, keeping it very rough and random. It's all about creating a swirl of autumn mist or soft fogginess, and highlighting some of that lovely Harlequin texture underneath. And it's really as simple as that.

(You could go a step further if you wanted... When the gesso had dried, I had a little play with adding extra shadows or a touch of blue with some Distress Crayons, but decided I preferred the straightforward white mist, so I spritzed it all away again with some water before it could dry and become permanent.)

I sponged some PaperArtsy French Roast Fresco paint around the bottoms of the jars to give my buildings and trees something to "stand on", and layered on some other rusty browns there later too for a slightly fuller more layered look.

(NB - always advisable to wear some goggles if you are using a heat tool with glass when you're too impatient to wait for the paint to dry.)

So, those rusty tin houses... I have to confess it was all largely accidental. I started by smooshing Distress Inks and Oxides in various shades - Vintage Photo, Walnut Stain, Rusty Hinge, Ground Espresso and Crackling Campfire were certainly amongst them - onto a sheet of A4 card, ready to run through the BigShot with the Thinlits. But somehow things all got a big foggy, even after I added a bit of Tarnished Brass Distress Spray to perk things up with a metallic look. I don't have any photos of that stage because frankly I was planning to bin it.

However, instead I decided to paint over the whole lot with some DecoArt Chalky Finish paint in the rusty Rustic colour, and I did it before the inks were fully dry. Lo and behold some of the Tarnished Brass and Oxides started to "peel" up through the coat of paint. It was a cool look, so I decided to intensify it with some splatters of Vintage Photo Distress Oxide spray (spattered on from the tube on the unscrewed lid of the spray bottle) which gave me even more lovely splotches of rusty decay, in very organic patterns.

I splattered on some Crackling Campfire in the ink formulation too once it was all dry, as well as dabbing on a little bit of Quinacridone Gold paint in places. It was all pretty random, and I wasn't really keeping track, but that's the method as far as I remember it. I think it's a rather good faux rusty tin, though I do say so myself - serendipity and just saying yes to whatever turns up!

The Thinlits set also includes a little bare-branched tree, so I cut that a number of times out of some kraft card which I spritzed liberally with Ground Espresso so that I could have darker tree trunks to contrast with the rusty buildings. I reversed a couple of them so that some point in one direction, some in the other.

But I needed a bit more arboreal variation, so I also cut the Tangled Twigs Thinlits from some of the same inked card and cut it to pieces to create some more random tree trunks and branches to put between the buildings. Now we've got plenty of nice natural randomness to our trees.

And then I glued my little village scenes in place. Simple! And as the light caught them from behind on my craft table, I knew I was on to something good...

You can see I've added some extra paint layers to the "ground" now, embracing imperfection and allowing it to spread up around the bases of the houses too, which earths them even better - they were sort of hovering before.

I'd been toying with tying some autumn leaves around the tops of the jars, but when it came to it, they really didn't need it.
Instead, I finished things off with some of my favourite rusty wire - it's great how the threading at the top of the jar actually helps at this point, giving the wire something to hold on to as you wrap it round.

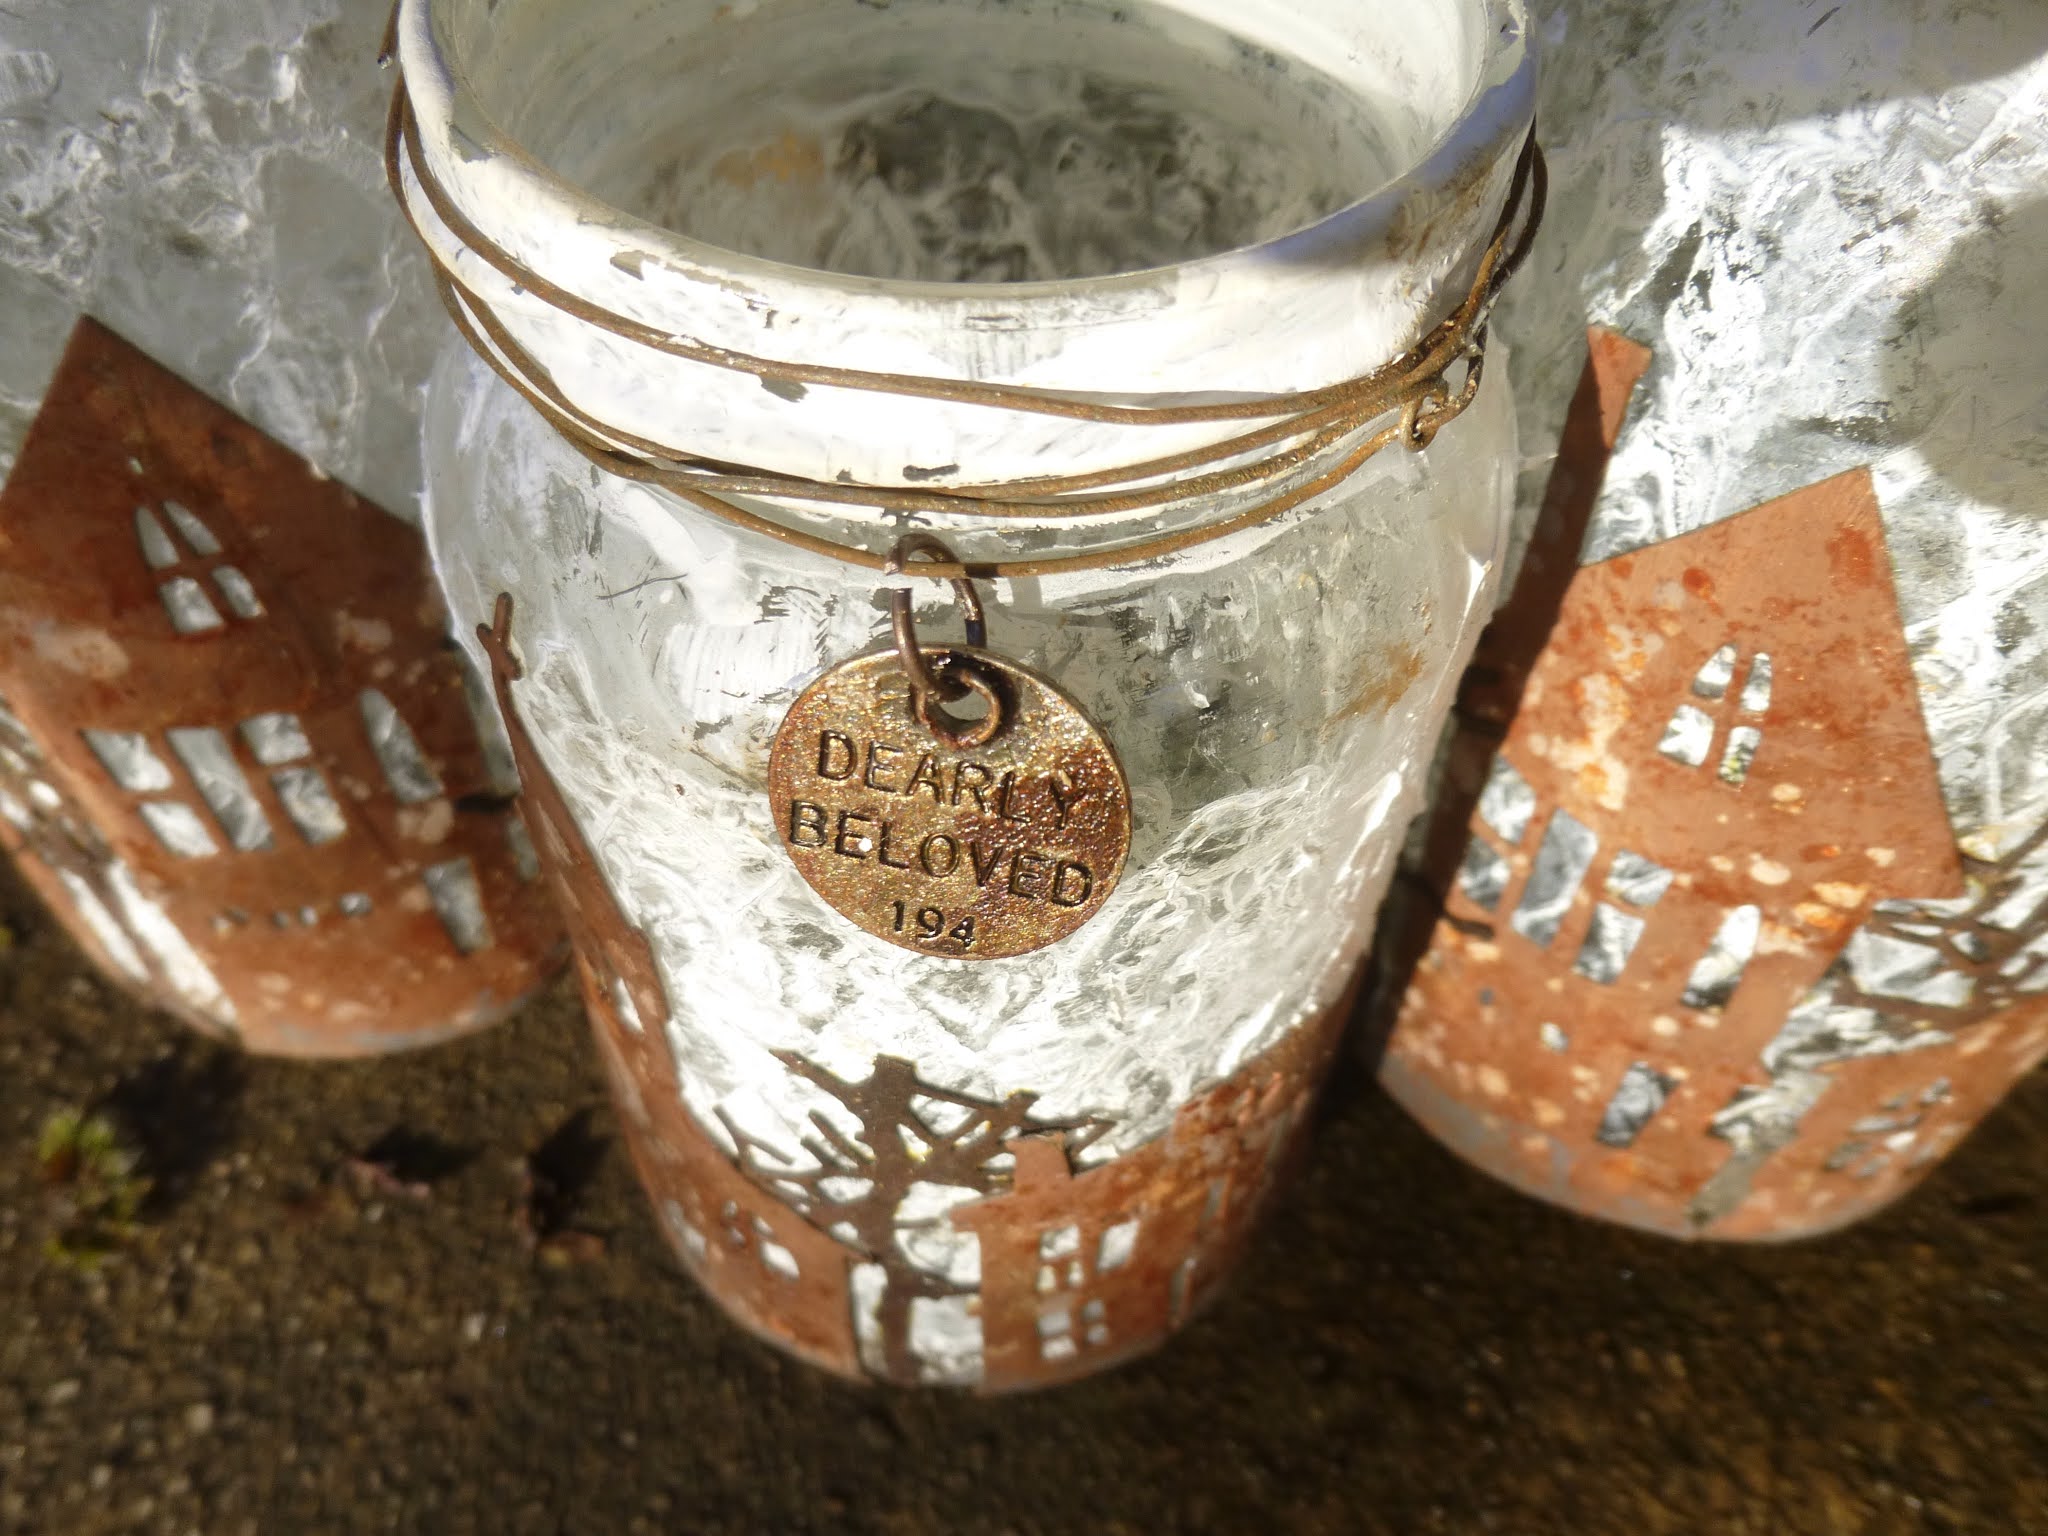
The colour is provided by alcohol inks - Mushroom, Ginger and Rust if memory serves. And the texture is really very easy. I just used my fingertip to dab on some Matte Collage Medium, pouncing it up and down a little to give it the rusty texture.

And even though it's matte, you do still get a dull metallic gleam when the sun hits at the right angle.

So there you are, by day and by night, some autumnal candle jars. And yes, they are eerie enough to work for Halloween, but I definitely think they'll work for the whole autumnal season, and even into winter.


I hope you enjoy these as much as I do, and do hop over to the Simon Says Stamp Monday Challenge for some incredible inspiration for the Not A Card theme from the team there.

As always, the designers will be selecting some of their favourite projects to spotlight at the end of the week, and one lucky entrant will win the lucky dip voucher to go shopping at Simon Says Stamp.

I'll leave you with a final shot where you get the best of a couple of worlds... a look at the rusty tin but also a hint of what happens when the lights go out!

Thanks so much for stopping by today. Good luck everyone, stay safe, stay well and stay creative.
Nature is a haunted house--but Art--is a house that tries to be haunted.
Emily Dickinson
At Country View Challenges they are playing Halloween - Make a Scene so these should fit right in
And it's Halloween Time over at Try It On Tuesday, so these should fit the spooky bill nicely
I'd like to play along at the Creative Artiste Challenge where as always Anything Mixed Media Goes
At the More Mixed Media Challenge this month Anything Goes with Optional Orange - it's a rusty orange, but I'd say it's orange!
#newbloggersucks - it can't even time a post right - sorry I'm late!
30 comments:
I absolutely love these jars Alison!! Thansk for the step-by-step instructions too! I am definitely going to have a go at stencilling onto a jar now! these look so super spooky and fabulous!! :-)
I had been saving jars for when I make some marmalade, I actually have boxes full as I have been saving them for a couple of years and never got around to making any marmalade ;-)
Hope you have a great week!
Stay Safe my friend xx
luv
Lols x x x
Thank you! And yup - boxes of jars... that sounds very familiar (though mine were always being saved for crafting not jam-making). I think my removal men are going to think I'm bonkers - it's not a hobby which lends itself to quick getaways! Ax
Oh Alison, these are wonderful! Love the rusty haunted houses and when they are lit up, what a sight...so much fun for the Halloween season! Have a great week, Maura
They are amazing!
Amazing rusty houses that look wonderful in all the lighting options!
Sally xx
i really love these Alison such a brilliant Halloween accessory, I would gladly go trick & treating swinging one of these to light the way
Love
Amanda X
You really surprised me when I saw the jars you altered. I was expecting tags and got a real surprise and treat, too. I so enjoyed seeing how you created these and I love how you grounded the houses at the end. Of course, one of my favorites on this was the rusty wire you used at the top and the tip about wearing safety goggles if using a heat tool when drying gesso on the jars. These turned out even better than I would have imagined.
Well, as the Americans expression goes, you knocked it out of the park, Alison! As usual, you have included great details and the serendipitous rust is indeed gorgeous... x
I absolutely love these. I think I’ll give them a try. Thanks for sharing how you made them!
These blew me away Alison. Wow. I am glad you told us how you created them because this is a project I would think of copying. Very clever! And they are also gorgeous too! Hugs-Erika
Before I read your your tutorial I was certain that you used a tissue paper to glue on the jars but how wrong I was, it was texture paste! And I think I need glasses because I didn’t realise the harlequin pattern at first sight. But I can see now and it’s really cool!!! I love the effect you achieved with the Distress inks and DecoArt Chalky paint. Your jars look fantastic in daylight and with candles too!
Fabulous rusty goodness!
Oh nice ones! I like the "three for the price of one" idea. Where are they standing in the outside photos? And speaking of boxes of jars and removal men - all those teeny tiny bottles are travelling too I hope? It's the cardboard they will mostly wonder at! xx
Mostly on the doorstep, some in the driveway... Yes, of course the bottles are all wrapped and packed and labelled with FRAGILE tape. Yes, the cardboard may be useful too though on the journey! xx
Gloriously mixed media, so creative and such fun Alison x. Had a little chuckle about the removals and not a quick get away with all your crafting goodies x.
It's night and I'm still awake, maybe just waiting for some relaxing and calm time to read your tutorial Alison! :)
And ooooh, I'm not disappointed, this is a brilliant project, a new one to add to my all times favorites!!!!
I love every step, how you have rusted your Halloween houses after accidental peel off of the tarnished stain and the other underlayer inks, your idea to put some transparent and then pale texture onto your jars, as well as the very clever way you have used the trees large thinlit... everything is perfectly integrated in a very spooky, and certainly terrific decor in the night, when light is on!!!
Thank you for this magnificent project once again my friend Xx
Corinne
Wow, the altered jars are fabulous Halloween candle holders. I can imagine what folk might say when they see them lit up on a dark night, I would be saying how awesome they looked. Thank you for linking with us at Try it on Tuesdays.
Stay safe.
Yvonne xx
Another occasion where I am almost lost for words! Halloween.... and I love these!!! The Autumn mist you created on the jars is wonderful but it's when you come to the trees and the rusty houses that I begin to mumble a bit. Altogether a fabulous trio in all lights - these will definitely move on through Autumn and Winter as a joy to have around! Thank you so much for joining us at Try It On Tuesday! Hugs, Chrisx
Alison these are amazing, and thanks so much for the step by step, they don't seem half as scary to make as I thought they would be! Thank you so much for joining in with us at Country View Crafts and have a very happy week, (blogger permitting) Sue x
I LOVE your Halloween jars, Alison. They are fabulous!
Thank you so much for entering our challenge at Try it on Tuesday. Looking forward to see you again next challenge.
Regards,
Mia
Designer for Try it on Tuesday
craftartista.blogspot.com {My Blog}
These lantern jars are so charming. I love the look you achieved!
These look amazing and the finish you achieved with the rusted houses looks fabulous. Love the effect with the candlelight.
Thanks for sharing with us at Try it on Tuesday
Avril x
These are fabulous, Alison!!!!!!!!!! Really fabulous!!!!!!!!!!!
Alison these look fantastic with their rusty Haunted Houses. I used to make these every year with my pre-schoolers filled with sweets for Mum's @ Christmas. So effective when light, love how you added those tags for extra detail. Thanks so much for sharing over @ Creative Artiste & congrats on your SSSGD spot, i've missed so much.. I apologise life's quite heavy at the moment, I hope yours is all going to plan.. Take care & stay very safe Hugs Tracey xx
Superb project Alison!! I can imagine they took ages to make but all that time and thought speaks volumes. Especially like them lit at night, they look brilliantly spooky. Nicola x
Fantastic creations, I especially love your rusty effects!
You seriously nailed that rust look on the houses. LOVE the contrast with the white backgrounds, and all lit up is fabulous!
I so love what you have created here..the effect on the houses is fantastic, just goes to show how good some things are when you least expect it.
Thank you for entering our challenge this month at More Mixed Media x
Oh, Alison, your jars are gorgeous! They look wonderful, by day and by night.
Thank you for joining in with our challenge at Country View Crafts! Evelyn xx
They look fantastic, what a great idea, love the texture and rusty look.
Post a Comment