I'm travelling into a new way of working, a new country, a new language, and a new hobby which I'm passionate about. Come with me for some of the journey...

Saturday 29 September 2018

Visiting Egypt with Lynne Perrella


Hello all!  I'm absolutely thrilled to be inviting you to hop over to PaperArtsy where I am sharing some samples made with the brand new stamps designed by Lynne Perrella, just launched by PaperArtsy yesterday.

I've been fascinated by Ancient Egypt since I was a child, so these three new sets of stamps, inspired by that extraordinary civilisation, were a joy for me to play with.


My favourite book to get out of the library when I was little was a picture book of tales about some of the Egyptian gods - I think specifically about a trip to the realm of the dead.  


In the book, the illustrations were all in the style of those ancient tomb paintings.  Oh, how clearly I remember Horus with his falcon's head, and Anubis, with his intimidating canine jackal head.  I wish I could track down the book now, but I don't remember the title or the author.  If anybody out there has any ideas...


But back to the point of this post... These little sneak peeks give you an idea of just some of the treasures you will find if you are tempted over to the PaperArtsy blog to see the golden wonders of this magical release in full.

Thanks so much for stopping by, and I'll see you again soon.


...as my eyes grew accustomed to the light, details of the room within emerged slowly from the mist, strange animals, statues, and gold - everywhere the glint of gold. For the moment - an eternity it must have seemed to the others standing by - I was struck dumb with amazement, and when Lord Carnarvon, unable to stand the suspense any longer, inquired anxiously, "Can you see anything?", it was all I could do to get out the words, "Yes, wonderful things".
Howard Carter, on his discovery of Tutankhamun's tomb in 1922

Wednesday 26 September 2018

Encore - Doodly Twosome

Encore Posts
Projects which made their first appearances elsewhere for Design Team duties or Guest Designer opportunities, but which only had a sneak peek here, are being gathered together in the pages of my virtual scrapbook while I'm away.
As always, the Encore Posts are formatted differently from the regular ones, so that you can easily spot them.  Please don't feel that you have to comment all over again!

Hello all from a lovely sunny Czech Republic.  I'm busy with all sorts of stuff here (not dollshouses, though... don't get your expectations up), so I'm just popping in with a quick Encore Post to keep things ticking over.  But watch out for a very exciting post this weekend!

This tag duo was created for The Artistic Stamper Creative Team back in July 2014, using some of the fabulous stamps from The Artistic Stamper (some of which were new at the time).  Here's what I wrote back then...
__________________________________________________

Hello all!  Alison (butterfly) here again, this time with a pair of tags which are not quite in my usual vein - though they are in some of my favourite colours!


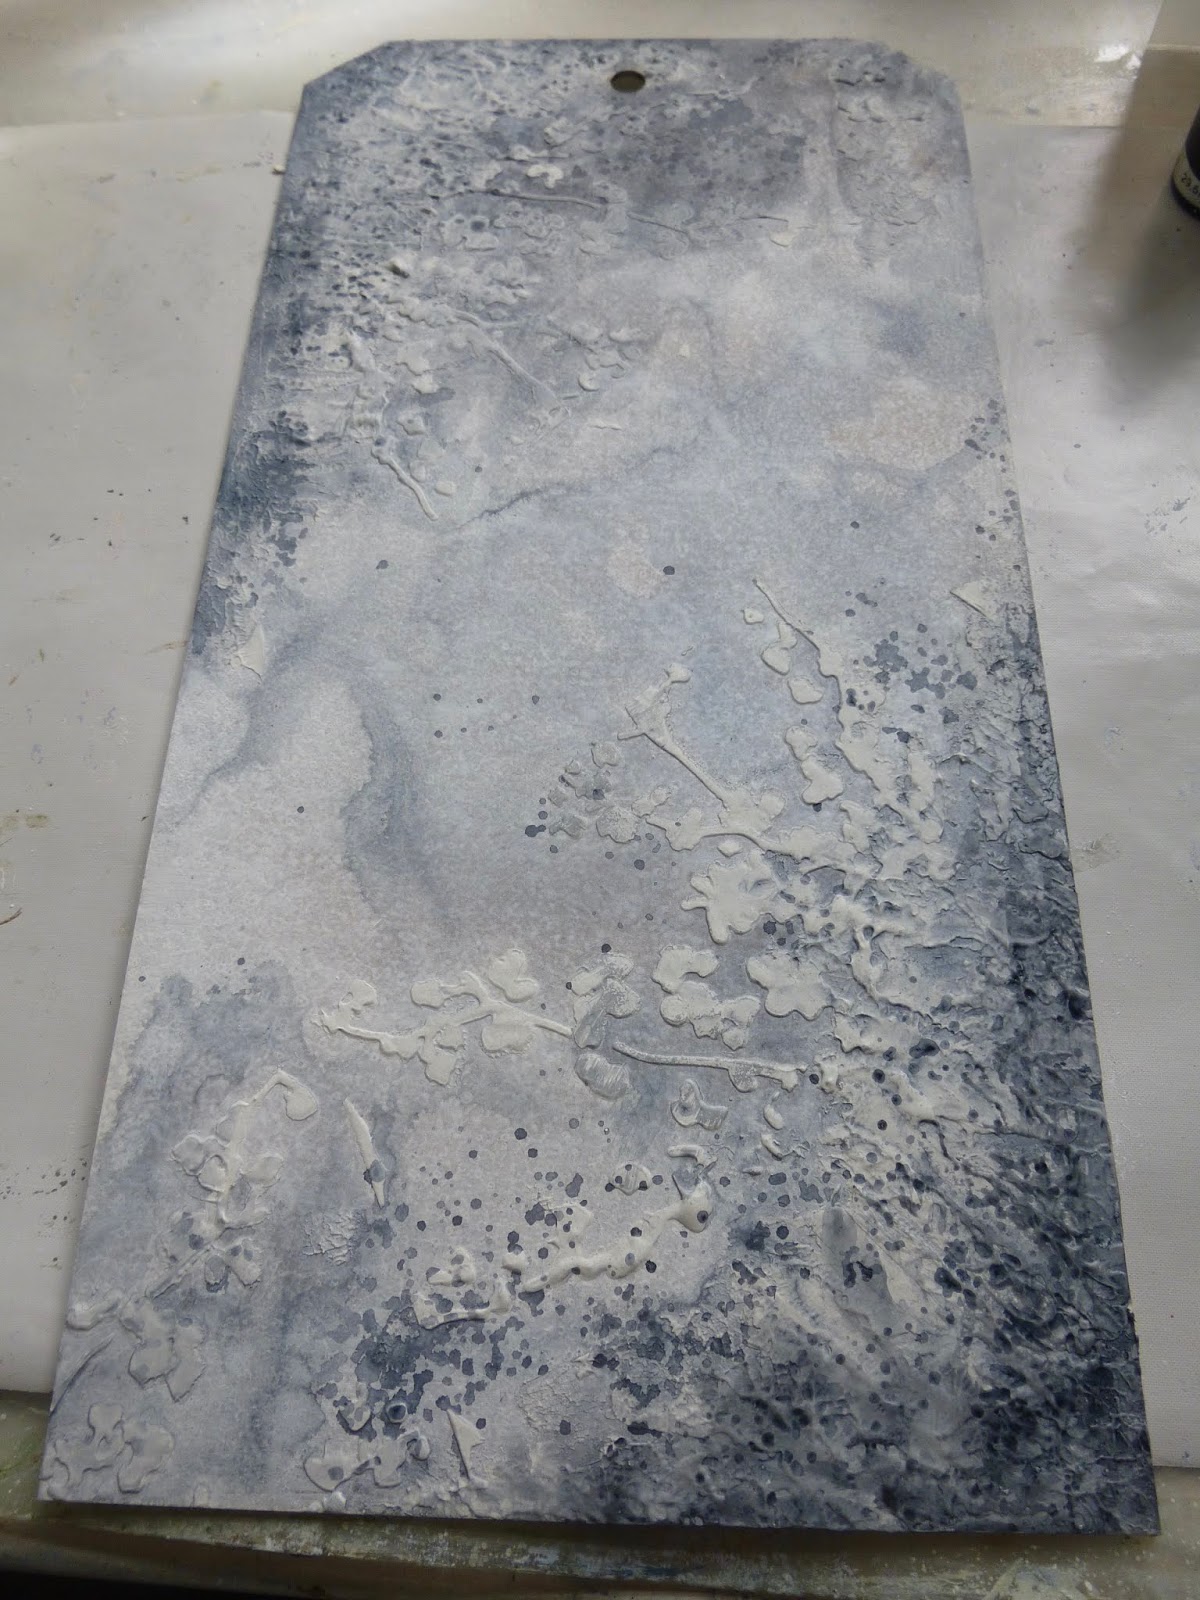
I used the new Alphabet Soup by Neil Walker as my starting point.  I clear embossed the background onto a tag.


Then I sprayed lots of lovely Dylusions colour onto it, and dried it with a heat tool.  I love the squiggly doodly lettering.


The next step was to cut Umbrella Man with the Sizzix die. (Did I dream it, or did I read that he's been discontinued?)


I hadn't really planned on making two tags, but as soon as I'd cut him, I realised I had the makings of a 'positive' and a 'negative' version.


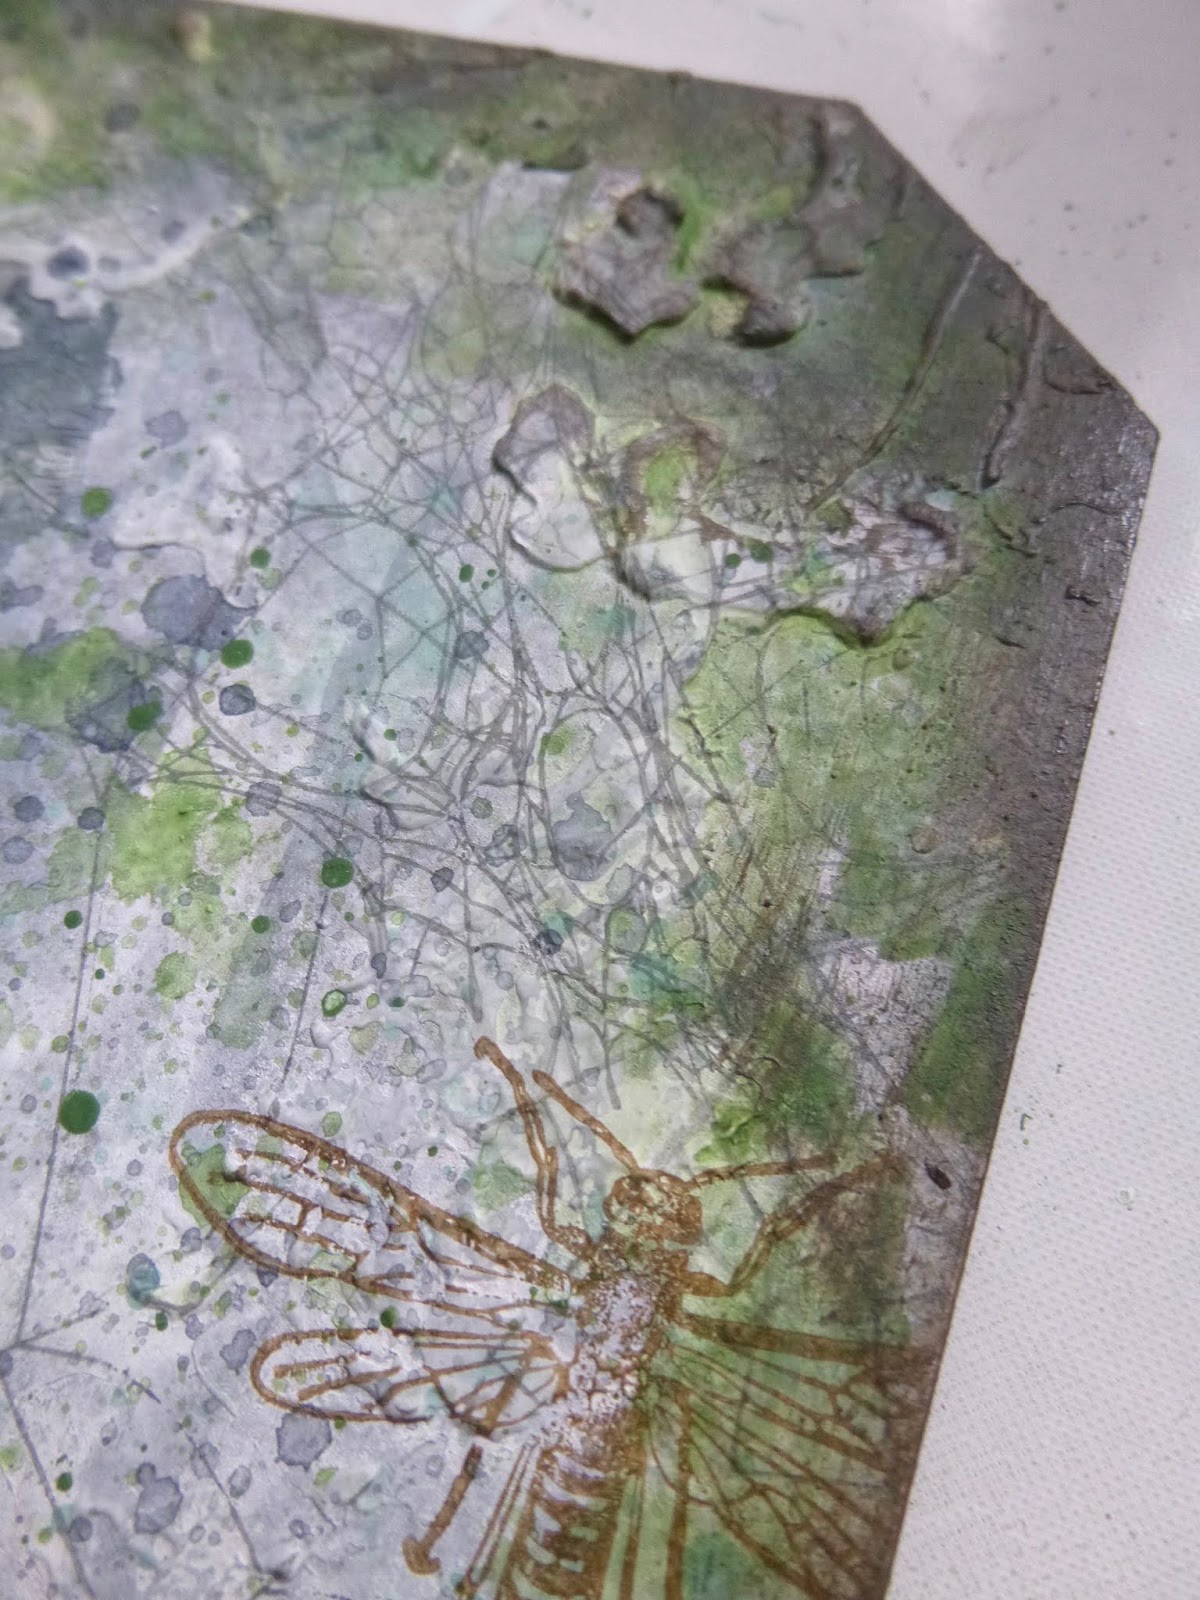
For the backgrounds, I just blended on various Distress Ink colours from grass to sky and gave both tags a good old spritz and flick with some water.


The words are all from the fabulous Journalling Words #5 set.  I stamped them onto another inky tag I had lying around on the desk, in a combination of Mowed Lawn and Peacock Feathers, and clear embossed the result.


I cut them and inked the edges and mounted them on padded tape for a little pop of dimension.


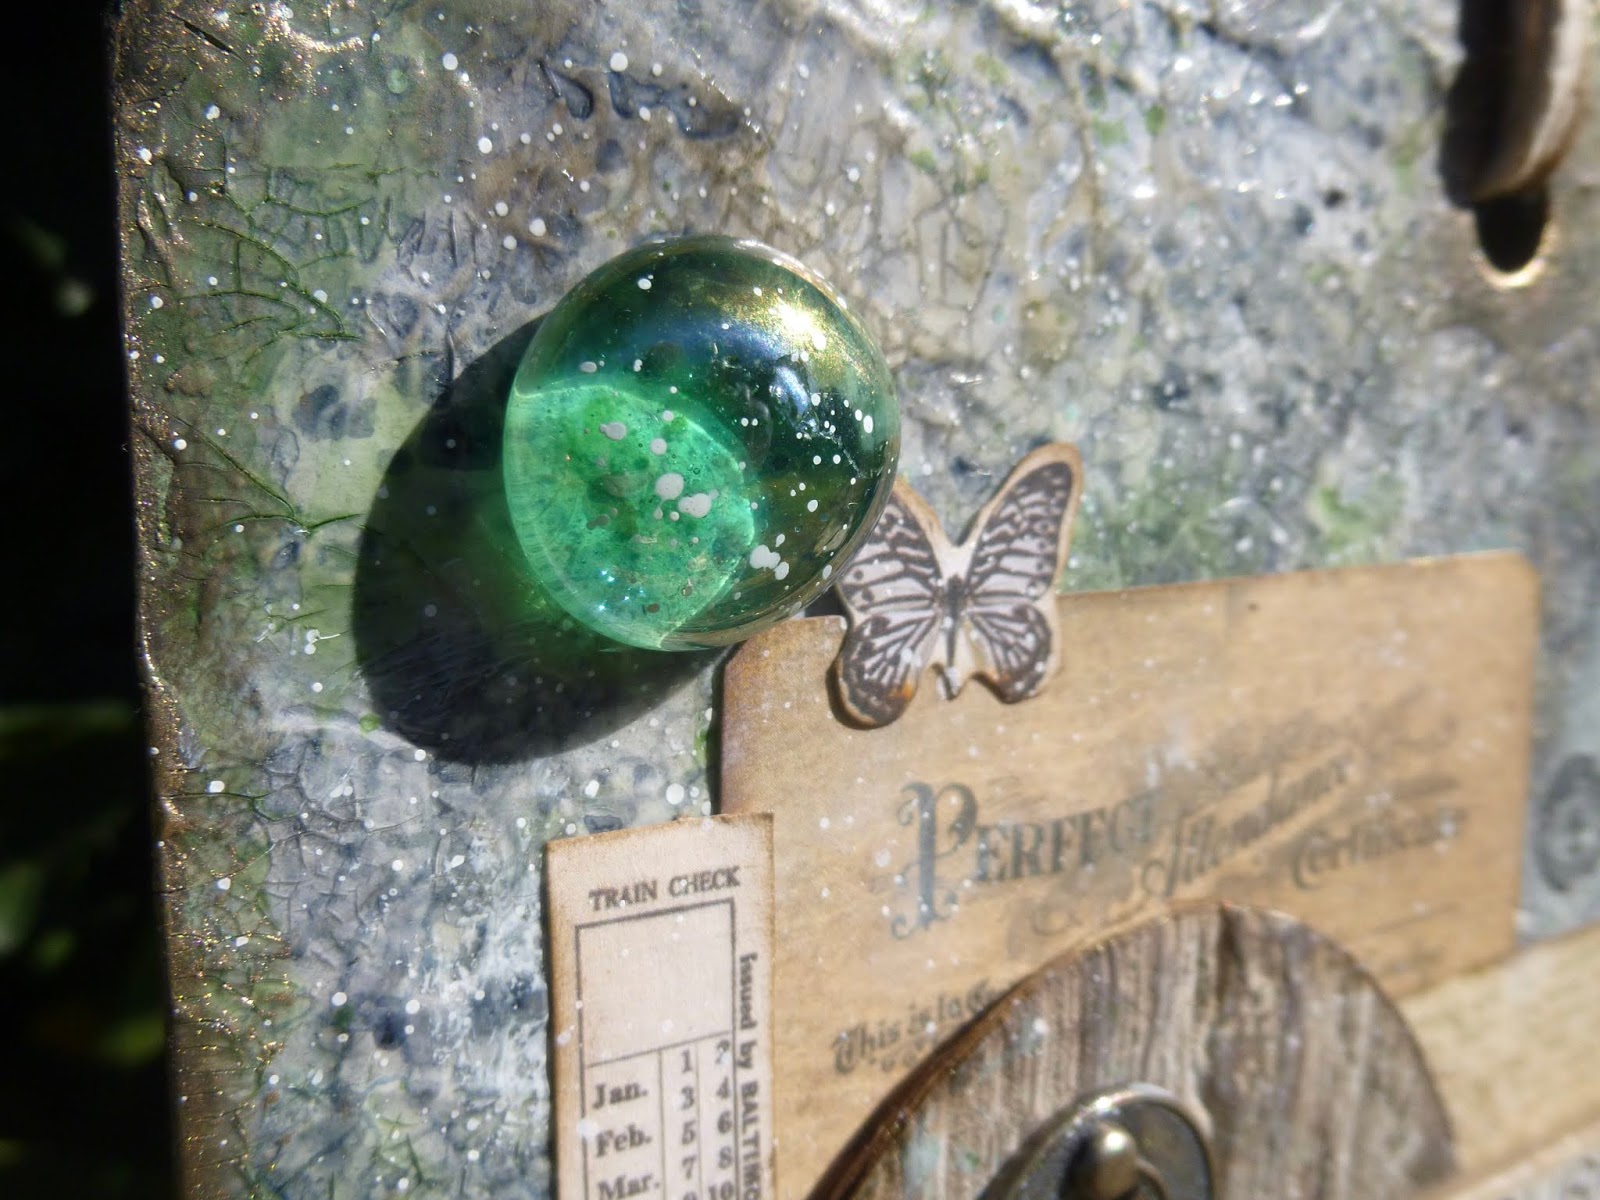
I altered a couple of Muse Tokens with Distress Paint, then sanded back to the metal underneath.


As soon as I saw the silvery detailing, I wanted to echo it on the rest of the tags.


So I used some silver gilding wax to edge the words and the tags themselves.


I ended up adding quite a lot of silvery sheen to the embossed Alphabet Soup too because I really liked the look of it.


A couple of twirls of metal wire finish off the tags at the top.  It's just some more of the rescued wires from some spiral bound notebooks that were being thrown away... 'waste not, want not', as they say!


And that's pretty much that... I hope you like my doodly tags.


Thanks so much for stopping by - I always love to hear what you think.


______________________________________________________

So, that's your Doodly Twosome for today.  I hope they brought back happy memories for you.  I find these trips back in time to my earlier crafting days remind me of all sorts of techniques I haven't used for ages, not to mention products which I have hiding in the stash, yearning to be brought out to play again.  More time, more time... that's what we all really need!

Thanks for dropping in today and, as I say, keep your eyes peeled for lots of excitement here at Words and Pictures on Saturday.  I hope to see you then.

The mind is like an umbrella. Its most useful when open.
Walter Gropius

Friday 21 September 2018

Curiouser and Curiouser


Hello all!  I'm here today with the results of a lovely day last week spent Skype-crafting with Brenda of Bumblebees and Butterflies and Nikki of Addicted to Art.

We've all been feeling a bit out of the swing of things and struggling for mojo, so it was fabulous to loosen up, get messy and laugh a lot together, thanks to the magic of the internet.

We each worked on a large surface - either a giant MDF tag or a large panel - and we are all sharing our creations simultaneously today.

If you hop around the whole trio, you'll see how differently they each turned out, even though we were all following the same process steps.  Here's mine...


I had such a lovely time with this project, and I have no doubt that the company and the process helped with that.

We took it in turns to suggest what the next layer or technique should be - keeping the instructions fairly loose, so that there was a bit of flexibility built in.


I was working on one of That's Crafty's Gigantags (whose name was invented by Nikki when she was on the DT there), so it's huge - 15 x 7.5 inches... lots of space to play on.


So what did we do?  Grab a cup of coffee and read on...

The first instruction was Brenda's - and she very sensibly suggested that we should seal the substrate with gesso.  Nikki was next, and hers was "use some texture paste in any way you wish".


I sponged on my gesso, and added some Finnabair Plaster Paste just with a palette knife in opposite corners, and then from there I "grew" some plant tendrils by adding some more of the paste through a stencil.


For my turn, I offered "dilute some paint and apply it in any way you wish".  I used DecoArt Media Fluid Acrylic in Payne's Grey to add a wash of colour.  I put some on the craft mat and gave it a few spritzes of water before splodging it onto the textured corners of the tag.


I then spritzed that with more water and allowed it to run in a very diluted wash up and down the rest of the tag.  And finally I did a bit of splatter with what was left over on the craft mat.


Next up was adding crackle in any way you want (B).  This was the only bit that went a little awry for me.  My DecoArt One Step Crackle, usually utterly reliable, simply didn't get the time it really needed to do its thing properly.

There ended up being a bit of crackle at the thinner edges, and I found a way to cheat the uncrackled parts later...


We did try to leave time.  Rather than an individual suggestion, we all agreed that, to give the crackle time to dry, next we should spend some time gathering potential embellishments.  

And then to continue to allow crackle-drying time, we did some altering of those embellishments... adding texture to one or more of them (N), and then colour to one or more of them (me).


This is when I started to build my shelf.  It's just a couple of layers of cardboard packaging, cut to size and then embossed with the gorgeous Lumber 3D Texture Fade.

I added colour to it with Distress Stains and Crayons until I had a weathered look that I liked.  I don't seem to have a progress shot of that bit...


... so here's how it was by the end.  As it turned out, I had to pull apart the two original pieces and stick another bit of cardboard in between to create a thick enough shelf, edged with plain tape to disguise the corrugate.


I also die-cut, embossed and inked the dragonfly at this point.  (Brenda had just discovered a pile of them in her stash that she'd cut for a workshop and not used, and as soon as I saw her waving them around, I wanted to use one - so there's an element that might not have made the cut if not for this Skypeing inspiration.)


Next step was "create a panel to use in building layers" (B).  You can see from the embellishments I was starting to arrange on the table beside the craft mat that I'd already planned to use some pre-made panels and frames on my tag, so now I decided to create an additional one which would add some more "wood" to echo the bookshelf.


I glued some more bits of cardboard together, die-cut them to an oval and went through the same steps as for the shelf.  You can see it taking its place in the upper left-hand corner as I continue to play with composition.

(And you can also see from the shine that the crackle is still annoyingly wet at this point.)


Now for some more colour... "apply a coat of paint to the background in any way you like" (N).  I added some Vintage Effect Wash in Patina, sponging it on and spritzing to let it pool and spread.

I then added some more vivid greens in the same way - a mixture of Fresco Hey Pesto and Hyde Park.


My paint layers were interspersed with my own next suggestion - background stamping.  I wanted to ink up my scrumptious new cobwebs from Tim Holtz.  I think they look stunningly delicate in Watering Can Archival.


And a few Potting Soil insects from the Entomology set also crawled their way into position.


For the next layer - dip, drip and dry some watery washes (B, of course!) - I used the same paint colours as were already present - some Payne's Grey, some of the Patina and a touch of the greens.


Since the tag is rigid, and there's the texture paste creating a dimensional barrier, I wasn't able to press right down into the paint on the craft mat, so more often than not I just got little dots of paint - which I loved... they looked like splatter!  So I added extra water to some of them, but not all (sorry, Brenda!).


Nikki invited us to "edge the base in whatever way you want".  I think all of us went for darkening it to draw the eyes inwards.  I certainly did - using some Archival Inks and Distress Crayons in the darkest browns.  It has the added benefit of bringing some of the texture into sharper focus.

I was busy playing, so all these photos come at pretty much the end of that whole batch of suggestions.


I was next up, and I really needed some time to work on what was really going to go on over the top of the background (which I very much loved by this point).

So my offering was for us to take some time working out the composition and design and finalising any embellishments we wanted to add.  For instance, I decided I wanted a lot more ephemera collaging in the background.


There followed a lovely period of quiet, intense, focussed work.  All you could hear were the occasional rustles of people searching for extra bits and bobs, or sanding or inking the final additions, and then working to arrange them on the substrate.

My little boy had been at the heart of things all the way from the start, but now I needed to make sure he had everything he needed for his collections.


I needed to fill the jars and vials... some glass chips and sand from a certain Swedish furniture store, funnelled in through a twist of paper.

I also decided to add a touch of gesso to the jars for a shabbier look, and dyed the corks a little darker with some Distress Stain.


As I was arranging them on the shelf (lying down still at that point, as I hadn't started gluing anything down), I suddenly realised that what it "needed" was one of the Tim Holtz skulls for the boy's collection.


And I also realised that I'd completely forgotten about the one element I'd been thinking of using even before we started the whole process... some moss.  So, as I started gluing down all the layers of ephemera and the panel boards and the frame, I had a lovely time tucking bits of greenery here and there.


It occurred to me that the jars might be a bit heavy for my cardboard shelf, and I was thrilled with my brainwave for the shelf brackets... two of those ornate metal corner decorations from Idea-ology - perfect!


I solved the lack of crackle by adding some more background stamping (from the earlier instruction, so not cheating!) - using a crackle stamp over the areas where there wasn't much going on.

If you look closely, you can see there is some actual crackle too, round the tag hole.


The glass pebbles also put in an appearance at this point.


I love that they are the perfect colour to go with everything around them, and how they catch the light.


Brenda saved me some trouble by making her final instruction: "Do an Alison and add some words"!  I'd known for some time that I wanted some Quote Chips, and had planned to make words my next addition, so that was great.


The choice of words was obvious for this boy and his collections, and all the ephemera which clearly show his curiosity about nature and the world around him.


Nikki's last offer was to "add a touch of gold".  I said could it be "add a touch of metallic" as I thought something silvery might work better with my colour tones.  She generously agreed, and then I ended up using gold after all in any case!

It is the Treasure Gold White Fire, so it's a silvery gold, but still... it turns out Nikki was completely right (though she couldn't have known that!) - the gold brings a lovely warmth.


And no guesses what my final suggestion was... yup, splatter!  I find it very hard to live without a touch of white splatter these days, but I left the colour of splatter open so that the other two could go wherever they needed to for their projects.

I heard Brenda adding some cheeky last minute rub-ons, and was inspired to do the same.


Then it was time for the big reveal, as we each held up our creations for the others to see.

And it was so much fun to see where these process steps had taken each of us.

I have to say it was a little unsatisfactory peering at the slightly blurry Skype screen (divided into three for the group call, so each camera shot was a third of the size of the iPad itself.

I can't wait to see the proper photos over at Bumblebees and Butterflies and Addicted to Art today.


Craft and art-making is usually a solitary activity for me, and I do like it that way - but this was a great way to free up the mojo a bit.  Bouncing ideas around with like-minded creatives, and sharing the burden of deciding what to do next, and also having a little less control at times, all contributed to the joy of this make.  We plan to do it again!

Thanks so much for stopping by today.  I hope you've enjoyed this journey even half as much as I did.  And I hope you'll all find ways to release your own creative mojo this weekend.   Happy crafting all!


When shall we three meet again?
From Macbeth by William Shakespeare (I know it's meant to be unlucky to quote from "The Scottish Play" - but it was irresistible)

I'd like to share this in the Anything Goes theme It's Been A While over at Stamps and Stencils
The Creative Artiste Mixed Media Challenge are playing Anything Mixed Media Goes
At the Mix It Up Challenge Blog they are playing Anything Goes with an optional twist of Layering
They're asking us to Slap It On at Try It On Tuesday - done!