I'm travelling into a new way of working, a new country, a new language, and a new hobby which I'm passionate about. Come with me for some of the journey...

Showing posts with label moss. Show all posts

Monday, 5 October 2020

Caught in a Cobweb at Simon Says Stamp

Hello all!  I'm absolutely thrilled to be guest designing for the Simon Says Stamp Monday Challenge for the month of October.  It's always an honour and a pleasure to create alongside the extraordinary team of creative geniuses (genii?) there, and I'm so happy to be back (even if I am squeezing it in amidst moving house to a new country!).

We've got a great theme to kick of the month... Dry Embossing, with a focus on Tim Holtz products.  I have a lot of Tim's Texture Fades (his name for embossing folders), but I often forget to use them.  I need to make sure they are stored more accessibly when I set up my new craft space since I had so much creating fun with them for this XL tag.

Yes, I'm in the throes of packing up my life and my craft supplies ready to move across Europe, so these projects for Simon Says Stamp will probably amongst the last things I make in the old space.  (I do plan to keep some inks/tags/stamps accessible throughout the process... I can't be without the option to craft in between sorting, clearing and packing!)  And here's today's tag...

There's quite a lot of dry embossing going on here, but also plenty of crackle, plenty of ink, crayon, paint and shimmering wax, along with some autumnal gatherings and of course that tiny spider... nothing to be afraid of, right?


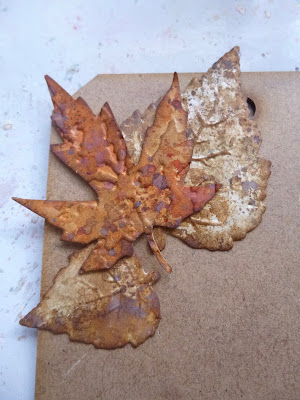
There was no doubt about my first choice given the time of year... it had to be the glorious Layered Leaf.  It comes as a set with a coordinating die and folder.  I created a background with Distress Inks and Oxides and cut and embossed the large leaf.


From the same background, I cut some of the smaller leaves from the Fall Foliage Thinlits, and then ran them through the Layered Leaf's embossing folder.  Of course the folder isn't sized for them, but I think it adds a nice bit of extra texture.

You can see I was already trying them out on the jumbo MDF tag (8.5 x 4.25 inches).


And with another subtler background I cut the Impresslits Leaf in both sizes several times.  This does the cutting and embossing all in one go as well as creating a 3D curve to the leaves.  Layered up together, I think they all look pretty good.


The other embossing folder getting in on the action is an oldie but a goodie... Tim Holtz's Cobwebs Texture Fade.  (A similar one is here.) I ran it through with some plain card and then scraped DecoArt Crackle Paint into the depressions and let it do its thing.


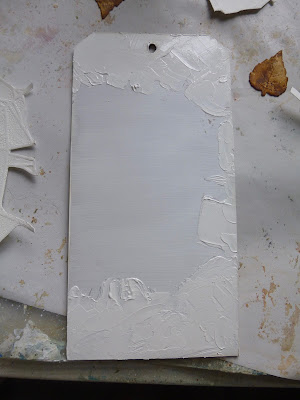
I realised too late that if I wanted it to blend into the background as though the cobweb were just hanging there in a crackled sky, then I should have glued it down to the MDF tag before putting on the crackle paint!


So I had to draw round it and then try and apply crackle paint to my background so that it would just slot in.

I thought you'd like to know that it's not always all plain sailing around here!  There's more trouble to come...


I'm not going to take you through the entire chapter of difficulties (with a functional Blogger I would, but with New Blogger I just haven't got the time to mess around #newbloggersucks).  Suffice to say that I ended up having to peel away my glued down cobweb, to find it left a slightly less dimensional version of itself, which I then re-added crackle to and started applying colour with Distress Sprays.


Trouble is because it wasn't as deep there's less of a crackle compared with on the MDF.  I'm also a bit disappointed at how no matter what colour medium I put on it seemed to fade to almost nothing... even the paint - what's that about?  It doesn't usually happen...


In any case, with all the layers of paint and ink and Treasure Gold which eventually got added, you can hardly see the crackle in the cobweb at all now!


Ah well, it looks pretty darn cool around the outside of the cobweb at least... highlighted with Walnut Stain Distress Crayon, amongst others.


Yes, that crackle definitely makes me happy!  You can also see here the fine wire I silvered up to create a web for my Idea-ology spider to dangle from (again there's a similar one here) ...


... and here he is, right at the centre of the cobweb, waiting for his prey (or for you to walk through the trees and get the whole web caught in your hair - ugh!).


I used the pad of my fingertip to swipe on some Treasure Gold wax in Silver and in pewter to give the cobweb that lovely shimmer you sometimes see the fragile fibres get when the sunlight catches them.


At this time of year, I can rarely resist adding some pinecones and acorns when I get the chance, and since this is an MDF tag it can handle both the weight and the dimension.


I also tucked some moss in and around the leaves as I felt the tag needed a bit of green going on.


I'm sure you spotted the Idea-ology Word Band with some shredded Mummy Cloth adding some extra cobwebby texture behind it.  There's more of the cloth and more of the rusty wire at the top of the tag to finish it off.


So, overall, despite all the frustrations along the way, I ended up very happy with my autumnal tag - with the dry-embossed leaves and the spider at the heart of it, glistening on his silvery web. 


I hope you'll be inspired to come and play along at the Simon Says Stamp Monday Challenge.  If this isn't enough, there is of course phenomenal inspiration from the full-time Design Team there.

As ever, the team will be spotlighting some of their favourite entries at the end of the week, and of course there's that $25 voucher to spend at Simon Says Stamp for one lucky randomly drawn winner.

Thanks so much for stopping by today, and I'll see you again soon.  Happy crafting all!


Laws are like cobwebs, which may catch small flies, but let wasps and hornets break through.  Hah!
Jonathan Swift 

Truth is by nature self-evident. As soon as you remove the cobwebs of ignorance that surround it, it shines clear.  Double hah!
Mahatma Gandhi

I'd like to share this tag at Try It On Tuesday where the theme is Autumn Colours
And at the Funkie Junkie Boutique Blog they are looking for Fall Foliage

#newbloggersucks

Friday, 7 August 2020

Look to the Speckled Skies!


Hello all!  We're playing with tags this month at A Vintage Journey... the lovely Amanda is our host and she says Tag, You're It!

As always, there's oodles of inspiration from my fellow Creative Guides, along with all the challenge details, and we hope you'll come and join in at some point.

Playing with tags is nothing out of the ordinary for me (in fact it's a rare week that goes by without one putting in an appearance) so to give this a little lift for the challenge, I've created a double-layered tag - two for the price of one, if you will.

And I've been playing with Speckled Egg Distress again... right down to some actual speckled eggs - but of course!

In fact, the regular sized tag mounted on the jumbo one here was my very first smooshing of the Speckled Egg (S.E.) when it arrived.


At some point the tag had had an oval cut out of it so it was just hanging around on the craft table when I wanted to play with my new colour, so now I had a Speckled Egg-smooshed tag with an oval cut-out sitting around.

It finally found a home when Amanda's challenge theme needed fulfilling... and here it is.


I've had these little plastic eggs in the stash for a while - they put in occasional appearances.  I used the S.E. Distress Paint along with a bit of white to coat the eggs, before spattering on some Mud Splat Fresco paint using a toothbrush.  They're inside the tape to stop them rolling around!


Given the tag already had the hole - and an egg-shaped hole at that - it immediately seemed like a good nook to rest a little nest in.   As you can see, I added some design tape, and a couple of my favourite stamps got pressed into action (yet) again.


The birds are embossed so they have that magical flash of movement as the light catches them.


I thought a wooden background made sense - sort of like a tree to hold up the nest - so I used some wood plank paper and whitewashed it...


... before adding a bit of script stamping in S.E. Oxide...


... and some more of my favourite Tim Holtz grasses.


And then it was really just a case of assembling things.


Some tangled moss and supporting twigs from the garden to form the nest.


The feathers have been gathering on my craft table.  I've been feeding the birds during lockdown.  Many, many different species have been visiting, so the occasional feather is really not hard to come by just outside the front door.


I suddenly thought that my quote (from PaperArtsy EAB11 Wings & Flight) would look good on another oval.  The original cut-out was long gone so I grabbed another S.E.-smooshed tag which was lying around and cut it from that.


It was then that I discovered the main tag must have had a wash of gesso/white paint before smooshing, because my sentiment egg has a far warmer manila tone.  But I love how it brings out the greener side of S.E. 

(I didn't want the author of the quote's name to appear (Gustave Flaubert, in case you're wondering), so I used some masking tape over it when I was inking up the tag and removed it before stamping.)


The speckled eggs look just as I imagined nestled in their mossy bed.


I'm sure that one of these birds will be back to keep an eye on them very soon.


I suddenly thought it might be nice to have a couple of glass pebble "dewdrops" glistening around the place, so I dug them out and played with the positioning to get the balance right.


They were definitely a happy last-minute thought.  I love how they catch your eye with a glimmer of light every now and then.


Gluing down wasn't entirely straightforward.  Feathers have their own ideas about which direction they want to curve in.

And those lovely soft fluffy bits die a death if you get glue on them!


But with the addition of some S.E.-dyed crinkle ribbon and frayed Idea-ology Linen Ribbon at the top, tied with fine twine, I was very happy by the time I'd finished.


I hope you like it too, and that you'll be inspired to come and play Tag, You're It with us this month at A Vintage Journey.  As always, we really enjoy seeing your creations and at the end of the challenge we'll be selecting three Pinworthies to go on our A Vintage Journey Pinworthies board.


As though there's not enough inspiration by the Creative Guides over at the main blog, I just want to finish off with a shot of my two recent Speckled Egg tags together.  They were made within 24 hours of each other, and I think this one and the Change your life tag work rather well as a pair.


Thanks so much for stopping by.  I look forward to some blog-visiting time this weekend to see what you've been up to lately.  Stay safe, stay well... the second wave is rising.  Best to stay indoors and do some crafting really!

I do not live happily or comfortably
With the cleverness of our times.
The talk is all about computers,
The news is all about bombs and blood.
This morning, in the fresh field,
I came upon a hidden nest.
It held four warm, speckled eggs.
I touched them.
Then went away softly,
Having felt something more wonderful
Than all the electricity of New York City.
Mary Oliver

Friday, 1 May 2020

The flowers appear on the earth


Hello all and a very happy first of May!  It's time for a new challenge over at A Vintage Journey, and our host this month is the lovely Jennie, who is looking for Beautiful Blooms.

As always, the Creative Guides have made some glorious projects to inspire you.  And it's a time of year when Nature puts on one of her finest shows of spring flowers, and heading into early summer, so hopefully this is well timed for her to add her inspiration to ours.

I've certainly borrowed more than just inspiration from Nature for this tag... those are real lavender stems there!  We've taken a bit of detour away from nature and springtime in the last couple of posts (with the Birthday Blues and Browns taking a grungy turn, and the unusual-for-me theme of sewing for Sew Far, Sew Good), but we're firmly back to business as usual here.

Do hop over to A Vintage Journey to see what the others have been up to, but before you go, let me share some close-ups and details of how my flowers appeared on the tag.


The background has been sitting around since the beginning of March - it was pretty much the first of my springtime moments.  And it was certainly a first inking for my then brand-new Field Notes stamps.


You may remember that this pair of tags almost made it on to my Spring Greens page, but got rejected in the end.  This one now finally has its moment in the sun.


And now I think about it, the other tag did in fact appear on that page spread... it got cut up into wildflower stems and then got painted over to make the flowers white.  Ah well, at least one of them survived!


In any case, when Jennie was looking for "beautiful blooms", I thought this remaining tag would make a good starting point.

I added some of the Rubber Dance Weed Love vines in Olive Archival - already beautiful blooms, in my opinion.  As you saw when I was Catching up, they're everywhere at the moment!


I'd had the idea that I wanted to use the lovely picket fence of the On the Edge die in the foreground, but I ground to a halt while I tried to work out what flowers would go on the far side of it.


Not more Wildflower stems - if coloured, they got lost against the background, if plain they just didn't look quite right.  I played with some paper flowers, but they weren't right for the meadow-flower look.  And then I remembered the dried lavender stems left from my neighbour's 102nd birthday cake decorations last summer.


Some of them already put in a crafty appearance shortly after the birthday last August in my ATC, A little lavender with a touch of rust, one of my all-time favourite creations.


They're really looking a little the worse for wear now, so I zhuzhed them up with a tiny touch of paint.  You can see the difference it makes - but I think they still look pretty natural.


I mixed some Fresco Lavender (of course) and Forget-me-not with matte medium, and brushed it on very gently.  I'm hoping that the medium will also seal and protect the delicate flowers to make them last a little longer.


The paler Forget-me-not is the main colour in most places, and the darker Lavender adds shadowy depths.


The fence was cut from kraft card, and I originally planned to have it as a wood look, but in the end I preferred the weathered painted look.  It's all done with DecoArt chalk paints and crackle glaze.


I glued it down with a curve to it, so that there's room for the stems behind, but it also gives a lovely bit of dimension to the tag.

I was really pleased when I remembered the moss tucked away in the stash - I love the grounding it gives to the fence, which was otherwise floating somewhat freely in mid-air!


Given that this is Words and Pictures, there had to be some words and these stickers from one of the Idea-ology Clippings sets simply demanded to be included.


I love that you can still see all that inky goodness in the background, and I think the pen and ink borders do a subtle job of framing the tag to draw your eye inwards.


And the other trick to catch the eye are these tiny gemstones dotted around to capture the light, and therefore the attention.  There are three of them - the rule of three works in visual design as well as in rhetoric.


I'm not much of a one for using "bling" in the ordinary way of things - though I do enjoy it when I see it on others' creations - but when it's a question of capturing sunlight I'll try anything!


The Field Notes stamping is still there to be found when you look closely...


And the loops of fine twine at the top are intricate without detracting too much from the main focus of the tag...


... those gorgeous lavender stems.  You can't really beat Mother Nature at her own game, can you?!


Even the butterfly clearly finds them irresistible.  (He's from the Idea-ology Transparent Wings, but has had a little wash of gesso to the back of the wings to give him a bit more presence.)


By the way, I do realise I'm writing quite long blogposts at the moment, even on the tags.

I suppose it's partly because I have the time to do it, but I also think there's something about losing yourself in the creative process and also in paying attention to tiny details which can distract you from everything which is going on.


Well, it does for me - I hope maybe a visit here does something similar for you... a few moments of light and beauty in a difficult world.

I also feel as though I'm chatting to all of you as I write, so it is a way of staying connected too!


Thank you so much for stopping by today.  There's a whole wealth of floral inspiration over at A Vintage Journey where my fellow Creative Guides have also been travelling amidst the flowers.  We hope you'll be inspired to share some Beautiful Blooms with us this month.  It's always wonderful to meet you somewhere along the way.

Take care, stay safe, stay well, and I'll see you all again soon, either here or elsewhere in Craftyblogland.

Where flowers bloom so does hope.
Ladybird Johnson

The perfect blossom is a rare thing. You could spend your life looking for one and it would not be a wasted life.
Ken Watanabe

The Simon Says Stamp Monday Challenge this week is to make something which is Not A Card
Anything Goes over at Tag Tuesday this fortnight - I seem to be on a tag streak so they're seeing lots of me this week!
At the Bleeding Art Challenge it's Anything Mixed Media Goes all the time
The Creative Artiste Challenge are celebrating their 60th anniversary with the usual Anything Mixed Media Goes