I'm travelling into a new way of working, a new country, a new language, and a new hobby which I'm passionate about. Come with me for some of the journey...

Showing posts with label Stickles. Show all posts

Friday, 13 June 2014

Wings and Things

Hello and a warm welcome to you all, with an especially big welcome to the newest followers - so lovely to have you here!

After all the colour that's been going on lately, I seem to have hit a neutrals zone!  From yesterday's Men At Work mini-album (if you blinked, you probably missed it, so I'd love it if you had time to check it out), we move to something a little more feminine, and it's all in honour of the new challenge at A Vintage Journey, where our host - the fabulous S@ndy Diller - is looking for Wings and Things - we must see birds, bees, butterflies or dragonflies (or all of them together!) on your Tim-inspired creations.

You'll find all the details of what she's looking for, as well as lots more lovely inspiration from my fabulous team-mates over at A Vintage Journey, and here's my starter for ten.


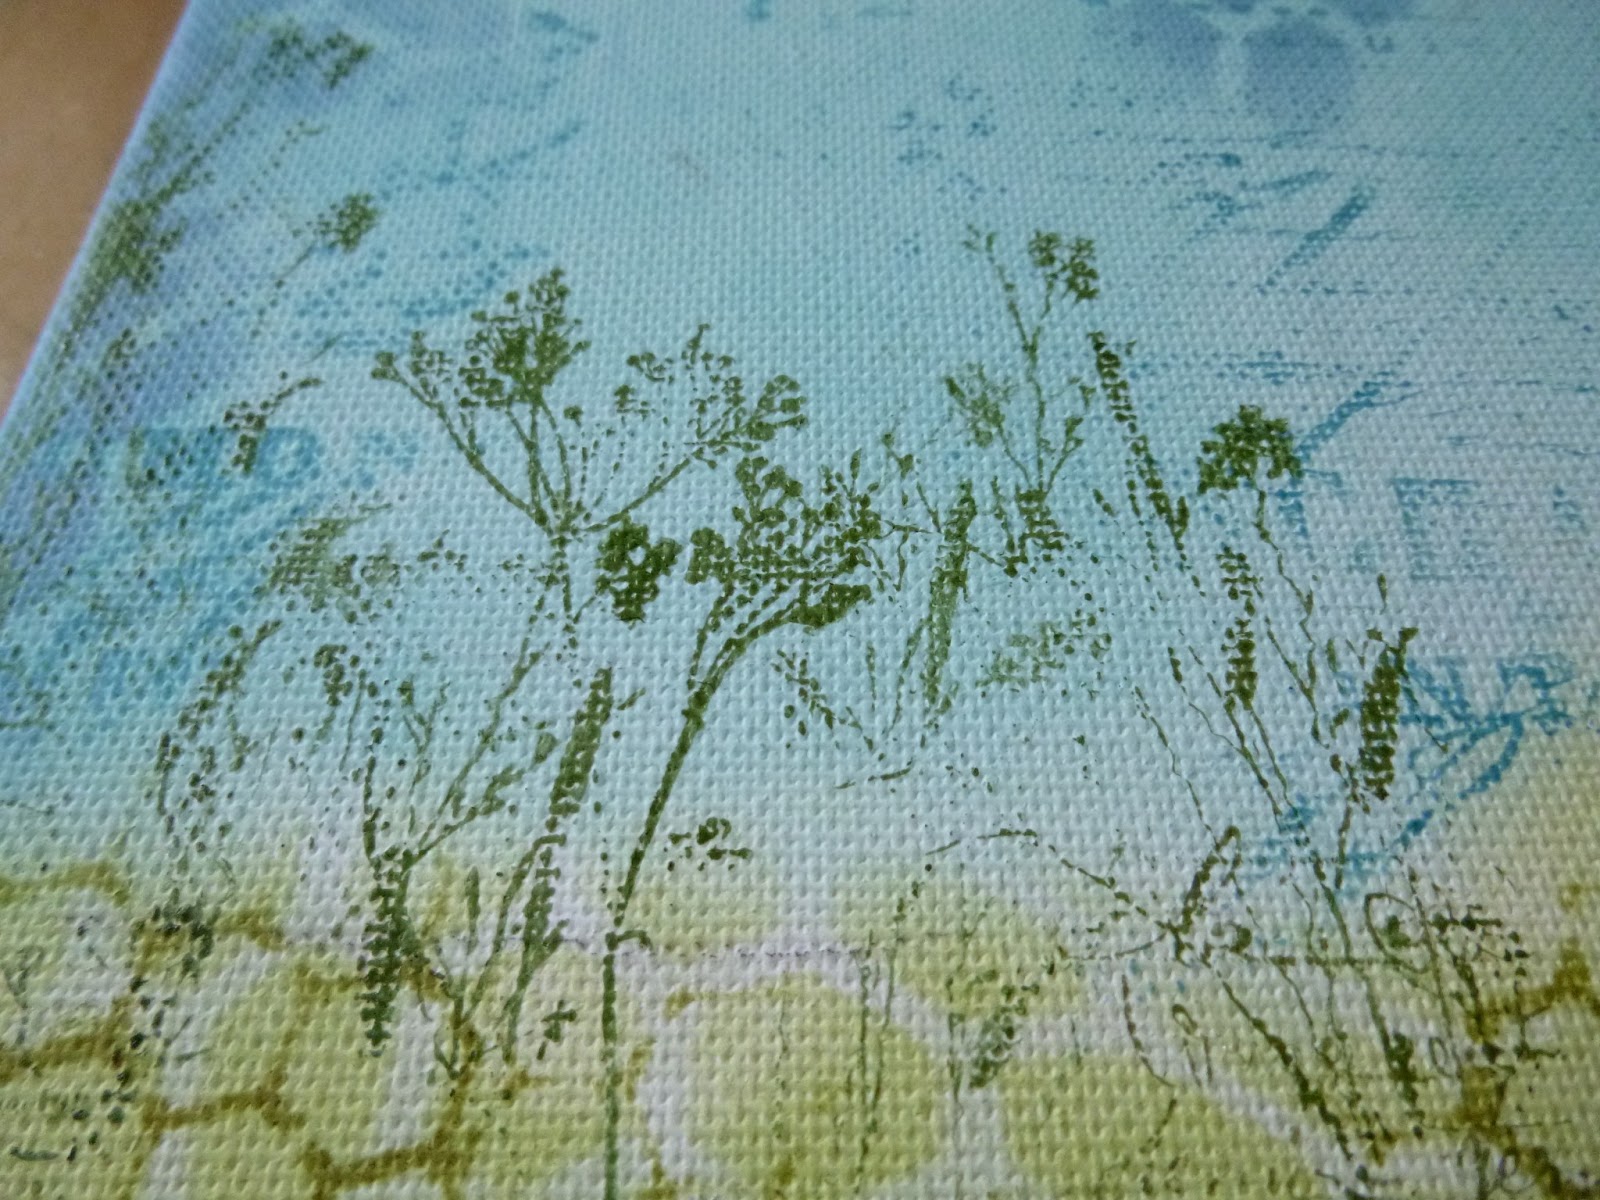
I had a lovely time playing with one of the 6x4inch burlap canvases.  The background was inspired by a technique I saw over at Layers of Ink, the blog of the amazing Anna-Karin... She was showing how to transfer patterned papers onto the burlap, so that's what I decided to play with first.


I used one of the Wallflower 12x12 sheets (click Anna-Karin's link above to see how it's done), and was really pleased with the textured look once it was done.

It's a subtle bit of damask, but it's there - for now!

I also wanted to play along with the Compendium of Curiosities III challenge, while I was at it.  I haven't managed to play in the last couple for various reasons, so needed to dive back in.  So, as you can see, the next step was stencilling for texture.


But I really, really wanted butterflies - to stick to the Wings and Things theme - and there isn't (yet) a Layered Stencil of butterflies, so I cut the Butterfly Frenzy Decorative Strip Die and used the "leftovers" from that as my stencil instead.  (I don't know if it will count.)


I can't tell you too much more (you'll find the technique on page 49 of Tim's book), but I wanted a bit of extra sparkle around my butterflies, so I also added some Picket Fence Distress Stickles for a touch of vintage shimmer.


I'd had the corrugated cardboard sitting around for weeks, with the butterflies already stamped and framed with the Ornate Plate, knowing this challenge was coming up.  (It travelled all the way to the Czech Republic and back.)  Now finally there was somewhere for it to sit!


The butterflies are stamped in Potting Soil over a thick layer of gesso, and then there's plenty of Walnut Stain inking around the edges.


I started to layer up some other bits and bobs around the corrugated panel:


Some Vintage Lace cut from the same paper as I used for the image transfer...


... and it goes off around the edge too, naturally!


Some ephemera from the Idea-ology Thrift Shop Ephemera Pack... this butterfly has acquired a Game Spinner body.


A couple of skeleton leaves, to tone in with the gold of the Ornate Frame...


One of the little Custom Fasteners, customised with the butterfly sticker, of course...


And the butterflies from the Butterfly Frenzy die - well, they're everywhere!


I'd used the new Motif Resist Paper Stash to cut them, so once inked with Walnut Stain, they've got lovely white script dancing across their bodies.


I decided to layer some of them precisely over the shimmery texture butterflies, to give them double dimension...

Others are just flying free.


And on the top, I added an Idea-ology Clock Key, with a butterfly perched just ready to alight on it.

It sits on some more Vintage Lace heading off around the edge of the burlap frame.


The Courageous Muse Token sits over another label from the Thrift Shop pack.


Oh, and there are the words, of course - stamped in Potting Soil, inked and spritzed and layered up with some more lace and ephemera.


I had such a lovely time playing with this - so thank you, S@ndy, for a great theme.  Do hop over to see what she and the rest of the Vintage Journey team have created to inspire you - you won't be disappointed! - and we hope you'll come and play along with your Wings and Things some time in the next fortnight.


Thanks so much for stopping by... there'll be dollshouses starting on Sunday, and a big celebration next week, so I hope to see you again soon!!

We have to continually be jumping off cliffs, and developing our wings on the way down.
Kurt Vonnegut

If you were born without wings, do nothing to prevent them growing.
Coco Chanel

I'd like to enter this in the Compendium of Curiosities III Challenge 4, hosted by the fabulous Linda Ledbetter
And at the Simon Says Stamp Wednesday Challenge where they are playing Stencil It

Wednesday, 1 May 2013

Quite Contrary

Hello all!  I'm very excited to be here as a Guest Designer for Country View Crafts new challenge for May: How Does Your Garden Grow (a GD spot earned for me by my Glampunk Birdhouse).

I'm a busy bee today, there's also my Artistic Stamper DT post (it's my debut for them, so it would be lovely if you had a moment to take a look at it!).  

And don't forget today also sees the launch of the first challenge over at the all-new Our Creative Corner (thankfully I'm not on duty until half-way through the month, or else I'd be on a hat-trick of posts today!). 

But for now, let me show you the canvas which was sparked off by this lovely challenge theme.


The minute I saw the challenge theme, my head went to a traditional English country walled garden.  And this canvas ended up being all about the Decorative Strip Dies!


I recently got the Brick Wall Decorative Strip Die (mostly thinking it might be useful for dollshouse duties) and I decided to press it into action.  

And the other main feature of the garden is obviously the flowers - cut with the Tattered Flower Garland Decorative Strip Die.


I've always had a bit of a thing for old red brick walls - I love the warmth and variation of tone in the bricks, so I set about trying to recreate it.

I used Distress Stains in a number of colours to cover a whole sheet of A4, cut several strips of wall, and then pressed out all the bricks.


For the mortar, I mixed some Antique Linen Distress Stain into some texture paste and smoothed it onto the card that I'd cut to size.

Then I did my brick-laying... fiddly, yes, but great fun seeing it take shape.

You'll see that originally I had a whole different background planned for this.  I even got as far as having everything stuck down, but it just wasn't working for me.


So I had to carefully peel off all my painstakingly stuck down elements and start all over again.

I was much happier as soon as I'd taken it all off and had a look at it, even on a blank canvas.

So then I started afresh (luckily I'd picked up a bunch of canvases incredibly cheaply at Kik, which is kind of the Woolworths/Poundland of the Czech Republic).


I had a lovely time with Distress inks and stencils, keeping it very gentle and soft in look.

The Distorted Hive Mask from Tando is a great texture creator, and I combined it with the Crafter's Workshop chicken wire.


Obviously there's some stamping... the Tim Holtz Papillon script rolled on randomly in places; some delicious hedgerow plants from some of the TH smaller stamp sets; and a touch of my all time favourite script stamp from the Apothecary stamp plate.

I love the texture of the canvas through it all.


I was also pretty happy with my brainwave for the "flagstone" pathway... strips of torn tissue tape.


This is one of my favourite bits of the whole thing in the end!


The quote is a PaperArtsy sentiment, stamped on watercolour paper in Olive Archival.  I used Distress Inks to echo the colours of the canvas from the grass up to the sky, with some Wild Honey for added sunshine.

It's mounted on padded tape for extra dimension.


The flowers are all cut from a sheet out of Prima's Tea Thyme collection.

I had a lovely time layering them all up.


They've all had an edging of Antique Linen, and then just a touch of Wild Honey for extra warmth (not that it was needed when it came to photograph time - we went up to 39 degrees that day - but don't be envious, I'm back on the hot water bottles again now!).


The long attachers have been given little dabs of Distress Paint to tone in with the papers.


The little butterfly is also cut from the Tea Thyme papers, but he's had a good dose of Peeled Paint DI to differentiate him from the flowers.

He got a good coat of Rock Candy Distress Stickles too, but it doesn't seem to show up much in these photos, sadly.


The little fluffy clouds were almost an afterthought... it suddenly occurred to me that if we were in an English country garden, it's highly unlikely that there would be no clouds at all in the sky (it does happen occasionally, but really not that often!).

I pulled apart a cotton wool pad (for cleaning your face really) and added some of the wisps to my blue, blue sky.


As always, when I work with a canvas, I carried the creation over the edges, so I'll leave you with a couple of angled shots to show you that overflow, and some of the dimension of the piece.

I hope this canvas encourages you to join in with the How Does Your Garden Grow challenge over at Country View Crafts this month.  You'll find a lots more inspiration from the regular DT - as well as a special celebrity guest designer appearance - and all the challenge details right here.


Forgive me for adding just another little reminder about the other May 1st excitements: my debut DT piece for the new Artistic Stamper challenge, and the all-new Our Creative Corner challenge also beginning today.  You have a whole month for each of them (well - until the 28th for OCC), so why not play all three?!?  Hope to see you there.  Happy crafting!


Her heart was a secret garden, and the walls were very high.
From The Princess Bride, by William Goldman

Give me odorous at sunrise a garden of beautiful flowers where I can walk undisturbed.
Walt Whitman

If you look the right way, you can see that the whole world is a garden.
From The Secret Garden, by Frances Hodgson Burnett


I'd like to enter this in the following:
Fashionable Stamping Challenge's current Sentimental challenge
At Unruly Paper Arts, they are looking for Paper Flowers for RAQ2
At Pile It On the theme is April Showers bring May Flowers - well, we're in to May now, so here are the flowers
Simon Says Stamp are having an Anything Goes week, and I think I'm just in time to join the hordes!
At Kreativ-Scrapping they would like to see What Spring Means To You - it's the flowers coming out, and the long awaited blue skies and sunshine!

Tuesday, 23 April 2013

Moonlight Revels

Hello everyone!  It's Tuesday and time for a new challenge over at Fun With ATCs.  For this fortnight we'd love to see your Artist's Trading Cards (2.5 x 3.5 inches in size) on the theme of Magic or Magical Creatures.  There's some really exciting inspiration from my fellow teammates here, plus all the challenge details of course.  Here's my offering to get you started:


This was a really tricky one to get a good photo of because there's so much faerie dust around (a.k.a. Perfect Pearls, Distress Stickles and Dry Glitter); the real magic happens when you move it around in the light...


I make no apologies for employing the same fairies as in my Once Upon A Time Steampunk Fairytale Book... they're pretty much the only magical creatures I have amongst my stash.  They come from the Prima 6x6 Nature Garden collection.

This is how they look before any doctoring (apart from a bit of sanding round the edges where I've stuck them onto chipboard).


Now they've got some Perfect Pearls powder in Pearl on their dresses and an aura of Rock Candy Distress Stickles in the haze around them, as well as some doodling with the Inkssentials white gel pen to give a moonlit glow to them.


I love this little one!


The moon was created by pressing one of the Tim Holtz texture stamps into some WV embossing paste to get that bumpy, cratered look.

I knew I'd only be using part of it, so I didn't bother making it very round...


Next step was a liberal coating of Rock Candy Dry Glitter... you get so much dimension and texture from this, and it has such a subtle sparkle. Fabulous stuff...


That sparkle, plus a bit of inking, gives the moon a touch more presence... and sparks the faerie revels - dancing in the moonlight!


The words are stamped with my little £1 alphabet stamps with some doodled moonlit highlights.  

They're inspired by Puck's speech from the end of A Midsummer Night's Dream - you'll find it below, of course (oh, and if you're wondering about my weird spelling of faerie, I did go into it here), and I'll leave you with that...

For now, I hope you'll have time to check out the inspiration from the rest of the DT, and it would be fabulous to have you play along with our Magic and Magical Creatures theme at Fun With ATCs... 

I really can't wait to see where your imaginations take you (and us).

Have a wonderful week!


Puck:
Now the hungry lion roars
And the wolf behowls the moon,
Whilst the heavy ploughman snores,
All with weary task fordone.
Now the wasted brands do glow,
Whilst the screech-owl, screeching loud,
Puts the wretch that lies in woe
In remembrance of a shroud.
Now it is the time of night
That the graves all gaping wide,
Every one lets forth his sprite,
In the churchway paths to glide.
And we fairies, that do run
By the triple Hecate’s team
From the presence of the sun,
Following darkness like a dream,
Now are frolic. Not a mouse
Shall disturb this hallowed house.
I am sent with broom before
To sweep the dust behind the door.
William Shakespeare


Oops, nearly forgot!

For something completely different, there's a one-time-only chance to see the card I made for my nephew over on the Artistic Outpost blog today.

"A card?", I hear you cry.

Yup, a card... because that's what doting aunts do for their adored nephews (and I'd do it for my niece too, but pretty much nobody else.  Grrr... I hate making cards - what is that about?!)

Happy Crafting everyone!


Saturday, 20 October 2012

Danse Macabre

Hi everybody - happy weekend to you!  I'm delighted you're able to spend a little bit of it here at Words and Pictures.... and a big welcome to the new followers - thank you so much for your support.

Today I'm sharing my take on Tim Holtz's October tag in the 12 Tags of 2012.  I was in two minds about this one as there's loads of glitter (which I don't really do so far), but he's also using a wrinkly tissue paper background (one of my all-time favourite things so far).  So in the end the tissue paper won - and here it is:


There's definitely a soundtrack to this one - the music trickling down the centre in a streak of fiery blood is inspired by Saint-Saëns' Danse Macabre - have a listen as you go, if you like!


Quite a lot of spinning off from the Master's inspiration here - as I had to invent my way round the lack of some of the supplies he's used.  

But I enjoyed trying to create my glitter alternatives - and, as it says, I'm pretty happy with some of the results!


As regulars will know, the tissue paper background is one of my staples.  I stamped it with the Kaisercraft music stamp in Archival Black first, glued it on nice and 'wrinklily', and then had great fun blending paint, ink and Perfect Pearls mist to get a good patina on it.


The bats and skull-and-crossbones came as little freebies with one of my Funkie Junkie Boutique purchases, and I'd used them to experiment with Andy Skinner's rust technique as part of the Timeworn Techniques workshop.  So they already had quite a lot of texture on.  

I added Black Soot Distress Embossing Powder to alter the colour and add even more texture.  


And I added a brushstroke or two of some sparkly embossing powder my sister-in-law gave me from her stash, so that I could approach a glittery look as well as texture.  

Behind it you can see that - since I don't have the spider's web stamp - I've used the crackle texture from the TH Ultimate Grunge set to give me my cobwebs in the background.


No big Boo! die to work with (boo hoo!), but I love the Happy Halloween calligraphy in the TH Apothecary set, so decided to try that out with a similar set of ingredients.  It's embossed with Black Soot embossing powder, and then got a good coat of Rock Candy Distress Stickles.  

As Tim says in his tutorial for this month's tag, it gives more of a lustre than an out-and-out bling effect, but I'm probably more of a lustre-type than a bling-gal, so it suits me fine!


The Arsenic label is also from the Apothecary set - stamped onto the corner of some old music paper, so it was already a good aged colour, but I've added some creases and tears, and some Vintage Photo to the edges nonetheless!  

I've also added the Poison label from a different Apothecary set - the Oxford Impressions Dr Coffin's Apothecary, and clipped it on with one of the Idea-ology hinge clips (so cool!).  


With no calendar ticket attached, I wanted to highlight the number 31 in another way - so there are some grungeboard figures, painted with acrylic, and given a good smear of Distress Stickles in Frayed Burlap.  (And edged of course with good old Vintage Photo!)

So, that's pretty much me for today.  I really enjoyed playing with this - as, again, it's taking me to new colour zones, and even this much bling is a lot for me... so thanks for the inspiration, Tim!  And thank you all for coming to check it out.  Look forward to seeing you again, here or elsewhere in Craftyblogland!


Lady Nancy Astor:          Winston, if you were my husband, I'd poison your tea.
Sir Winston Churchill:   Nancy, if I were your husband, I'd drink it.

I'm entering this in the Tim Holtz 12 tags of 2012 for October
And I'd like to add it to Anything But a Card's current challenge of Halloween or Autumn colours

Oh, and please forgive me for doing a little celebration dance - I'm so thrilled that the Sonnet Mash Up got a Top 3 spot at Simon Says Stamp and Show!!