I'm travelling into a new way of working, a new country, a new language, and a new hobby which I'm passionate about. Come with me for some of the journey...

Showing posts with label dolls. Show all posts

Thursday, 23 August 2018

Encore - Calico Shrine Brocanterie

Encore Posts
Projects which made their first appearances elsewhere for Design Team duties or Guest Designer opportunities, but which only had a sneak peek here, are being gathered together in the pages of my virtual scrapbook while I'm away.
As always, the Encore Posts are formatted differently from the regular ones, so that you can easily spot them.  Please don't feel that you have to comment all over again!

I'm so glad you enjoyed my Engraved Enamelled Plaques over at PaperArtsy.  Today I'm here with another Encore post.  This project first appeared back in July 2015 over at the Calico Craft Parts blog when I was on the Design Team there.  It remains a favourite.  Here's what I wrote back then...
___________________________________

Hello everyone, it's Alison here again from Words and Pictures, and today I've got a little antique shop window to share with you.  Well, it's more of a Brocanterie really... Brocantes is such a useful French word - somewhere between antiques and flea-market finds (but nicer than thinking about fleas!).


I used one of the fantastic Shrine Kits to create my shop window.  This is the simple arch design, Style 2, in the smallest size (12x7x3cm).  If you want to go large with your project, you can choose one of the two larger sizes.  


The kits come in pieces, but assembly is pretty straightforward.


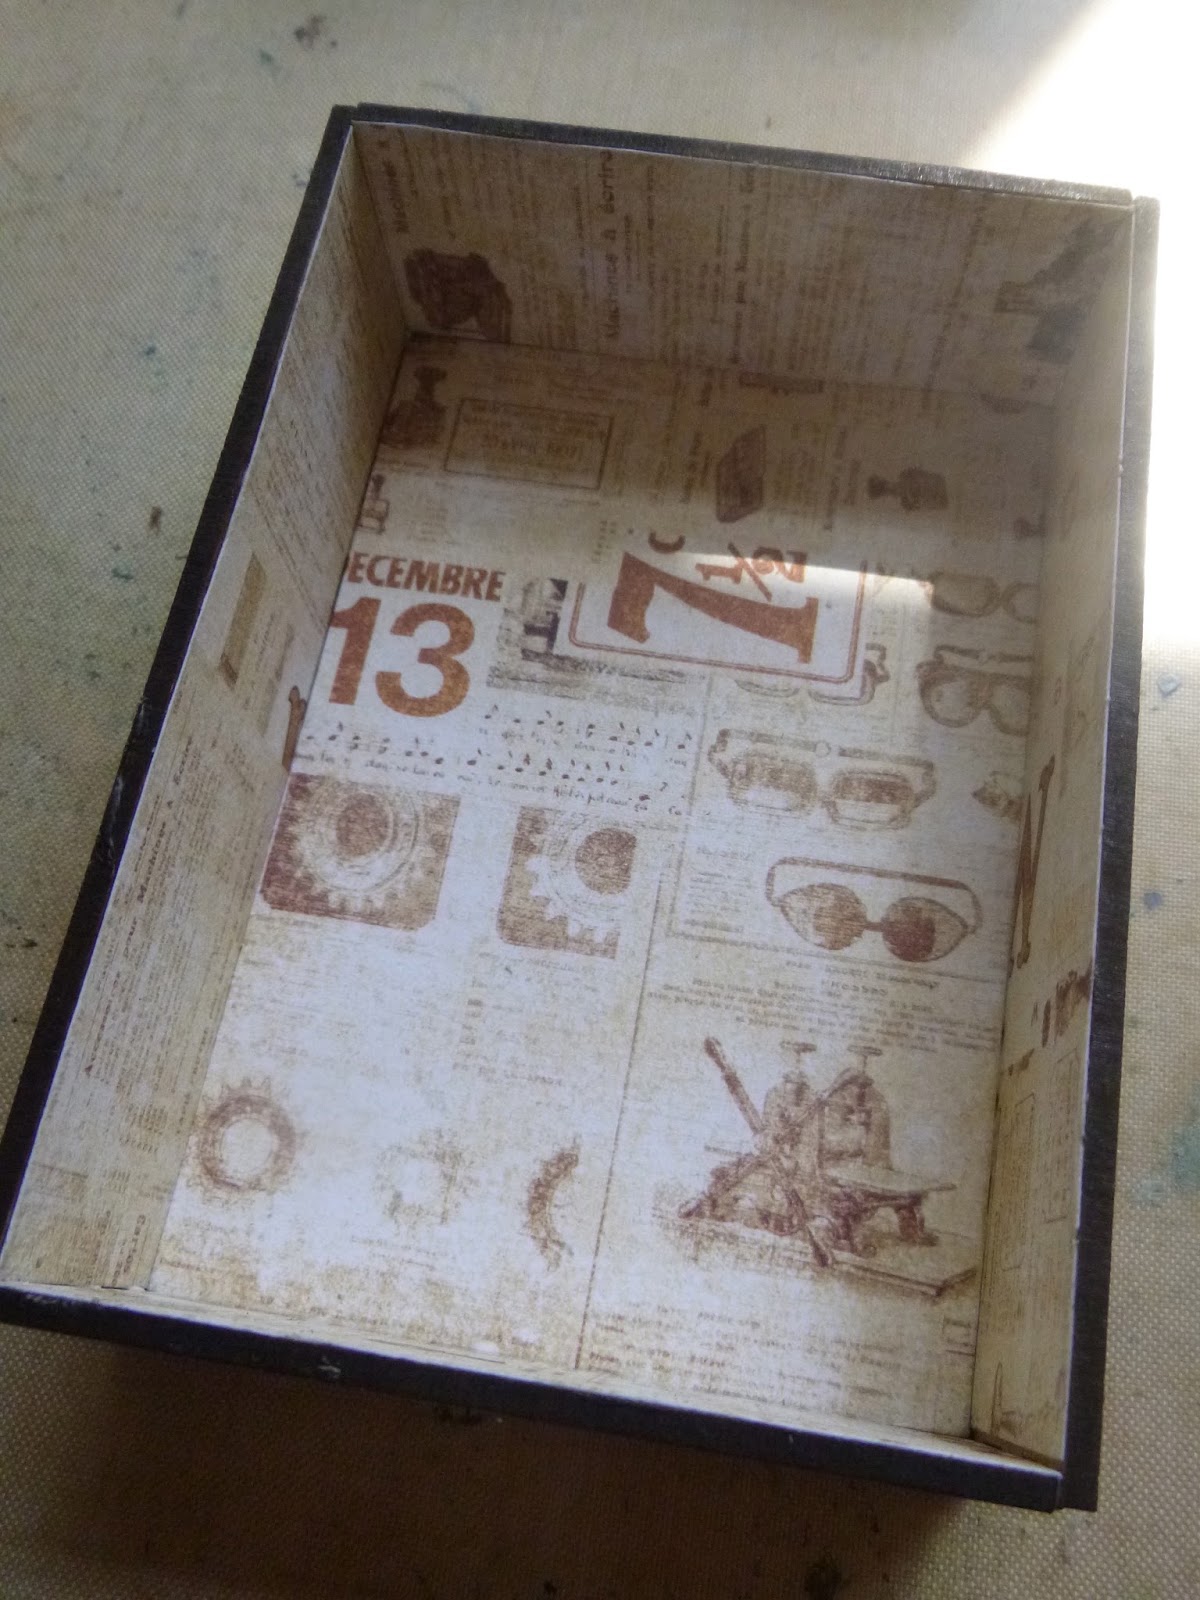
If you want to cover the pieces with design papers, that's best done before you glue the thing together.  I wanted papers for the inside of my shadow box, so I glued those down, taking care to get them on the right side of each piece.


You also want to avoid papering the "teeth of the combs" along the edges - those are going to slot into each other, so you don't want the extra thickness of the paper in the way.


Once that was done, I glued together the walls and the back, but left the front cover off for the time being.


I painted the exterior with layers of DecoArt paint and crackle mediums, starting with the Chalk paints line, adding some Media Line crackle paint over those, a coat of Ultra Matt Varnish to seal it (so that the precious crackle won't flake off), and then some Raw Umber to add shading around the edges and corners.


I also added a wash of chalky white to the interior walls, and some Raw Umber shading to darken the corners of my dusty little antique shop.


The kits also come with little circular feet.  You don't have to put them on at all if you don't want to, and you also have some leeway as to how long you make the legs.  I did a two layer version, then just gluing the little circles to the bottom of the shrine to raise it a little way.


For the inside I gathered a motley little collection.  Against the back wall you can see the gorgeous Calico Craft Parts Candelabra (strictly that's probably one candelabrum!).  This is Candelabra Style 1 out of a whole collection of Chandeliers and Candelabra - well worth checking out.


And mounted on the wall there's also one of the delicious Mini Butterfly Wood Shapes, which has had a coat of DecoArt Crackle Paint.


I also used crackle glaze and paint on the little china doll, and filled a glass vial with tiny copper beads cut from a bead chain.  There are some other metal bits and bobs if you rummage around - old keys, bulbs and pocket watches, some wooden bobbins, and a antique picture frame.  Looks like a bargain... snap it up while you can!


I altered my Word Band with DecoArt paints in Raw Umber and Red Iron Oxide as well as some granules of embossing powder for a rusty texture, and it's bound on with good old rusty wire.


I hope you've enjoyed browsing amongst the remnants in the brocanterie.  If you'd like to have a play with any of the Calico Craft Parts I've mentioned you can click on the links in the text to go straight there.  In the meantime I'll wish you a wonderful week, and I'll see you again soon.
________________________________

So there you have it... those wishes for a wonderful week apply in the present day too.  We're almost at Press Night so I'll be packing up and travelling home again in the next couple of days.  I'm very much looking forward to getting back to my craft table, and to spending some time catching up with you all again.  Happy crafting in the meantime!

A house with old furniture has no need of ghosts to be haunted.
Hope Mirrlees

Sunday, 26 November 2017

Just Slightly Macabre

Encore Posts
I'm away again for a month or so.  There are some scheduled posts with new creations coming your way, but I'm also taking the chance to do some catching up here at Words and Pictures.   Projects which made their first appearances elsewhere for Design Team duties or Guest Designer opportunities, but which only had a sneak peek here, are being gathered together in the pages of my virtual scrapbook.  I'm calling them "Encore" posts and they're formatted differently (all the way down the centre), so you can spot them easily.
Please don't feel that you have to comment all over again!

Here's another creation from a couple of years back... September 2015 to be exact.  This was one of my Destination Inspiration posts for A Vintage Journey, where you have set ingredients to play with - and I must say, it's one of my favourites.  Since it's only three inches cubed, you could consider it some extra inspiration for Anne's fantastic Mini Marvels challenge over at A Vintage Journey right now, November 2017!

I hope you enjoy a little trip down a slightly shadowy memory lane into the "regions beyond".  Here's what I wrote back then... It's a long one this, so you may want to fortify yourselves with a hot drink, ready for the macabre stories and ideas twisted into this tiny room.
__________________

Hello all, Alison here, and I'm delighted to have arrived at Terminal 2 with my bagful of possibilities.  If you saw Astrid's fabulous creation last Monday, you'll know what we've got packed in our luggage this month:
Product - Distress Inks
Technique - Wrinkle Free Distress
Featured Colour - Wild Honey
Substrate - Anything 3D

And here's what I put together whilst waiting for departure... a tiny room, which became gradually slightly creepier as the project progressed (well, Halloween is on the way, though it's not quite here yet).


Yes, that's right, that is a candle down there at the front - so obviously you need to know how it looks lit up too!


I'm going to follow the pattern and give you candlelight and daylight for most shots - it really does change the mood.


I suppose it was partly the candle that influenced the path the room took - it became a little Victorian parlour, a shrine filled with memento moris, the signs and symbols of death and mourning with which the Victorians were so obsessed.


It didn't start out that way!  Wild Honey is a colour full of sunshine and warmth.  In fact, I did my wrinkle free distressing over some stippled gesso so that I would get some extra texture, and that gave it an even lighter, brighter look.  This is pure Wild Honey apart from the gesso - no other colours involved at this point.


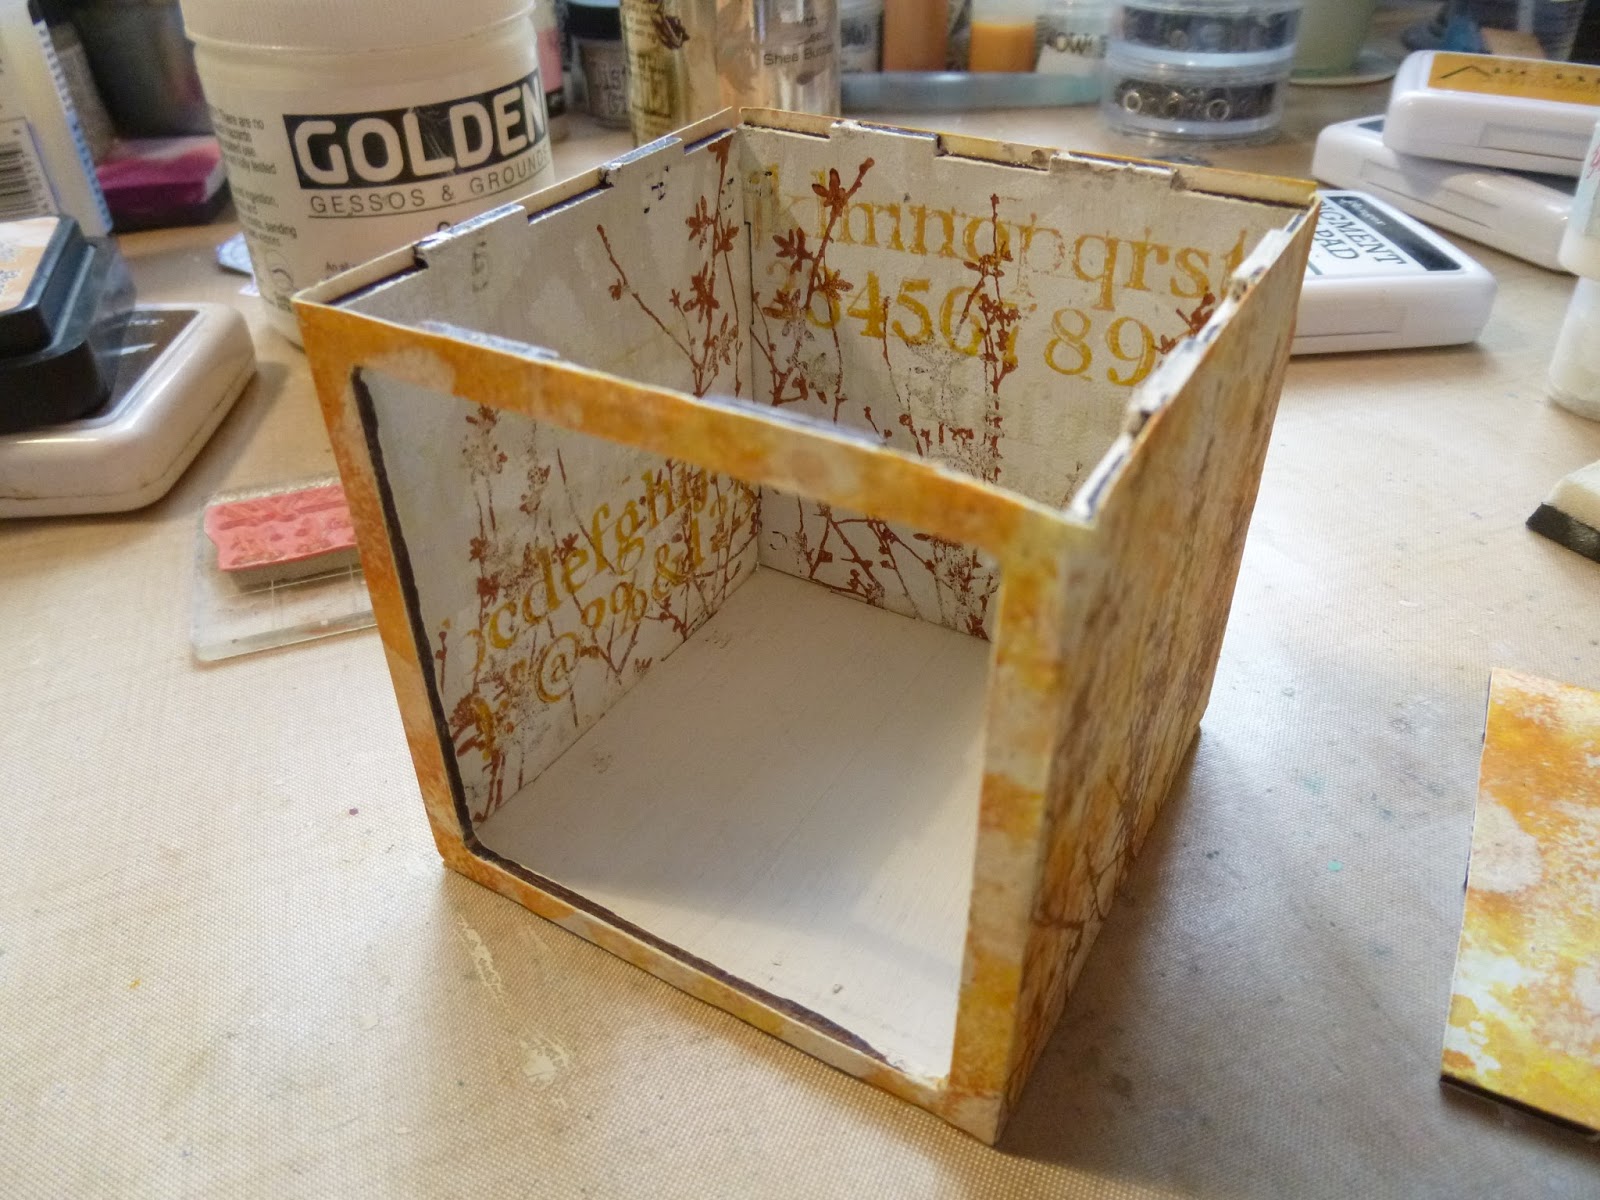
I'd decided I would use one of the Calico Craft Parts ATB kits.  This one is a three inch cube, and comes with a square frame cut out of one side of the cube and with my dollshouse connections it immediately looked like a room to me - once it was put together obviously!


I covered the exterior walls with my Wild Honey patterned paper and added some extra detailing with the gorgeous alphabet stamp from the Typography set. It's stamped in Dandelion Archival - a really good match for the Wild Honey but with permanence to it.


I used the same stamp on the inner walls (this is all before gluing the kit together obviously, making it much easier to decorate!), stamped in Dandelion Archival and also clear-embossed over Picket Fence Distress Paint to create some resist detailing.


I couldn't resist adding some of my favourite tangled branches and grasses from Spring Sprung, inside and out.  I like how you get a sort of negative version of the outside on the inside...


At this point it was all still quite pretty and delicate - but then the Regions Beyond started to take hold of me and the influences got darker.


It started with punching the tiny bird out of the leftover wrinkle free distress paper and popping him into the cage.  I added a backing of the Regions Beyond tissue tape.  Why?  Well, caged birds take me on a couple of journeys in my imagination...


One, straight to any Victorian parlour, crammed with over-sized furniture and oppressively dark paintings and ugly bric-a-brac and almost certainly a bird in a cage...


Two, to Sondheim's Sweeney Todd - the song Greenfinch and Linnet Bird, all about caged birds, sung by Joanna, herself trapped essentially as a prisoner...


Three, to the canaries taken down mines as alarms - the canary would suffer the effects of undetected gas or lack of oxygen before the men working there.  A dead canary in its cage meant get out... fast!  So you can see we're slightly on the downswing with the canary in a cage.


Next to it on the shelf stands a bottle of poison - it turned up almost without me noticing.  The label is straight from the Regions Beyond papers... and the Regions Beyond tissue tape started to make its way onto the walls in straggling clouds, boding no good to anyone.


It's there on the outer walls too.


The interior shelf is created out of one of those padding foam pieces that comes in the packaging with embossing folders, covered with some more of the Wild Honey paper and some more tissue tape.


The china doll came next - most china dolls are always an unnerving presence to my mind, and here she's distressed and dilapidated and bound with rusty wire - ominous.


A forbidding portrait on the wall - either the subject of all these musings about death, or the lady of the house who insists on keeping these fragile mementoes of her lost ones.


She's cut from the Regions Beyond papers and glued behind a Fragment with some alcohol ink to distress the look.


On the floor, the most recognisable memento mori of all - you only catch sight of it at certain angles (like with Holbein's Ambassadors, where you only see the huge skull he's painted in to the supposedly flattering portrait if you look at it from a very acute angle).


As for the candle - that too has had a wrapping of Regions Beyond tissue tape - just the right width for these little tealights.


I'll have to keep the tape to hand each time I want to add a replacement candle of course.


By now, the floor was looking a little white and pristine, so I cut the Mixed Media Thinlits lattice out of some brown card and added Vintage Photo Distress Embossing Powder to give it some rusty distressing.


I love the look of this, and how the floor is clearly worn away in places.  Along with the rusty floor, I also dirtied up (down?) the walls with washes of paint, especially in the corners where nobody has cleaned for years.  This also means the resist stamping shows up a bit better too.


Some more rusty wire is wound around the room, keeping everything locked inside.


And I altered some Idea-ology corners with my favourite Rust, Ginger and Teakwood alcohol inks to give the top of the box a Victorian finishing touch.


Of course I still have the original "roof".  It can't go in place while the candle is lit - FIRE! - but I thought I'd hang on to it - if I keep the lid on when not in use, it will reduce the necessity for dusting!! (Dusting? Yeah, right, like I ever dust...)


So, I hope that's provided some fuel for your own crafty journey.  I had such a wonderful time making it.  Apologies for the long post, but I wanted to get inside the nooks and crannies...


... and let you explore from every angle!


Do come back next Monday to find out who your next travelling companion will be, and what they'll get up to with the contents of their bags at Terminal 3.


Thanks so much for stopping by - it's always fabulous to hear what you think.
_____________________

Subtly macabre - but I tend to think that's the best sort of eerieness... when it creeps up on you with you hardly noticing, but then you suddenly notice all is not quite what it seems.  We're past Halloween now, but we are entering the longer nights of winter, and the time for ghost stories round the fire... or at least round the candle!  Thanks for stopping by and I hope you all have a wonderful weekend.

She herself is a haunted house.  She does not possess herself; her ancestors sometimes come and peer out of the windows of her eyes and that is very frightening.
From The Bloody Chamber and Other Stories by Angela Carter

Saturday, 22 April 2017

Pastime With Good Company

Hello all!  As promised/threatened a number of times, I'm finally ready to introduce you to the newest inhabitants of the Tudor Tavern.  Bear in mind my long-held aversion to working with fabric (sewing machines break when I sit down at them), and that this is my first go with doll-making.  Grab a drink - you may need it.  As always with the dollshouse posts, this is a long one...

(If the post title has inspired you to want some musical accompaniment as you go, the best instrumental version is here, but there's no singing, sadly.  If you want the words, who better than the King's Singers to render the king's composition?)

For some time, Cestina has been promising visitors to Small Worlds, her dollshouse museumthe imminent arrival of a troupe of Elizabethan strolling players.  But I couldn't make the actors before there was somebody in the tavern to greet them, so please meet the proprietress, Mistress Quickly; one of her most illustrious customers, Sir John Falstaff; and one of her (ahem) employees, Doll Tearsheet.


The Shakespeareans amongst you will know those names aren't my invention.  Even when I was working on the tavern building, back in 2014, in my head it was definitely the Boar's Head Tavern, which appears in Shakespeare's Henry IV Parts 1 and 2.  So I knew who would be peopling the place - I just had to see whether I could do them justice.


Mistress Quickly was the first one I started with - also known as "Gossip Quickly", she "will drink no more than will do me good, for no man's pleasure, I".


She's the long-suffering Hostess of the tavern, loyal-hearted, aspiring to gentility but hopelessly vulgar - as is usually revealed when she mixes up her words.

She's a woman of more heart than brain, but she brews a good ale and keeps a good table.


And then to fill the time while bits of her were drying or curing or baking (!), I began work on Sir John Falstaff - "that old, white-bearded Satan ... that stuffed cloak-bag of guts, that roasted Manningtree ox with the pudding in his belly".


He's fond of regaling the assembled company of an evening with tales of his times at court, his adventures and derring-do.

You might need a pinch of salt or two to go with the stories, and don't even think of trying to get him to pay for a round.


Those two were pretty much complete, just finishing touches to go, by the time I got going with Doll Tearsheet, a creature of "excellent good temperality", according to Mistress Quickly, with a colour "as red as any rose".


Her name pretty much gives the game away regarding her profession, I think.  Safe to say, she's extremely good at her job, by day and by night, but she's got a fiery temper.  You wouldn't want to cross her.

For some examples of the mouth she's got on her, check out the quotes at the end of the Tudor Tavern post!


I learned huge amounts as I was making these - quite a lot of it was what NOT to do next time! - so that's why I'm documenting the process so fully here.  I don't know when I'll next be back in the Czech Republic (which is where all the doll-making materials are), so I'll need a record to remind me of how I did what I did.

If you'd just like a few more close-ups of the finished characters, by all means scroll to the end of the post, but if you're interested in what lies beneath, then here we go...


I warn you, it's often not a pretty sight!  There were times I laughed out loud at the photos I was taking... like this one, for instance, looking straight up poor Doll's skirt.  No dignity for half-made dolls round here.


The skeleton structure for all of them is based around pipe-cleaners.

Here Mistress Quickly has already got some fabric wrapping starting to shape the body, as well as the beginnings of her "bumroll" - yes, that's the official name for the padded sausage worn under an Elizabethan woman's skirts to give her the fashionable shape for the era.

For now, I've unwound her lower legs so that she can stand up while I work on the upper body.


I knew I wanted Falstaff to be sitting in one of the tap room chairs, so I built his skeleton in situ.

At this point, I wasn't thinking in terms of pose-able dolls.  I wasn't sure how I would progress, but I figured either sculpture medium on fabric, or sculpted clay bodies around the pipe-cleaner would fix the dolls in position.

It never occurred to me that I might actually be able to make fully pose-able dolls, and free-standing into the bargain.


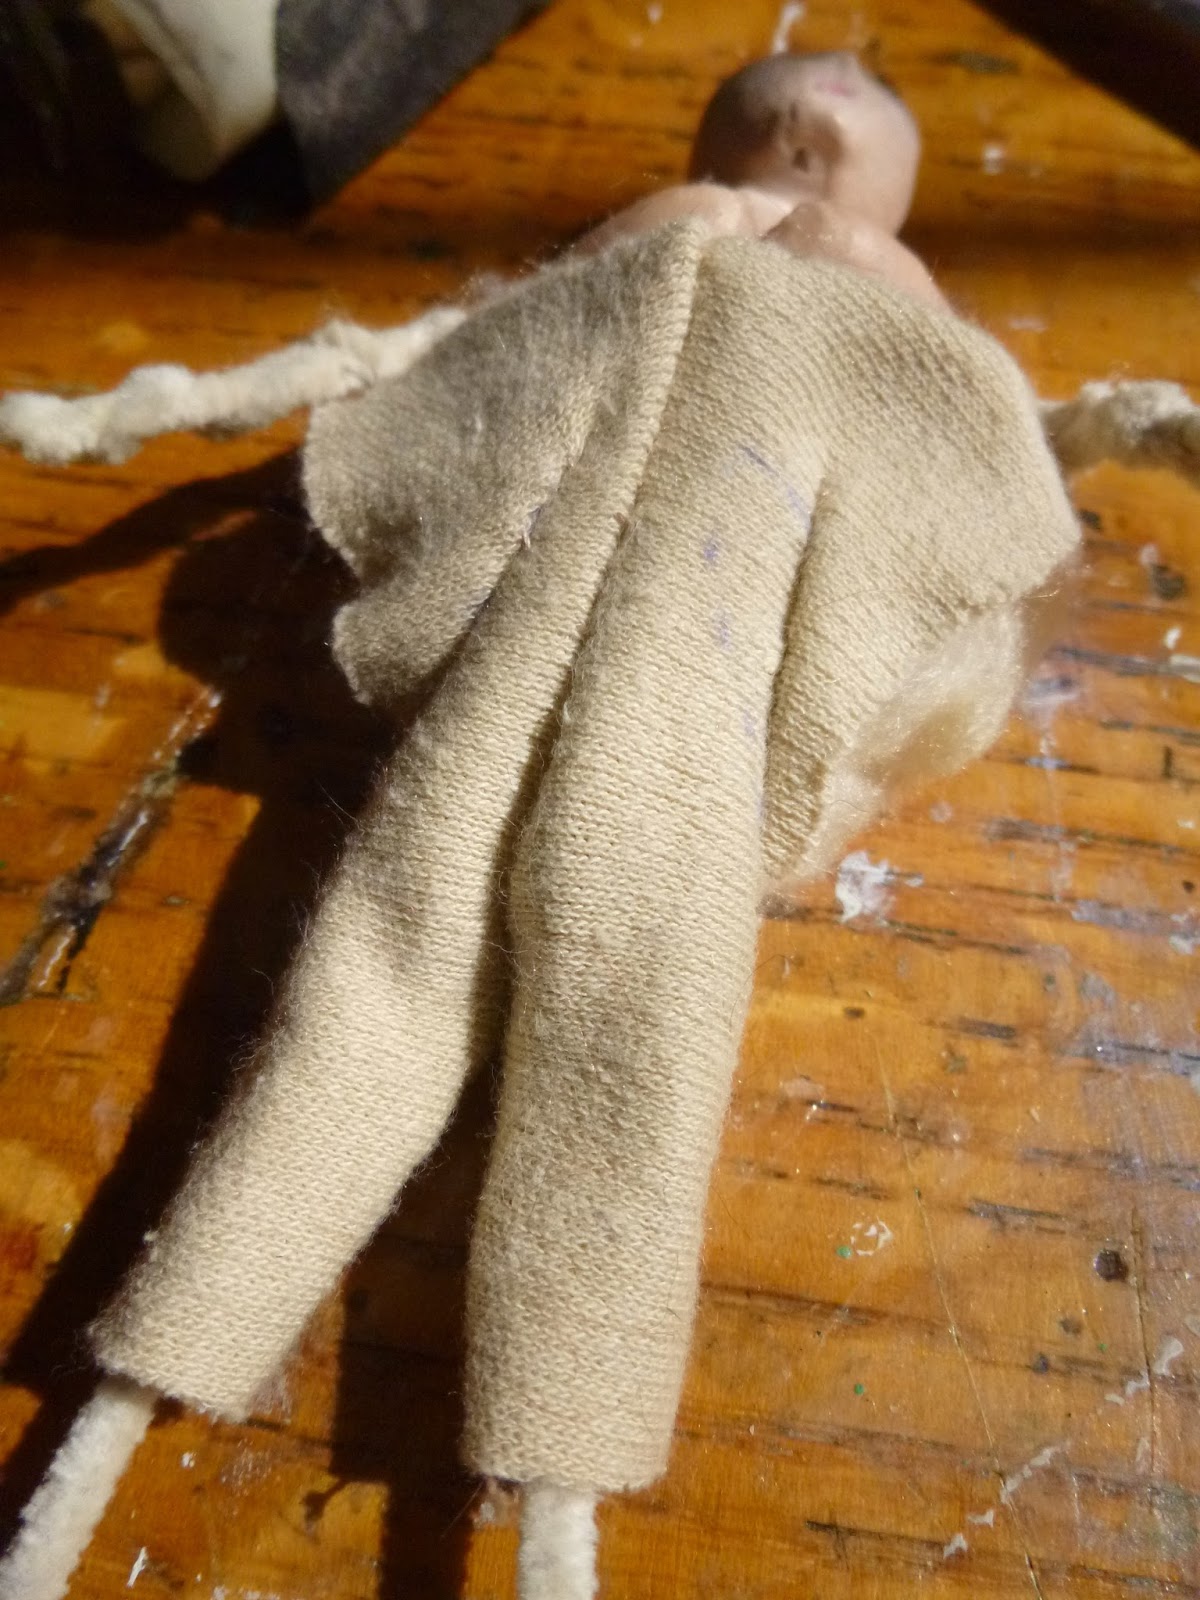
If there's one thing everybody knows about Falstaff, it's that he's fat.  So I wrapped plenty of kapok stuffing around that skinny pipe-cleaner skeleton.


Then I used some of the thin jersey type material which I had in my Doll Box to wrap around the kapok.

(Okay, the "Doll Box" includes useful-looking materials and bits and bobs gathered together over the last couple of years while I've been gearing myself up for this attempt.  The stuff is mainly from Cestina's hoard, and some from purchases researched online in preparation.)


I think somebody who knows about doll-making had probably recommended this stuff at some point in the past.

They'd even left a couple of half made body stockings - properly cut and sewn ones - which I was able to take advantage of further down the line when making Doll's body.  Cestina's not sure any longer which of her friends obliged with these - if you're reading this, let me know and I can give you the proper credit you deserve.


No sewing for me... Falstaff's torso "skin" is folded over and stuck down with fabric glue.

I warned you some of the photos were undignified!


Mistress Quickly, in the meantime, was progressing.  I've stuck her head on!

Life was made easier by the fact that I was using a head I sculpted about 20 years ago, although I've made some slight alterations to it during this process.  (Doll's head was also made a long time ago, but she's had very significant "plastic surgery" on this occasion.)


Cestina - I think as part of an earlier effort to encourage me towards doll-making - set the whole family a task at some get-together or other (I suspect it was an Advent Sunday).

She gave us some Fimo and challenged us each to sculpt a head.  I wish I'd taken a photo of the resulting gargoyles and grotesques (we still have them and, yes, they're in the Doll Box!), but I don't seem to have done so.


In any case, this is the head I came up with at the time.  I'd even already given her some hair.

If I'd been making Mistress Q from scratch, there'd have been a bit more silver amongst the flaxen hair, but I was willing to work with what I had... I'm sure she uses lemon juice to enhance the brassiness!

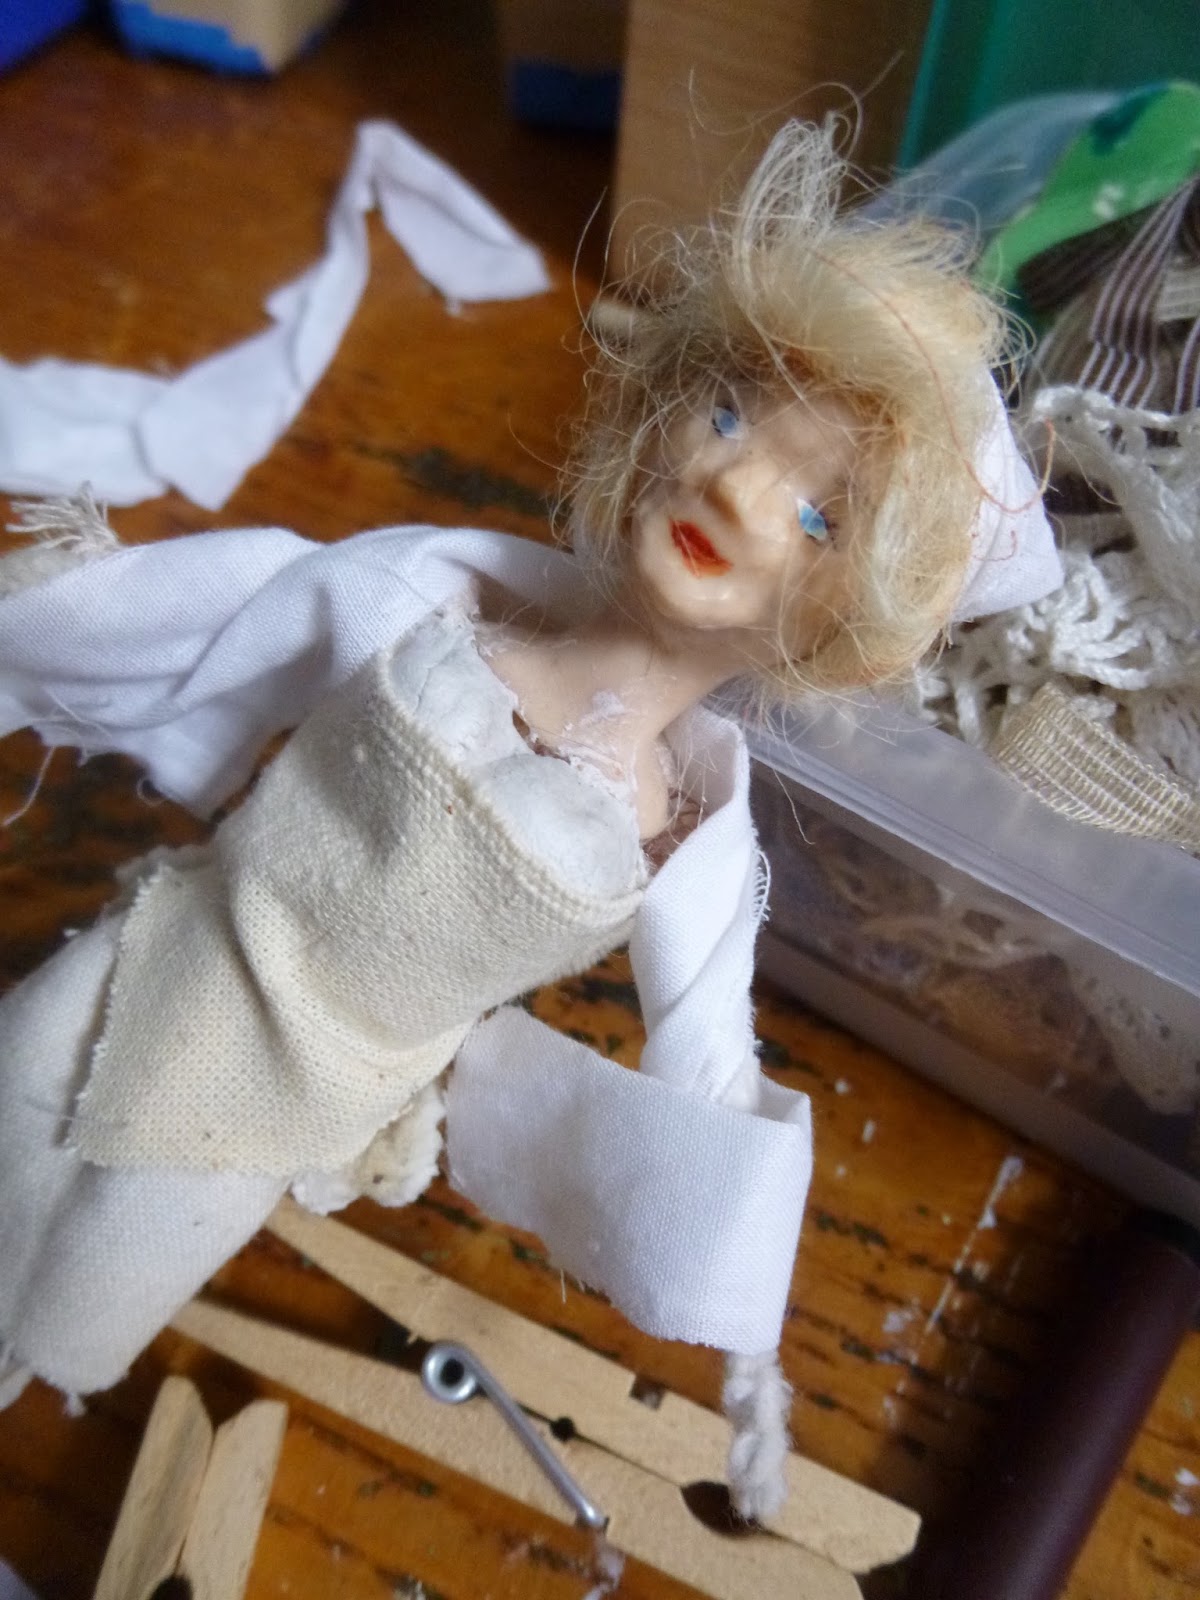
First of all, of course, she needed a coif and/or wimple of some sort.  It's better from some angles than others.


And as you may be able to see in the photos above, I'd only moulded as far down as the collar bone.  Any Elizabethan woman worth her salt needs breasts, so it was time to get sculpting.

Since I was moulding them onto an already-baked piece of Fimo, I thought I'd better use air-drying clay rather than one which would mean she had to go back in an oven (just in case!).  So they're moulded with Das, which I later smoothed and painted to blend in to the already existing flesh.


You can see that I've also started to experiment with cutting the shape of her corset and winding various bits of fabric around her limbs to see how they'll work.


Time for some clothes for Sir John.

This is one of the elements I'm most wary of.  I'd been going round and round in my head over various options for avoiding any sewing.   The sculpture mediums (like Powertex or Prima's version) seemed like they might be a way to approach it.  It would mean the figures would be "frozen", but if it made dealing with the fabric easier...


But when push came to shove, the Elizabethan fashions didn't really lend themselves to that kind of sculptural, swooshing fabric work.  If I'm ever making lots of Romans in togas, then maybe, but otherwise not so helpful.

So, having successfully cut, folded and glued Mistress Quickly's coif, I set out to see what I could accomplish.  I cut a fine handkerchief to half-shirt shapes and shaped it around the torso.


This rather splendid satiny material (from a book of samples picked up at an interiors shop) seemed like a good option for the trousers, but this turned out to be one of my errors.


It's very stiff, and needed so much glue that this has become the least mobile part of any of the dolls.  He's sitting, and he'll stay sitting!

But it's right that it's satin - in Henry IV Part 2 he asks his page whether his tailor has got in the material he ordered yet - "What said master Dumbleton about the satin for my short cloak and slops?" - slops being baggy trousers - perfect.


Cestina dug these plastic boots out of the hoard, but I felt they needed a little adaptation before they could be used for Falstaff.  I added some folded-over leather flaps at the top with some more air-drying clay... (Remember, you can click on the photos for a closer look.)


In the second photo, you can see the next stage - a coat of Raw Umber acrylic paint, and finally I added some Rust Effect Liquid in brown.  That's what it called itself, and it appears to be made by Model Mates.  I think I bought it yonks ago, thinking it might be useful for the dollshouse work.  Rather than rust, it just gives a nice textured effect, which I think works well for the leather look I was after.


It was becoming rather unnerving having this headless torso sitting around, so I decided it was time to stiffen the sinews and sculpt my third ever head (and remember there's been at least a 20-year gap since the last attempts).

I had been watching some youtube videos (what a fabulous resource it is), my favourites being this sample series by Creager Studios (wish I had access to the full DVD), and I also had James Carrington's book 1/12 Scale Characters for the Dolls' House to hand.


Carrington has excellent pictures and clear explanations - and he even suggests you remember to keep breathing - a useful pointer as it turned out!

My research had led me to Super Sculpey over Fimo as the best medium for this work, and - having spent years making dollshouse food and tiny teddy bears with Fimo - I have to say, the Super Sculpey really does win hands-down for malleability and ease of use for detail work.


I'm afraid I haven't any part-way process photos of the sculpting - I was too engrossed in building my double-chins and loose jowls.  But for a first go I was pretty pleased with the results.

You have to have a certain amount of faith at this point that once it has been painted and has some hair, it will look a bit more human!


But this is not air-drying clay, so you have to bake it to harden it.  And I'm afraid there was a bit of a baking disaster...  If you're of a nervous disposition, look away now!


Yup, he was too long in the oven (well, not an oven, a Remoska - as Cestina has no oven in the Czech Republic - so no temperature control).   I took my eye off him for just a couple of minutes too long (busy unpacking the new microwave) and... horrors!

Considering the time and effort spent in sculpting him, I think I kept remarkably calm.


And as you already know, it all worked out okay after a few coats of paint, so we can all breathe again.

I couldn't ship over all my beautiful paint supplies on this trip, so I was constrained by the comparatively limited stock available in Small Worlds.


The colours are mostly selected on the basis of being useful for working on house interiors/exteriors and on furniture.  People, not so much.  So it was good practice for my colour mixing skills.

Thank goodness for the cheap Viva Decor chalk paint starter kit we'd picked up a while back.  That included an Antique Pink without which the painting of all the faces, hands, and breasts would have been a much trickier proposition.


And the DecoArt Traditions paints which I'd insisted had to be part of the Small Worlds arsenal - including Transparent Red Iron Oxide, Quin Gold, Transparent Yellow Iron Oxide and Paynes Grey - turned out to be surprisingly good at shading lips and cheeks and eyes with a bit of mixing.

As mentioned, I also adjusted Mistress Quickly's colouring - those startling blue eyes are now a subtler blue-grey.


While waiting for coats of paint to dry, I'd been wrapping various underskirts and skirts around Mistress Quickly.

Since I had no intention of actually lacing her corset to create the extreme shape so fashionable in Elizabethan England, I took rather drastic measures to ensure that her torso would conform.


And, in the meantime, work continued on the non-functional corset itself.  You saw the basic shape already cut in the earlier photos, and now I used plain old cardboard to structure the panels which would be wired in real life.

(See... my wire-wrapping is not that far off the truth.  At least I'm not making her wear a pointed cast iron frontispiece to her corset which would mean no sitting down without doing yourself an injury.)


I've worn enough corsets, petticoats and bumrolls in my theatrical days (and laced plenty for other people too) to be pretty au fait with the workings and shaping of various period undergarments.

Turns out that's all very useful information for doll-making...


Like Falstaff, she's had some shift sleeves wrapped around her limbs and glued, and the rest of the shift tucked around her decolletage, so now it just needed some of this lovely lacy wool - it's known as mesh or net yarn (thanks to AbbeyBufo of StitchWords for the proper name), snipped and trimmed to create a nice, cosy shawl.

Bit more snipping still needed at this point.


I stuck Falstaff's head firmly into the torso construction.

In order to give it more stability, I wound those pipe-cleaners which had been sticking up, neck-like, into more of an oval nest (not dissimilar to the shoulder girdle of a real skeleton).

And I thought I'd encourage myself by putting the pair of them into the tavern itself for their overnight resting place.


This isn't their first overnight - this is already more than one day's work.  It's just the first time they've both looked remotely human - though hands and, in some cases, feet are still to come...


... so I thought I'd like to see them in place before going home for a hard-earned rest.  Phew - I think you deserve a rest too, but it's just a short interval, I'm afraid.  You can't let Falstaff settle down - before you know it, he'll be "fast asleep behind the arras, and snorting like a horse".  I'm going to invite you to re-charge your glasses and we'll set off again.


New day, new start, new shoes!

Nell Quickly is now the proud owner of some tiny boots, pulled out of the stash by Cestina.

And, most exciting of all to me, she's free-standing.  You don't need to lean her against something, as you so often have to with dollshouse dolls.  She'll simply stand there, rock steady.


I think they're actually intended as modern walking boots (though I see I've no pictures where you can see the tops) but, with a touch of paint to cover that very modern silver trim you can see above, I think they'll pass as pattens, the wooden overshoes worn by working people to protect whatever footwear they could afford.


I decided that gluing down the overskirt gave us a better shape on that.  So, barring a couple of finishing touches (which I'll show you later), that was our Hostess pretty much done.

Oh, except for one major omission - can you see what's still missing?


Still a way to go for Falstaff, though.  Let's start with a trip to the barber surgeon.

There's a small amount of hair available in my Doll Box.  He definitely needs at least a salt-and-pepper grizzled look - he is described as "that old, white-bearded Satan", after all - so I mixed strands of two colours and then started to stick it on.


Beard first, then the moustache, and then a little trim for both.


I rather liked the bald look, in a way, but as soon as the first strands of hair were on, I knew it was the right decision.


Isn't it funny how it completely changes him?  I know it's all rather wild at the moment, but it's pretty unmanageable stuff.

As you glue it down, it gets all stuck to your fingers or glues to the wrong bit of the head.  Fun, fun, fun.


Some more snipping and shaping and adding of trims, and pretty soon he had a tunic - all glued together, still no sewing.

That makes it sound simple.  You'll have to imagine the soundtrack of swearing and cursing the material for not behaving like nice, easy paper!

That's a real leather belt he's wearing around his ample belly.  The belt buckle is made out of a couple of jump rings, cut to work together to form the clasp.


Did you spot what was missing?  Not only for Mistress Q, but for Sir John too?  Yes, the hands.  I'd been putting this moment off, hoping I could get away with sort of scoop hands, massively simplified.

In fact, the pipe-cleaner dolls in the Edwardian Walmer house just have the ends of pipe-cleaners as their hands (you can see them in this post of Cestina's).


But having so far achieved so much more than I ever thought possible, I was coming to the conclusion that I would have to follow my spirit and go for the fully-fingered look!

The Carrington book was fantastically helpful for the sculpting of the hands - it's as you're moulding the fingers that he reminds you to keep breathing! - and here they are, his and hers, in the tin tray ready for baking.


It really was as much as I could do to keep breathing for these first attempts, so no photos.  You'll see more of the steps in the process once I get to doing Doll's hands later.

By now, I'd discovered that I could "bake" small elements using the heat tool so a) it could be done right there in the museum and b) much less danger of the horrible burns suffered by Falstaff before.  Here's the view of my work space at around this point... 17 different things going on at once.


I tried to make the wrists so that they would shape round the pipe-cleaner arms when gluing them on, and I'm delighted that it all seemed to work out okay.  Once they were firmly in place, I was finally able to glue Falstaff's sleeves together.  Sadly, I'd already glued Mistress Quickly's so it was a fabulously fiddly job to roll them up far enough to glue her hands on and then roll them back down.  Lesson already learned.

So final touches for Falstaff and Mistress Quickly...

His hat - completely made up as I went along... a ring of cardboard; some fabric pleated and folded and glued around it; some kapok stuffing for extra shaping.


The third photo above is of a failed step - some trimmed braid I was trying out as a possible base for the hat.  I love how it looks on him, but the rest of it looked silly perched on top... so it was back on with my own thinking cap.


The solution turned out to be two narrow leather strips stuck back to back and shaped to form the (almost) circular headband to rest low on his forehead.  This time the painstakingly pleated and stuffed dome looked great glued on top, and a jewellery finding provides the brooch to adorn it.


I absolutely love that it's not glued to his head, so that he can wear it at different angles and, more importantly, he can still doff his cap to you!

The other major works you can see in these photos are the ruff (why, oh why do I do these things to myself?!) and the fastening of his small cloak.


I'd been dreading trying to make a full-on gentleman's doublet, so it was such a blessing when I remembered that quote again - "What said master Dumbleton about the satin for my short cloak and slops?"  No need for a doublet, he can have a short cloak... much easier!

I cut the shape from some lovely velvet (left over from the cloak made by Cestina for my 'Victorian' doll when I was about 10 - yes, its been around for 38 years... oh, and I still have the doll and the cloak too - we're a family of hoarders!).


The fine rope to fasten it is from the neck of a small perfume sample bottle, and some trimmed braid provides a decorative touch around the bottom.  I think I prefer the inner side where you just see a touch of white braid, but that's what's mainly in view from most angles.

Short cloaks are often worn diagonally across the body, and swirl beautifully in a sword fight... or, if you're Falstaff, in the dramatic re-telling of an entirely imaginary sword fight.


Ooh, just zoom in on that table for a second... I almost forgot - I also made him a tiny leather money pouch while I was at it.  The metal coins were in the hoard (of course).

The only problem with that, of course, is that Falstaff never pays his debts at the inn.  As Mistress Quickly complains, "He hath eaten me out of house and home.  He hath put all my substance into that fat belly of his ... I have borne, and borne, and borne, and I have been fubbed off, and fubbed off, and fubbed off, from this day to that day, that it is a shame to be thought on."


And that ruff.  I'm not going to repeat the language used as I was making it.

Trial and error with braid- a complete failure - and then the fiddling with the lace off the edge of a handkerchief... tiny folding and pleating, PVA glue solution and Prima Sculpture Medium in an attempt to set it, and finally - my saviour - the cardboard onto which I glued it down.


I did it in two halves so that I could fit it around his neck, and they don't quite match but quite frankly, my dears, I don't give a damn!

It's lucky all the inhabitants of the Boar's Head are slightly down on their luck, so that it's fine if things are a bit shabby.


A couple of final touches for Mistress Q too... a brooch to keep her shawl securely fastened (another bit of metal filigree or some sort of jewellery finding); and the chatelaine for her keys.  The clasp from an unwanted necklace makes the perfect keyring.

When I'm next there, I hope to add the odd thimble and maybe a small bottle of aqua vitae for emergencies.


So, on to doll number three, Doll Tearsheet.  Now that I knew a bit more about what I was doing and what I was capable of, I hoped I'd be able to apply the lessons learned.  And I hope I can take you through the making-of process in a slightly less haphazard fashion.


I considered sculpting a completely fresh head for her (against the odds, I actually really enjoyed sculpting Falstaff), but I had this other one from 20-odd years ago which it seemed a waste not to use.

As you'll see, it underwent a pretty complete remodelling as I went, so I might as well have started from scratch.


First step... breasts.  As I said, I've worn plenty of Elizabethan corsets in my time, so I know what they're capable of cleavage-wise, and these are some of Doll's most tangible assets.

Having discovered that I could bake the Sculpey with the heat tool, it was now possible to mould it directly on to the already baked and painted Fimo head, and then give it a judicious toasting to set it.


I need to get pretty intimate now - excuse me, please, Doll - to show the underside of the decolletage moulding.

I shaped it to accommodate the pipe-cleaner structure I'd created for her - important for me to remember for next time as it makes the gluing together a) much easier and b) much more secure.


If you remember aeons ago near the start of this post, I showed you the half-finished body-stocking I found in the Doll Box.  Oh, never mind, don't scroll back - here it is again.

I "dressed" my pipe-cleaner skeleton in it and added some kapok stuffing.


Time to add some more padding... extensive bumroll work for posterior shapeliness to match the curves above...


... and, once she had the first part of her shift (made from a rather nice handkerchief) to protect her modesty somewhat...


... she got the same wire-waist treatment as Mistress Quickly for that essential cinching.

These photo poses were making me laugh out loud... "assume the position, Doll"!

You can see in these photos that, in the meantime, her head has undergone some changes.  The Morph-like simplicity of that original head needed alteration.  I added Sculpey to the back of it to create more of a human skull shape.


I've added brow bones and a proper forehead (instead of that backward-sloping rotundity).  She's also had a nose job, as well as having her lips done - another major enticement to customers, that pout.

I didn't bother with ears this time, as I was planning on a nice full head of hair, but it does mean she still looks somehow alien.


I set these changes with the heat tool.  None of this would have been possible if I'd had to run back and forth to an oven - and already-cooked bits might have started to crack up with repeated bakings.

She's become something of a "painted lady" too.


Same process with the cardboard for Doll's corset as for Mistress Quickly's.

(You probably spotted her in the background just now, lending moral support as Doll undergoes these indignities.)


But Doll, being the merchandise, gets an altogether fancier and lacier finish to her corset - all the better to display her considerable wares.


She's still a bit lacking in the shapeliness department.

Time to create a finely-turned ankle with which to turn men's heads.


I moulded her lower limbs directly onto the pipe-cleaners.  Good for structure, not so easy in terms of making sure bits don't poke through the flesh.

And I made her shoes out of Sculpey too (I'm scouring cheapy shops for dolls' shoes in suitable shapes and sizes for future characters - really makes life much easier not to have to make them from scratch).


Obviously they were painted once baked, and I added some braid to "fasten them".

They're not quite as I envisaged them, but I rather like the "come-hither" stance she's adopted.  Time to get dressed you hussy!


I rummaged through Cestina's haul of fabric samples and scraps (a whole suitcase full... for somebody who doesn't work with fabric, she's certainly amassed a fair amount over the decades), and pulled out some silks and linens in colours which I thought might catch the eye.

I actually enjoy the initial stages with the fabric.  You can wrap it around, you can get a rough shape that seems useful.


And, delightfully, the firm fabric I used for the underskirt, coupled with those sturdy shoes, means she is also self-supporting and free-standing - I'm so happy!

But it's how you get the stuff to behave well after those first stages that gives me headaches - making the final trims, and getting it to settle down from that wonderful swirl of movement, without crushing all the life out of it, or making a cut which wrecks the whole thing.


So I put off that next stage in favour of working on the hands.

Yeah... that's how much I don't want to risk wrecking what I've managed so far with her dress... I'm doing the hands.


As with the legs, I moulded the Sculpey straight on to the pipe cleaner arms.  Here's the first bit of shaping.


Then, heart in mouth, you do the snipping for the fingers (no thumbs yet).

You then have to kind of wiggle each finger between your own, delicately and gently trying to soften the edges and create the tapering finger shape.  No photos of this - too busy remembering to breathe...


The thumbs are added as a separate element in a sort of sausage shape, which includes some Sculpey to form the heel of the hand, helping to shape the palm and wrist too.

And there they are - safely baked with the heat tool, so you can breathe out again.


Okay, final furlong, I promise...

For the first time, I had a go at making the sleeves off-body, as it were.  They're made of the same rather fine handkerchief as the rest of her shift - only right since in the real world they ought to be part of the self-same garment.


It almost looks like a tailor's workshop now!  Still no sewing of course.  These were glued with fabric glue, including a touch inside the rolled up sleeves to hold them in place.


Not perfect, but it's almost believable as one garment...


... especially given it won't be visible once there are corsets and silk wraps in place.


I had to summon up the blood to make my cuts to that billowing silk.  But I think I've pulled it off.  I really wanted to keep the effect of the swirl of movement, as though she's in mid-twirl.


The glue smudges from where I had to secure some of the folds are all part of the slightly grimy world she inhabits.

And I think Doll's happy with it.  Or perhaps she just likes that lace trim I've added to the hem of her kirtle.


I'm afraid there are no photos of the hair-attaching or the corset-gluing.  I was doing that on the Saturday morning when the museum was open to the public as part of the Easter market in the village, so I was a little distracted.

This was the next one I remembered to take - hair on, corset laced, and a gold chain (a gift from a wealthy patron) around her neck.


Later that evening, she was spotted wearing a gold bracelet to match... I don't care to speculate about what she did to earn that.


And she now has a silk headscarf and a rather fetching lace-edged satin shawl draped around her shoulders (without concealing too much, obviously).  It pays to flatter elderly corpulent gentlemen, it seems.


So there you have it.  I'll leave you with a few pictures of them all settling in to their new home.

No apologies for the length of this post, though it's right up there with the other Dollshouses posts.  As always when documenting this work, it takes what it takes for my records to be complete.


But if you've enjoyed the ride, then that's a lovely bonus.

I was hugely wary of this whole venture.  Cestina will tell you how much I grumbled and procrastinated and protested - but only because I didn't know if I could make dolls worthy of the Tudor Tavern, of which I'm very proud.


I don't mind saying that I'm now also rather proud of what I've achieved with these characters, not least because it came as a genuine surprise to me that they worked out so well.  I didn't know I could do that.

I'm even happy to make some more, drawing on the lessons learned, and I should get better with practice.


We need a couple of tapsters and drawers to work in the inn, fetching and carrying for Mistress Quickly, and serving the customers ("Francis!").


And Falstaff needs some drinking companions to regale with his stories, not to mention someone to pay for the drinks.


I may even get around to tackling that troupe of strolling players at some point.  They should bring in some extra custom for Doll (though something in her stance tells me she may be a budding tragedienne herself, despite women not being allowed on the stage.  Wait, that sounds like a good plot line...)

No miniature actors just yet though.  Next stop is New York again, to play with some real actors!


Thanks so much for your good company today.  As the song I've borrowed for my post title says, there's nothing better than spending time with good friends, whether that time is spent in hunting, singing, and dancing (as Henry VIII preferred), or at the craft table.  Happy crafting all, and have a wonderful weekend.

Pastime with good company
I love and shall unto I die;
Grutch who list, but none deny, 
So God be pleased thus live will I. 
      For my pastance
      Hunt, sing, and dance,
            My heart is set:
      All goodly sport
      For my comfort,
            Who shall me let? 
Attributed to King Henry VIII

There's a new challenge blog launching in May called Mix It Up.  As an introduction, they're having a Just For Fun theme for April, and since these dolls are off my beaten track, I thought it would be nice to share them... just for fun.