I'm travelling into a new way of working, a new country, a new language, and a new hobby which I'm passionate about. Come with me for some of the journey...

Thursday, 13 April 2017

April Showers


Hello all!  Firstly, apologies for being a poor blogger again at the moment.  You'll see why over the next few posts - it's been a busy old month or so, and I'm away from home yet again so I had to do lots of making in advance to get ahead of the game.

Also I'm scrambling up the steep learning curve of doll-making, so that's taking lots of time and energy.

But I'm absolutely delighted to be a guest over at Frilly and Funkie today, sharing a project for their new theme, April Showers, hosted by the fabulous Suzz.

It's always a thrill to have something you've made singled out for recognition, and Frilly and Funkie is one of the places I discovered very early on this crafting journey, so it was especially lovely to have my Tiny Greenhouses honoured by their amazing Design Team.


From the moment I learned what the challenge theme was, I had an idea in my head about wanting visible raindrops on whatever I made.

It took a bit of experimentation, but I'm rather pleased with how it all ended up.  I hope you like it too!


I always enjoy my layers, so way back in the invisible distance there is some dipped and spritzed paint and ink, over which I scraped a thin layer of the PaperArtsy Crackle Glaze.


Next step, once the glaze was dry, was a coat of Snowflake Fresco paint...


... and then some more dipping into droplets of Stormy Sky Distress Ink and Faded Jeans Distress Oxide.

I love the ink droplets over the crackle texture - already a slightly rainy sky, wouldn't you say?


Around the foot of the tag, I blended on some Peeled Paint and Mowed Lawn inks, and then spritzed with some water to create even more showery droplets within the layers.


At this point, I mounted the tag on some sturdy cardboard to give it strength and stability for what's to come.


The fabulous Calico Craft Parts provided my central image - a lovely MDF wood field full of flowers.


I don't seem to have a picture of it "naked", but regulars will know what how it started out (and if you need a reminder, you can get the idea if you hop over to my Three Little Birds where you can at least see a "before" of that Calico Craft Part).


As I did for that ATC, I applied a coat of gesso first of all, and then used DecoArt Media Fluid Acrylics to paint the flowers, grasses and butterflies.


Since many of the Fluid Acrylics are translucent, you can build up layers of colour and create some really lovely effects.


Can never resist a bit of white spatter...


My sentiment - one of my favourites - is stamped in Leaf Green and Olive Archival inks.  I apply one and then add touches of the second before stamping.

We're still looking for that showery feeling, so I clear embossed the sentiment.


You get that lovely glossy dimensionality - like a film of water just sitting on the lettering.


For extra watery effect, I also clear-embossed the inky shading right around the edges of the tag.


And then it was time for the raindrops.  I settled on Glossy Accents and did some practising on a separate sheet of card to find out the best way to form a nice teardrop shape.

When they go on, of course, there's a slight cloudiness to the gel, but you just have to be patient and let them dry fully.


And yes, I know that raindrops aren't really that shape when they're falling, but we're allowed a little artistic licence, aren't we?

If I were making this again, I would spread my drops a little less regularly.  I was concentrating so much on the shaping, that I didn't even realise I was doing the spacing so evenly.


But I do like the effect, even if you have to wave the tag around a bit in certain lights to catch sight of the droplets - I do seem to like to set myself photographic challenges.  You can always feel them with your fingertips if you're in doubt!


I dyed some seam binding with Wild Honey and Picked Raspberry Distress Stains which gave me colour tones that blended nicely with the flowers and butterflies below.


And there you have your April Showers on a tag.

Thanks so much to Cec and the Frilly and Funkie Designers for having me along for the ride - I had a lovely time getting wet and watery! - and I hope it will inspire you to come and splash about in the April Showers at Frilly and Funkie too.

There's a clue in the last couple of posts about where I'll be bobbing up next as a guest, and there's another exciting project in the offing, not to mention those Tudor Tavern dolls.  I hope you'll hop by again soon... but, for now, happy crafting all!

For after all, the best thing one can do when it's raining is to let it rain. 
Henry Wadsworth Longfellow

Friday, 7 April 2017

Three Little Birds

Hello all!  It's time for a new challenge at A Vintage Journey.  Our host this month is the lovely Annie, and she would like you to conjure up The Magic of Three.  There's lots of amazing inspiration from my fabulous team-mates, and here's my offering to get you started.


I've kept things very simple really.  You can see my main "three" straight away... the trio of birds trilling away together on this ATC.  There are also three words to go with them.  And at least three layers in the background!


The whole thing is constructed using Calico Craft Parts - one of their sturdy ATC blanks and this delightful Songbird Trio on Spring Branch.  (That's actually what it's called.)

The medium-sized version is exactly the right size for an ATC.


I started with a coat of DecoArt Americana WhiteWash and then applied a rough coat of gesso.

Over that rough texture I added some PaperArtsy Fresco paint in Sky (well, of course), with some touches of a couple of other blues for depth.


And over that, I put a layer of the Media Crackle Glaze and once it was fully crackled and dry, I used Antiquing Cream and Media Fluid paints to highlight the cracks...


... as well as to darken the edges, drawing the eye inward.  And of course adding some white paint splatter.   See?  At least three layers...


I used a little bit of gesso and then Snowflake Fresco paint to highlight areas of the birds' wings and breasts.


The fantastic texture in the Craft Parts makes it really easy to make them look good!


I also gave the leaves a coat of gesso on the surface first, to allow the greens which followed to show to their full advantage.

I forget now, but there's Green Gold and Sap Green involved from the DecoArt Media Fluids, and I think some Hey Pesto and Hyde Park from the Frescos.


The branches themselves have been left entirely "naked".  Bare Craft Parts also look good!

I'm always amazed at the delicate cutting possible with these fabulous MDF shapes.


And I really love the dimension you get both with the ATC blanks and using Craft Parts generally.  It's a lovely way to add a touch of permanence and solidity to the ATC format.


And finally, of course, there are those ChitChat stickers...


... three of them, adding the Words component, and another little bit of threesome magic.

So that's my simple ATC for you, celebrating the Magic of Three.


I hope you'll check out the inspiration offered up for you by my fabulous travelling companions over at A Vintage Journey, and we hope you'll come and play along this month.

You might get selected as one of our Pinworthy projects, or be our lucky randomly-generated winner, with a fabulous prize on offer for April from Emerald Creek Craft Supplies.  Happy crafting all!

Rise up this mornin’,
Smiled with the risin’ sun,
Three little birds
Pitch by my doorstep
Singin’ sweet songs
Of melodies pure and true,
Sayin’, “This is my message to you-ou-ou:”

“Don’t worry about a thing,
‘Cause every little thing gonna be all right.” 
Singin’: “Don’t worry about a thing,
‘Cause every little thing gonna be all right!”
Three Little Birds by Bob Marley

Tuesday, 4 April 2017

Encore - More Than You Realise

Encore Posts
Projects which made their first appearances elsewhere for Design Team duties or Guest Designer opportunities, but which only had a sneak peek here, are being gathered together in the pages of my virtual scrapbook.  I'm calling them "Encore" posts and they're formatted differently (all the way down the centre), so you can spot them easily.
Please don't feel that you have to comment all over again!

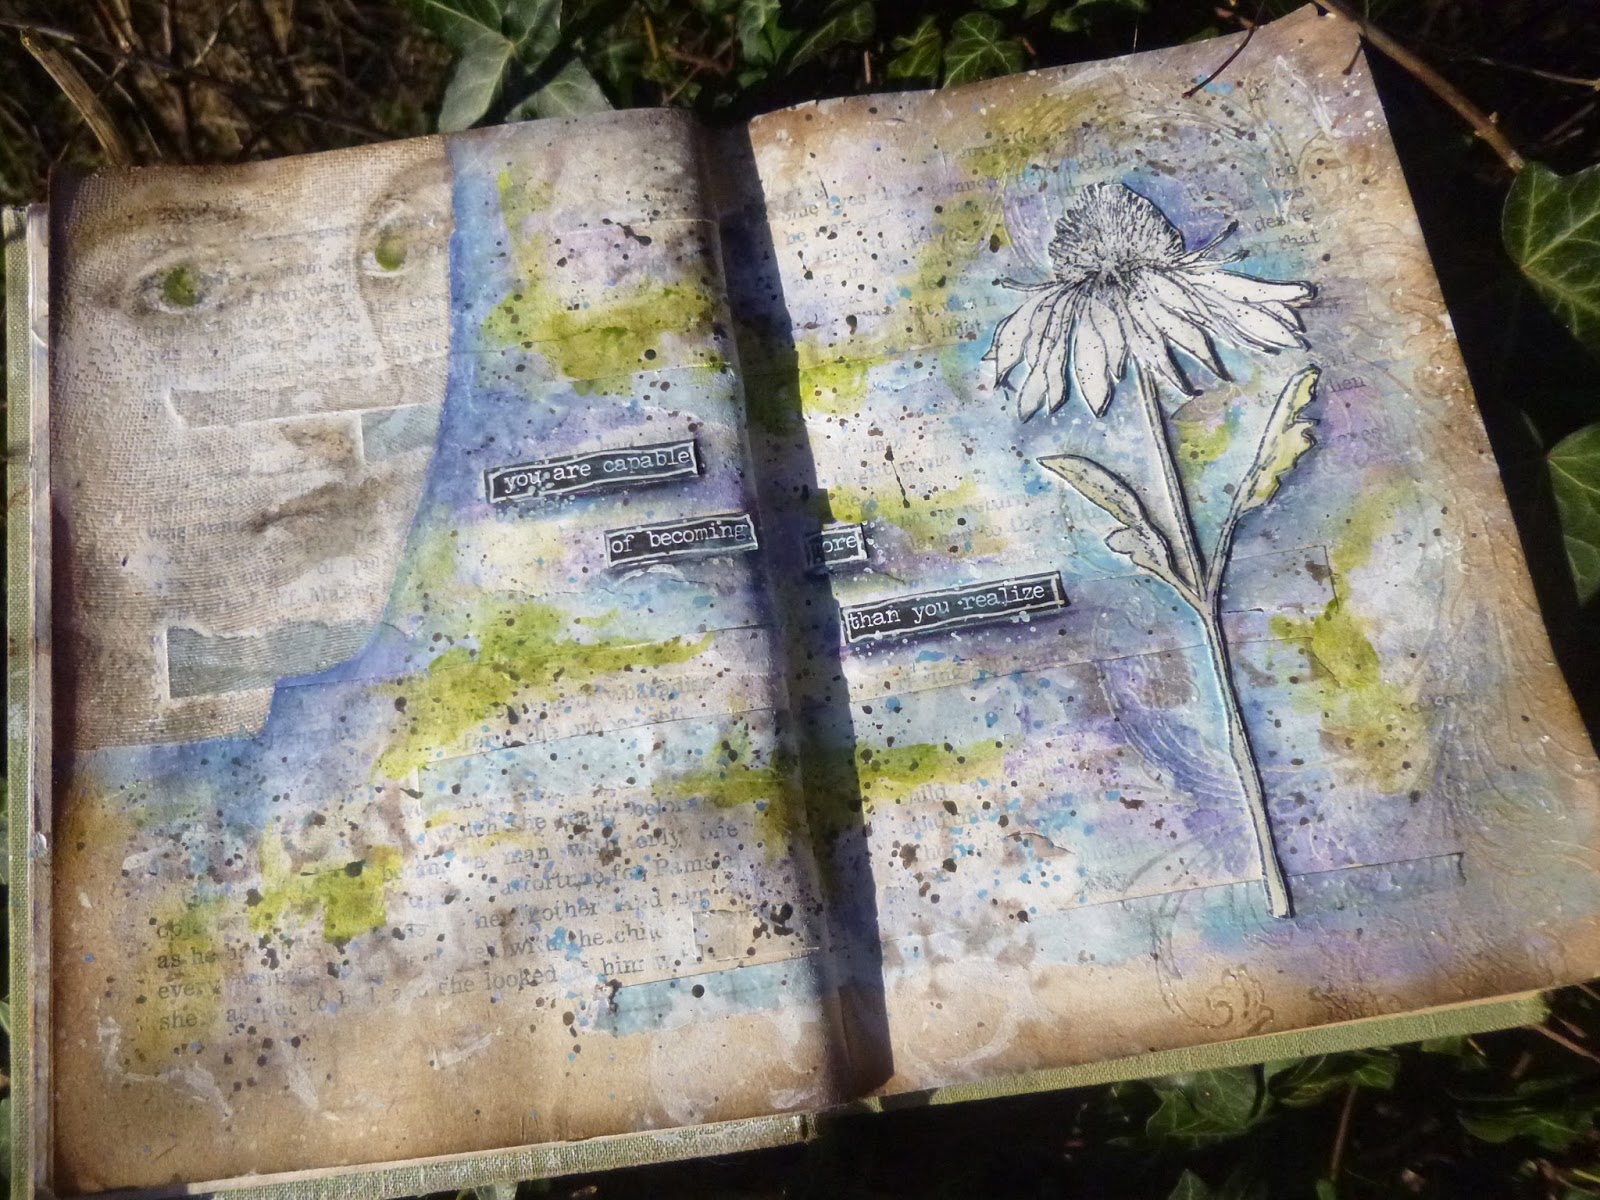
Hello all!  Since you enjoyed the Wallflowers so much, I'm throwing in a quick encore post with some journalling which also used the coneflower stamp and die.  And it has a timely spring-like feeling, I think.  This was made as part of my Country View Crafts DT duties, and it appeared there in February 2016, just over a year ago.  Here's what I wrote back then...
_________________________

Hello all, it's Alison (butterfly) here from Words and Pictures, and I've been playing in one of my old books as a journal again.


This started out going in one direction, and then shifted, and I'm a bit surprised about where it ended up, but I suppose these colours are a bit of a foretaste of spring.


Initially, I was just gluing down some paper scraps left over from another project to get them out of the way... then I added a coat of gesso to soften and blend everything.


This Tim Holtz woman used to bob up on my early journalling efforts quite often, but she hasn't been out for a while.  I stamped her in Pumice Stone and clear-embossed over the top to give her a subtle presence on the page.


Over at the other side, I did the same with the fabulous large flourish stamp (also a TH one).


I'd been playing around with the wonderful cone flower for something else where it didn't quite work, so I tried it out on these pages and rather liked it.


I started to build up layers of colour, using mainly Fresco Chalk Finish Acrylic paints, first in blues (Smurf, China and Blue Glass)...


... then some (slightly surprising) shades of mauve and lilac (Wisteria and Purple Rain, and eventually some Blueberry).  There's some Wilted Violet Distress Ink in at this stage too...


... a layer of Ground Espresso stencilling (which barely made it through to the end)...


... and finally a step into brights with Hey Pesto, Zesty Zing and Limelight.  From a distance I confess it does look slightly like the final stages of a very impressive bruise!!


But close up I love the effect of the layered colours.


Shading around the main images helps them pop.


I used the same paints to light up the woman's eyes, and I love how she emerges out of the purply shadows.


There's lots of splatter...


... mainly in Ground Espresso, I think.


The inking around the edges gives us a really nice look of aged weathering.


And I really like the effect of the embossing resist of the flourish under the paints too.


I used some Small Talk stickers and, as I did with my recent tag for the Backgrounds theme over at Country View Challenges, I used a white pen to doodle lines around them.


I love how this completely changes their look.


So there you have it... another journalling journey.  I'm not always sure about the results, but I do enjoy the process and the learning, and I think that's what journalling is really about.


_______________________________

I'm busily creating characters to inhabit the Tudor Tavern, so there's not much else apart from some watercolouring going on craftily (and I'm not getting much done on the visiting front either - apologies).  But I will share those characters with you once they're ready, and in the meantime I'll be back on Friday for the new monthly challenge at A Vintage Journey.  Hope to see you soon, either here or elsewhere in Craftyblogland.

If we did all the things we are capable of, we would literally astound ourselves.
Thomas Edison