I'm travelling into a new way of working, a new country, a new language, and a new hobby which I'm passionate about. Come with me for some of the journey...

Monday, 13 August 2012

A handmade wedding

This post is dedicated to the amazing friends without whom I couldn't have achieved the transformation: Jo, Lynda, Sheila, Katy, Simon, and my mother, Gil.

Hello all, and welcome!  A post slightly off the usual tack today... but there's plenty of crafting content too...

So, alongside everything I've been blogging about for the last couple of months I've been carrying out some other - top secret - crafting transformations, and this was on an industrial scale: a whole wedding's worth!  I couldn't blog about it because it was all supposed to be a secret from Laura, the bride, my brother's partner, though there has been the odd sneak peek.  Those sneak peeks encouraged some of you to hope that there might be some pictures of the end result... well, you asked for it!!

The venue was a scout hut: the grounds are already rather lovely, but the hut itself - though it has very large windows in the main room - is a pretty dingy affair, so something drastic needed to be done.  It was my task to transform the lowly scout hut, inside and out, on a (compared to most weddings) pretty minuscule budget.  There was borrowing, begging and a lot of handmade crafting.  So I think I'll start with some 'before-and-afters', and then show you some of the details.


We "wallpapered" over all the posters and posterboards with metres of lining paper. And we took down the grimly dark blue curtains and swooped net curtains between the very useful metal struts. 


The metal struts were decorated with ivy, metal hearts, and hooped decorations created out of a scarf holder from Ikea.  The bits and pieces from Czech bric-a-brac stores were decorated with paints and inks to suit the wedding colours of sage and lilac.


Tables were decked with either white or lilac tablecloths - some were old family linen recently discovered in the house clearing we're doing; the lilac linen an incredibly lucky find in the Oxfam shop where my mother volunteers (and cut and hemmed by Jo); some were paper - and all covered with metres of material painstakingly cut into table runners to go down the centres (and I HATE fabric - any other kind of crafting, let me at it, but not material!) 

The green runners were cut from material bought very cheaply in CZ.  The top layer of runner is heavy duty paper, bought in great quantities years ago by my mother for dollshouse wallpaper.

If you click on the photo of the windows above, you can see the wonderful butterfly wings effect Simon and Katy managed to achieve with the nets.


The place cards are made on tiny tags to continue the theme started with the wedding invitations (made months ago - so I now find them a bit tame! - but much admired by the recipients).

The tiny clothes pegs we'd had sitting around for years (benefits of hoarding again), but unfortunately the hearts were bright red... that was fairly tedious - 80-odd tiny hearts needing, in some cases, three coats of white acrylic before the scarlet stopped showing through!

But I was delighted that many people attached their name to themselves for the rest of the day, as I'd hoped.


I used the little Prima stamp as the background, and on the back, and the most used Distress Ink for this wedding was Bundled Sage (predictably, given the wedding colours of lilac and sage!).

We were working in a world of shabby chic and vintage... so one of my ideas was that everyone should have a slightly different drinking vessel, and a mixture of beakers and wine glasses.


(Champagne flutes for the toasts were hired, which was great because then all the place cards were at the same height as you looked along the tables!)

Again, some we'd had for years (I'm quite a glass collector); and we scoured charity shops and car boot sales (sort of like yard sales only with all the yards in one big field together!) for bargain vintage glasses.  The gold-rimmed ones you can see in these photos were my Czech grandmother's, so it's lovely that we had that sense of heritage in the day too.


In this view from the top table, you can see some of the other glassware being used.  (Bride and groom each had the gold-rimmed champagne glasses; mine's the green spirally one!)
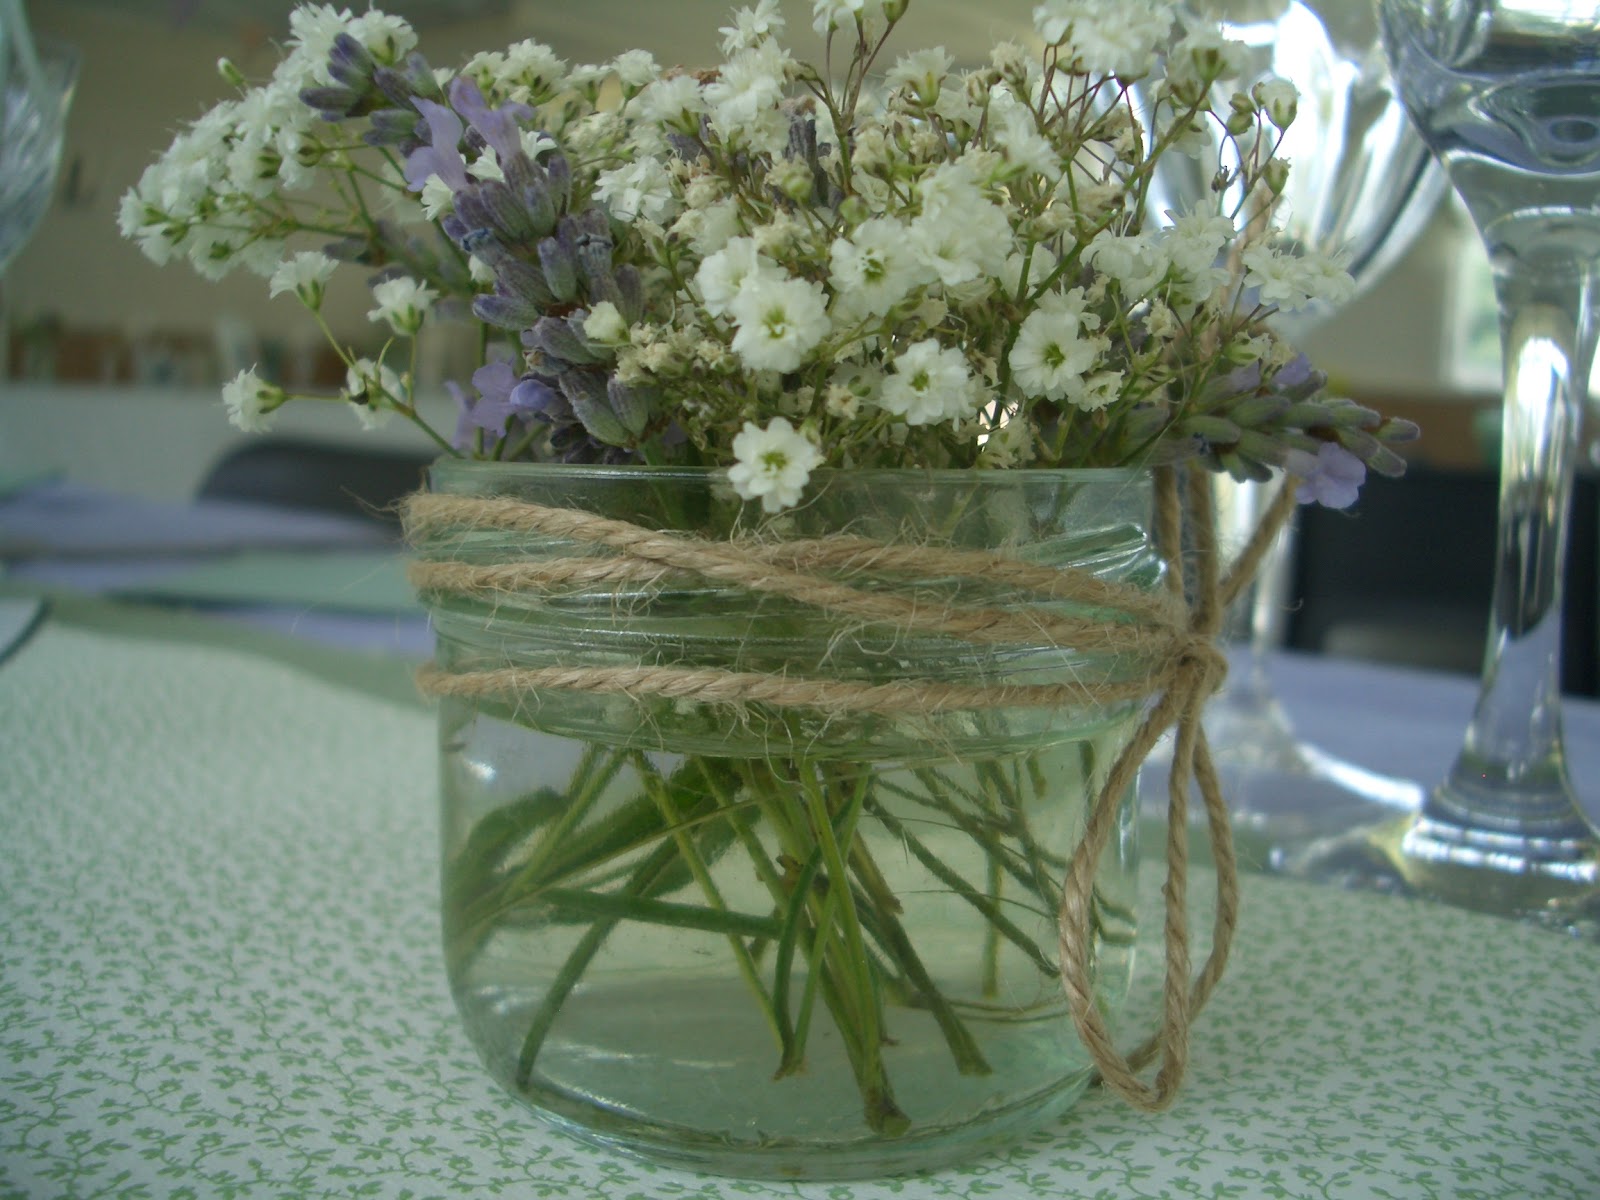


For the wild flowers on the tables (grown in our garden, gathered from hedgerows, begged from strangers' gardens - how lovely people can be... and the gypsophila our one flower expenditure) I went with simple jam jars of all shapes and sizes, with rustic string wrapped and tied in a rough bow.


Also on the tables were some of the vast numbers of picture frames we'd sourced, and I'd filled with collages and pictures not only of the bride and groom, but of Victorian wedding couples too (Google image search I love you!). This is the selection directly in front of the happy couple, along with the gorgeous glass bell, another Oxfam find, which we used to announce the speeches.


Most of the rest of the pictures formed part of the decorative backdrops on either side behind the top table.  And the vast majority of this lot I already owned - what can I say, I'm a shabby chic, candle girl!


We'd been gathering picture frames both from charity shops and from the house-clearing process we'd been going through, and had amassed quite a large, but disparate collection.

The silver and gold ones I decided could stay as they were, but the motley crew of pine, stained wood, and plain old nasty plastic (some of it masquerading as wood) needed dealing with.  Distressing time!!


I tried out a couple of techniques I found online, but in the long run worked out the simplest method was simply to use good old gesso - it needed a couple of coats in most cases, but it looked really good, plus it felt really great to the touch, grainy and rugged.

I then made some collaged backgrounds, using all the greenish or vaguely mauvey coloured papers I'd dragged out of my paper stash (many from K&Co's Best Of collection), and some of which I'd doctored with some stamping or Picket Fence Distress Stain.


As focal points I used the "vintage" wedding photos (the printer played up again, and instead of sepia a lot of them came out lilac coloured - oh happy serendipity!)...


...the happy couple's favourite photos of themselves, reprinted in many different shapes and sizes...


...and some "vintage" postcards I'd created using the wedding colours.


The picture frames (with a specific travel twist to these ones) also put in an appearance as part of the "Gift Table".

Rather than presents, given they've been together twelve years, have two gorgeous children, and a houseful of belongings, Adam and Laura requested contributions to a 'travel fund' so that they might take a family holiday, something which they can't often afford.

So I knew I'd need somewhere for people to leave envelopes and cards with "holiday money", and had always had the idea that I'd love to have some vintage luggage involved (because I love vintage luggage!).


I had a tiny leather suitcase that I used to keep my dolls' clothes in; another belonged to my uncle when he went to school; and the largest was a donation from friend Sheila.


So with another Google Image search I gathered old travel labels, and I used the Tim Holtz (phew, he made it into the post) Distressables to create some "vintage" postcards.


I made a large scale postcard telling people that they could leave their gifts in the smallest suitcase.


We had also found, when clearing the house, a shoebox of real vintage postcards, which I left for people to write messages on and 'post' into the suitcase too.


There was even a vintage style cotton nightdress, and men's stripy pyjamas hanging above on padded, embroidered hangers - I forgot to take a picture, but I think you might be able to spot the pyjama legs somewhere here...

Then, of course, there was the outdoors to be dealt with...


One of the very first things I was desperate to do was find a way to disguise the horrid plastic chairs being used for the ceremony.  At the wedding breakfast, the chairs would be less of an eyesore, since attention would be drawn by the decorated tables, but at the ceremony, it would be just the chairs, standing in rows in the garden (as long as the weather remained fine...).


Eventually, after toying with and discarding a number of ideas, I came up with the idea of draping the chairs with tulle (otherwise known as discarded net curtains).  Then we'd wrap ribbon/fabric/raffia (still, at that point, to be decided) round the seat, with some lavender and ivy tucked in to it.

Now ivy we've got growing in profusion all over the house and garden, and we set about growing some new lavender.


As soon as the stems were large enough, we snipped a crop and then ran it through the dehydrator (usually used for fruit!); we didn't have time to wait for nature to take its course.

Fortunately, since there were more yeses to the 91 invitations than I'd been hoping (sorry, Adam and Laura, but I had my fingers crossed for lots of "sorry, can't be with you" responses!), we were able to raid a friendly Czech's magnificent lavender display in a nearby village.


And then the operation started really to be on an industrial scale!  From the garden, to the dehydrator, or up into the garage roof to dry naturally, then into a crate to be shipped back to the UK with us.  Can you imagine what the car smelled like as we drove across Europe?!


We also collected old net curtains from all our usual sources - Oxfam, friends, friends-of-friends both in CZ and the UK.  We ended up with vast bagloads which all needed cutting to the right size for draping over the chairs.  The sashes to tie round them were cut from the remains of the runner and tablecloth material - at least it meant everything matched!


Lynda did incredible work assembling the 75 chairs on the day before the wedding.  It was the element I'd been most unsure about - I still thought maybe it would look too random and makeshift.  But as soon as they were all lined up, I was deliriously happy with the look...


After the ceremony we scattered the chairs in groups around the garden and people were able to gather, eat, drink and chat in the glorious sunshine... it was completely lovely!


We bought some cheap rose arches to form an aisle - one at the start, one behind the celebrant's table, and one to provide a backdrop to the garden bench under the tree for the wedding photographs (you can just see it behind the arch).


They're decorated with some more cut-up net curtains tied into bows, some metal tealight holders of mine, and some balloon string ornaments made by my niece and nephew (with some parental assistance I believe!).  And then of course some ivy, gypsophila and lavender to complete the look...


And another jam jar and candle affair to adorn the celebrant's table.


One last element I was very pleased with (if there's anybody still with me...) was the table map.

Adam and Laura named the tables after delicious teas and their favourite cakes, and then we'd ended up needing to have the tables in columns to fit - but I didn't see any reason why the table groupings within the columns couldn't still have their tea-and-cake names.


There was a posterboard right at the entrance, perfect for my table map (which was rather large).

Each gesso'd frame had information about the cake or tea of the table it represented - this one is for a delicious Czech honey cake called Medovnik.  


The text was computer generated of course, but stamped with a Kanban frame of wild flower silhouettes, and the individual name labels have the Prima background stamp again.


We were fantastically lucky that the weather held out, and everyone had a wonderful time - the greatest satisfaction was seeing people enjoying themselves so much in the surroundings I'd created.  It took blood, sweat and tears, and hours and hours of work.  And then it all had to be returned to its original state before leaving, so I can't tell you how exhausted I am today - but I know what it meant to Adam and Laura... so it was completely worth it.

My thanks to all of you who sent good wishes for the wedding day, so kind, and I hope you've enjoyed seeing some of the results.  Normal blogging service will be resumed as soon as I've recovered a bit!!  Hope to see you again soon.

Now join your hands, and with your hands your hearts.
William Shakespeare

Oh, and a totally fantastic P.S. - my thank you gift from Adam and Laura is a workshop place for when Tim Holtz is next in the UK (have to get in there early, of course!)... I'm ecstatic!

I'd like to offer this up at Inspire Me Fridays - to let people know that you don't need to spend thousands on a wedding - all my stuff came in at under £200, and the venue itself was £130 (including the day before which gave us crucial set up time)...

Friday, 10 August 2012

Secret Garden

Hello all!  I'm making time again, out of a busy schedule, to create and share a tag with you (yes, it's just one tag)... I think I'd go mad if I focused only on the wedding stuff!!  And I really, really wanted to find time to enter the House of Bears' inaugural challenge based on the Secret Garden (they're all going to be literary-related themes, gorgeous idea).  And given I'm learning and experimenting all the time, I didn't want to miss Simon Says Stamp and Show this week trying out different ways to Paint it Up.  (Both deadlines coincide with the wedding day!!)  So here's my (two-faced) tag for today:

The front                               
The back

I guess that like much of my recent work it's coming from the thing that's taking most of my time and effort at present - my brother's wedding preparations. 

I'm at that scary stage: full of doubt that we'll pull off the wedding transformation, and full of hope that we'll end up with a magical garden of a wedding venue.

And those two feelings are on opposite sides of this tag.


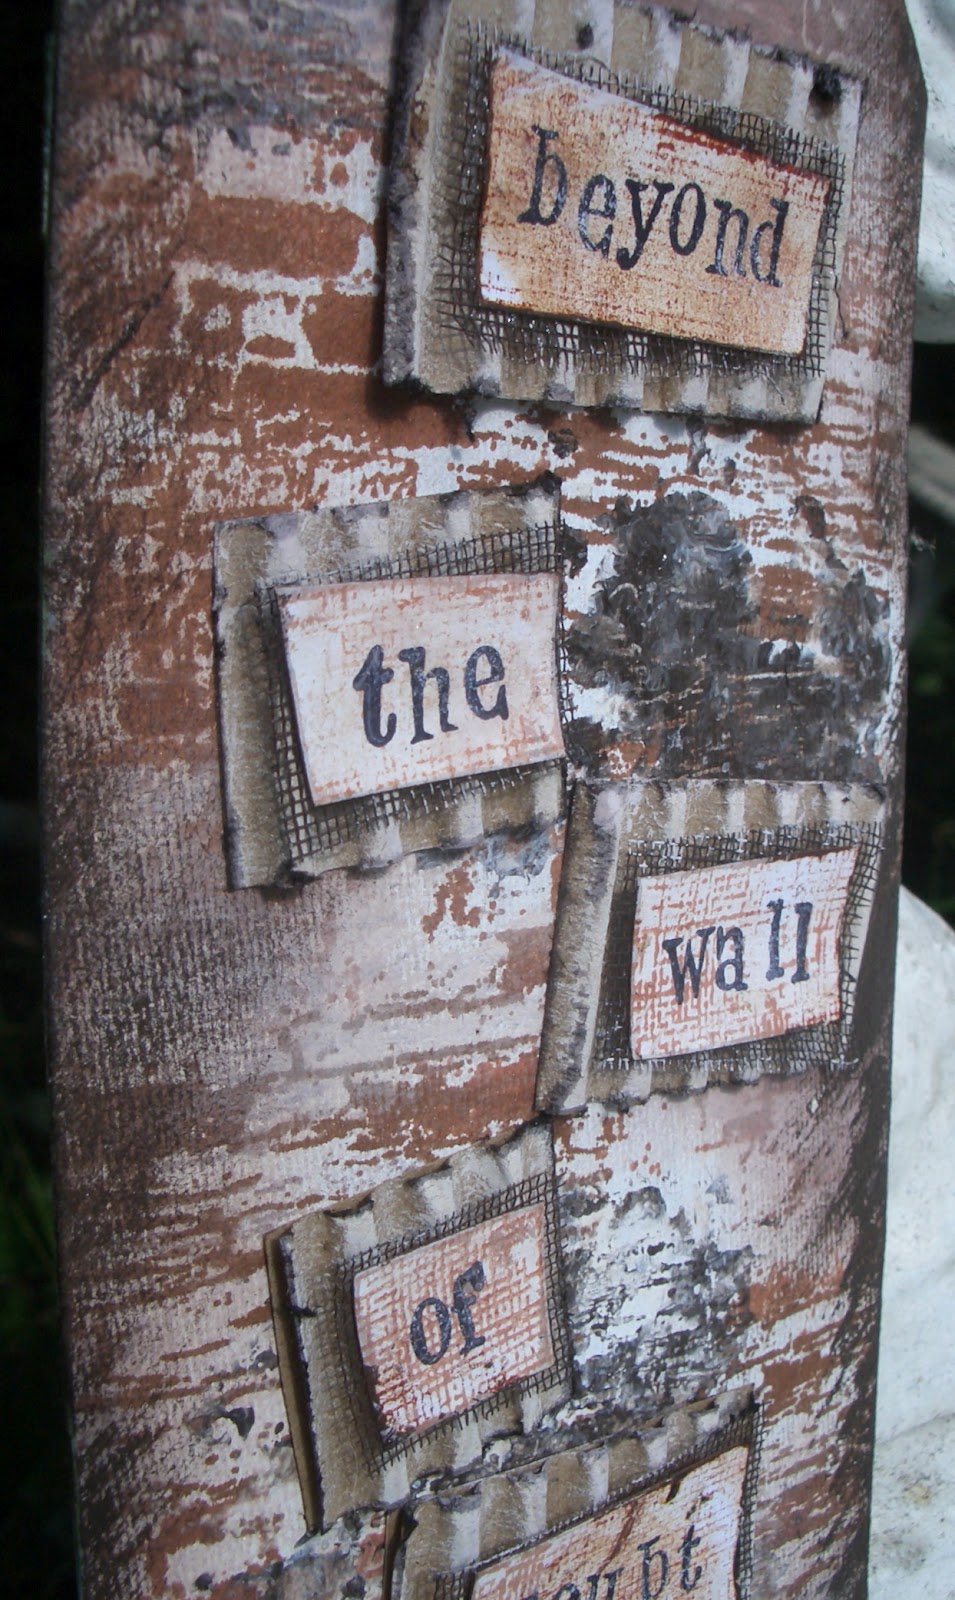
On the wall side, the background started with a coat of gesso (rubbed in well to get the chipboard texture coming through) and then I built up layers of stamping using the Tattered Angels Architectural set in Coffee and Sepia Archival.  

I stamped a few times with acrylic paints on the stamp, quite thickly to get some texture (as I've done before), and also with some bronze pigment ink onto which I swept some copper Perfect Pearls powder.  

I brushed over some areas with a bit of gesso again, and then edged it with the dark brown acrylic, quite dry on the brush so as to get the brush strokes visible.


The gorgeous, fine metal mesh comes from the fabulous Linda Coughlin's Funkie Junkie Boutique, and came wrapped in the corrugated card (which got a rough coat of sand acrylic just on the raised edges) - genius packaging going straight into action, and giving a lovely grungy bit of texture to the tag.


I stamped the words on some scrap paper where I'd been wiping my brushes and blending tools, also adding some textural stamping, using another of the Tattered Angels stamps, to match the mesh.


As you 'leap over the wall' - or turn it over! - pretty much everything changes... I wanted a complete and surprising contrast.


The background started with a coat of muted green acrylic, mixed with white.  I then put in some almost dry brush strokes of gesso all the way down and, once dry, added a coat of Rock Candy (clear) crackle paint, thicker in some places, non-existent in others.  I left it to 'do its thing' while I went off to do some more wedding chores...


On my return I blended in some Peeled Paint and Forest Moss to bring out the crackles, and edged the whole thing with the Forest Moss too.  


The papers are from K&Co and from Prima's Botanical, each given a coat of watered-down gesso to whitewash the colours.  I cut them to tag size and then ripped, rolled and edged them with Bundled Sage and Forest Moss, to create the framing dimensionality.

The words are stamped onto the 'whitewashed' K&Co paper using Aged Mahogany.  Rather than full strength, I used the second stamping, so that I got a paler cherry to match the roses in the paper.

Also in my Funkie Junkie parcel were a couple of lovely freebies, these corrugated die-cut butterflies amongst them, so they were put straight to use as well.  


I gave them a coat of Shell Pink with a Paint Dabber, then softened it with some Vintage Lace Fresco Paint from PaperArtsy.  


Using a paintbrush I stippled on some Aged Mahogany Distress Ink from the pad, and finished with a spritz of Perfect Pearls Mist in Pearl for that lovely sheen.


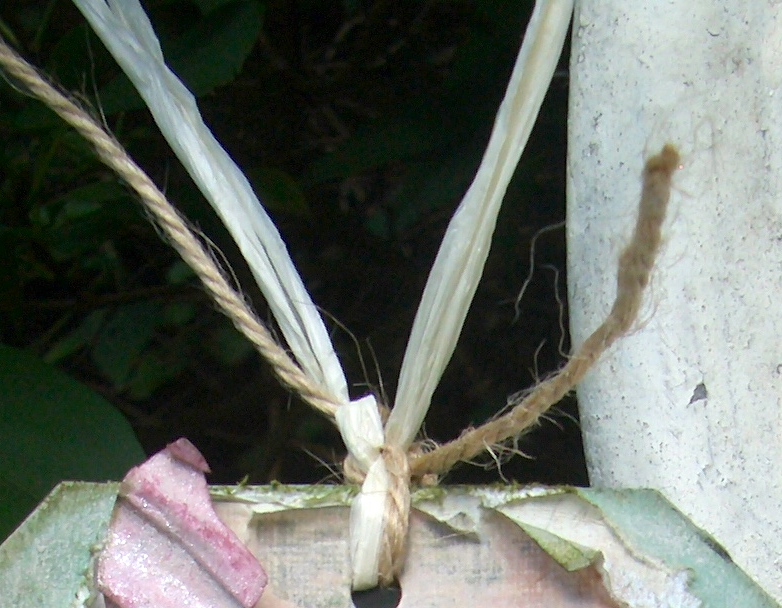
I had to work out something to act as my tag string which wouldn't look out of place on either side, so in the end I decided to keep it pretty simple.  The ivory raffia picks up the creamy colours in the tag on both sides, and you can't go wrong with a bit of neutral twine!


Thanks so much for stopping by today... I'm so grateful for your feedback and support.  Your lovely comments make my day!  I love Craftyblogland!!

I'm entering this in the following:
The House of Bears challenge, The Secret Garden
Simon Says Stamp and Show who would like us to Paint It Up
The Sunday Share over at Frilly and Funkie, having used my lovely new mesh, freebie extras and the packaging bits from the Funkie Junkie boutique
The Inspired by Stamping challenge - though they'll only be interested in one side of the tag! - with their lovely inspiration photo, Garden theme, and a request to use Pink, Green and Creams
And I'm joining the Bloggers Challenge bloghop again - hosted by Lisa Somerville - adding some Texture this week

If you look the right way, you can see the whole world is a garden.
from The Secret Garden, Frances Hodgson Burnett

Wednesday, 8 August 2012

WOYWW Wedding special


Laura - do not read this yet!!

Hello and welcome to everyone else, though...  My brother's having a commitment ceremony on Sunday, with all the glorious trappings of a full-on wedding and, as regular readers know, I'm in charge of the transformation of the scout hut where it is taking place.  It's all to be a big surprise for my sister-in-law (they've been together 12 years, and have two gorgeous children, so I do know pretty well what she'll like!), hence the warning at the head of today's post.


So that's what my workdesk is pretty much full of at the moment.  There have been some sleepless nights but we're into the final push now, and I'm so grateful to the wonderful helpers along the way (some of whom may also be reading this).  


I'll post properly about what I've been up to, with all the crafty before-and-afters once it's all over, so watch this space, but for now, here's What's On My Workdesk... 


                      ...and floor... 


...and pretty much half the house... 


          ... this Wednesday!


Thanks so much for dropping by - I will do my very best to do some hopping (as light relief during meal breaks!), but apologies if I don't get very far this week...

If you've got time to be nosy, then head on over to the Stamping Ground, where our generous hostess Julia has a WOYWW weekly linky list of crafters' work spaces stretching almost to infinity!


Come, let's be a comfortable couple and take care of each other!  How glad we shall be, that we have somebody we are fond of always, to talk to and sit with.
from Nicholas Nickleby by Charles Dickens


Monday, 6 August 2012

Making time

Hello and welcome (back) to Words and Pictures.  A bit of insomniac creativity for you today - and I'm really going to try to keep it short and sweet...

I mentioned before that I'm getting ready for my brother's wedding: my main task is to create a wedding venue out of a scout hut - it's quite an undertaking (including various bits of craftiness, which I'll let you see after it's all over), and I have to admit it's giving me some sleepless nights at the moment - will I have everything ready in time, and will it work?!  So at 4am this morning, rather than lie there fretting about it, I got up to take my mind off it all in the best way I know how at the moment... I did some crafting!

I'm getting closer to my first Guest Design spot (it's for Top Tip Tuesday), and that's also been causing me some concern. Let's just say it's a challenge that's not exactly in my comfort zone... so the first thing I did at 4am was work through some potential ideas that had been swarming in my brain.  You'll get to see the results very soon.

Then I came up with this - I guess it's pretty clear where my brain was at!

It's on a tag handcut in chipboard to the dimensions of the large tag on the Tim Holtz die (which I haven't got), so it's good and sturdy.

I'd had the stripes nagging at me since unpacking when, by chance, a bunch of scraps and offcut papers ended up lying next to each other while I was putting things away.  I glanced at them and thought that actually they should be allowed to stay together.

There's a ruler from TH Crowded Attic, some DCWV Tattered Time, some TH tissue tape which I'd backed onto tissue paper, a touch of the Simple Stories Documented collection, and some bits and pieces from the 7 Gypsies Conservatory collection... talk about mix and match!

Once I'd worked out the order and stuck them in place, they all got a coat of Picket Fence Distress Stain for that lovely muted look, and a bit of Walnut Stain distressing at the edges.


The Weathered Clock is die cut on fairly sturdy chipboard too, for strength, but also to get a bit more dimensionality to it.

It's covered with the 7 Gypsies paper, and the edges are done with Walnut Stain.  I had to use a cotton bud to apply the ink, rather than the blending tool, for the narrow gaps between Roman numerals.


The hands of the clock are secured with an Idea-ology long fastener, and they're set to the time I woke up!!

The words are stamped, edged, and mounted on some padded tape to lift them away from the surface of the stripes.


There's some more TH tissue tape, this time from the Nostalgic set (backed on to tissue paper and tinted with Walnut Stain), forming the ribbon at the top of the tag, and I also added some simple, natural twine.

I really enjoy the gentle neutrals playing off each other... I think I needed something calming given the time of day and lack of sleep - lime green and neon orange wouldn't have been comfortable to work with!


Okay, it's back to the wedding prep; no rest for the wicked - though I do hope there'll be a bit more rest tonight.  Much as I love crafting, I'm quite fond of sleeping too...

Thanks so much for stopping by today, and I hope that you find time to do all the things you love - and remember, if you're having trouble fitting everything in, you can always make time by getting up at 4am!


I'm entering this in the following:
The Time challenge at Vienna Impressions Inspirations
The Shabby Tea Room who are offering a lovely photo prompt, which you can see here on the right, and an invitation to use Soft Neutrals
I'm just in time, I hope, for the Crazy Amigos challenge Dies and Punches
Sugar Creek Hollow are playing Something Old, Something New (from your craft stash, that is), and given that I made this project to escape for a while from wedding preparations, it seems appropriate to join in!  The 7 Gypsies Conservatory collection was the first set of papers I bought for my stash, early this year when this whole thing began for me.  And the 'ribbon' is made from one of the latest additions, a part-roll of one of the Nostalgic set of Tim Holtz tissue tapes, part of a lot I won on ebay while away, and have just enjoyed unpacking and playing with for the first time.

So little time and so little to do.
Oscar Levant
Yeah... if only, Oscar!!


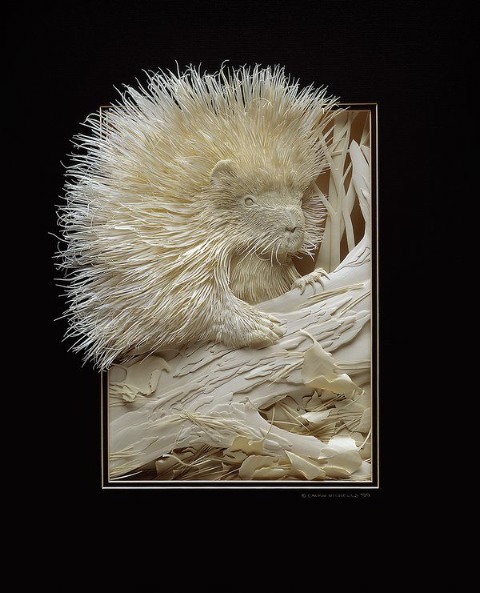
Just a little something I wanted to share - if you've never come across Calvin Nicholls Paper Sculptures, do go and have a look.  I sat looking at them in awe, jaw hanging.  Here's a little taster... unbelievable papercrafting!

Saturday, 4 August 2012

The Puppeteer

Hello again!  Thank you all so much for your kind wishes for a good journey home to the UK - the Butterfly has landed!  And, first things first, the craft boxes are unpacked, and this afternoon I seized a bit of crafting time (needed to calm the jitters), so I'm here with a little something to show you.  I could have called this one, "And now for something completely different..."!

The thing that really switched me on to crafting was the grungy steampunk I found in Tim Holtz's work and products, but most of my projects have mutated via shabby chic into something slightly different (I got distracted by all the pretty papers around!)... So I wanted to try something a bit more purely steampunk, like the stuff I'd played with early on before I discovered all this blogging business!  

This is, in fact, an altered piece.  It started with a bookmark which had been lying on my staircase forever.  I found her slightly disturbing to start with, I have to say - that very intense stare and those slightly strangely clasped hands... besides, there's nothing spookier than a spooky child!

I also wanted a suitable project with which to use metallics, so that I could finally join in with the Studio L3 challenge.  A hugely talented bunch of crafters, hosted by the fabulous Linda Ledbetter, have been working their way through the techniques in Tim Holtz's Compendium of Curiosities II.  

I ordered the book several months ago, and have at last got home to unpack the parcel, so I get to join in with the Perfect Pearls Mist technique on page 54 - better late than never, I say!  You can see the results of the technique here on the right... but I'm not allowed to reveal its secrets!

I'm using it to create a frame for my steampunk puppeteer.

The little steampunk flying cyclist came from some digital wallpaper I downloaded for free months ago, and I'm ashamed to say I can't any longer remember where from.  (If anyone recognises it, do please let me know, so that I can add the credit.)

He's had a coat of UTEE, partly to strengthen him, as the fussy cutting has some very delicate parts.  The added bonus is that you get some dimensionality and that spectacular glossiness!

She's dangling him on a piece of black cord, part of an Ikea jumbo present-wrapping set bought years ago for peanuts in the Christmas sale.  I started with a loop of it, but decided it looked more as though it was between her fingers with a little snip taken out.


The puppeteer herself is sporting a false eye created from a wheel from that same steampunk wallpaper, also glossy with UTEE.  Her skin is Tattered Rose, applied with a blending tool.

Her dress is also coloured very roughly using a blending tool (I didn't want to get into 'colouring-in' too perfectly), with shades of Broken China, Tumbled Glass and Dried Marigold Distress Inks.

There's a touch of Picket Fence Distress Marker on the lace of her collar and cuffs, and on her necklace.  The pearls have also got a lovely dimensional coat of Glossy Accents too, to pick them out.

I used the fine end of the Barn Door Distress Marker for her lips and nails, and Peeled Paint to give her a touch of eyeshadow.


I like a sentiment to be a little ambiguous sometimes - so that you're not quite sure what's being said - you have to stop and think.  This one could, I suppose, be either quite reassuring or quite threatening... look in her eye(s) and see what it says to you!

I inked some plain cardstock with Dried Marigold and stamped the words in Archival Black with my little alphabet set.  The extra little stamped industrial and clock bits are from a freebie stamp included with one of my PaperArtsy orders (thank you, PaperArtsy!).  

I cut jagged corners around the words, edged it with Black Soot, and gave it a little spritz of Perfect Pearls Mist in Pewter.  And there's another wheel from the digital wallpaper, UTEE'd and added to the sentiment.


The gears in the bottom right corner are cut from the DCWV Tattered Time matstack, so have their own built-in gloss.  And I've added one of the TH Idea-ology gears to the centre of one of the paper gears.  I think it all looks great against that metallic Perfect Pearls Mist frame - such a fantastic technique.


I added a couple of bits of black coil to the piece - it's just that stuff you twist round to seal a plastic bag or whatever... again saved from some packaging at some point.  Hoarding does have its uses!  I think you can see it better in the picture on the left.


I backed the altered bookmark onto some more plain card, coloured with Dried Marigold so that it would make it stand out against the embossed frame (it's  the TH Distressed Frame embossing folder twice and joined together so that it would be long enough for her).  

Finally, I added a couple more gears round the puppeteer to finish it off. Had to use up the last of my silver ones so that it would all tone in - oops, now I need some more...!

I'm so glad to be reunited with the remainder of my stash (I couldn't take all of it to the Czech Republic), and also very excited to unpack the parcels which had been arriving in my absence (can't pass up an ebay bargain - even if I know I'm not going to get my hands on it immediately!).  

Lots of lovely things to play around with... though I've also got a lot to do getting things ready for my brother's wedding.  You'll get to see how that turns out after the 12th August, because there's quite a lot of crafting of one sort or another involved, but I have to keep it all secret until then!

I should just quickly say a big welcome to the new followers - great to have you with us!  And thank you all so much for spending some time here at Words and Pictures today.  I look forward to seeing you again soon, either here or somewhere else in Craftland!  

I'm entering this in the following:
That Craft Place who are having a Steampunk challenge this fortnight
Challenge 16 in the Studio L3 Compendium of Curiosities II challenge

Simon Says Stamp and Show still want to know "What do you say?"
And I'd also like to join in the Bloggers' Challenge Blog Hop for the first time  - hosted by Lisa Somerville over at her wonderful blog Splendiferous Creations... For this one, we have to Alter It, and you can while away some wonderful hours travelling round to the crafty blogs below to see what everyone's produced - and/or join in yourself!  

First, though, it's time for the quotes...

We are only puppets, our strings being pulled by unknown forces.
Georg Buchner

Master of puppets, I'm pulling your strings, twisting your mind, and smashing your dreams.
Metallica (look, it's even metallic here...!!)

Wednesday, 1 August 2012

Afterthoughts

Hello to followers old and new, and also to any occasional visitors who happen to be dropping in.  It's great to have your company for as long as you care to stay...

As I packed up my temporary crafting area for transportation across Europe, May Flaum posted a piece about using up leftovers so, although I still have three large folders full of scraps in my luggage, I did make an effort, as I was clearing up, to start putting the 'using it up immediately' into practice.  Here are some ATCs (my first go at them) I put together out of the leftovers lying on and around the craft table.   Last minute crafting, when I should really have been packing...

The sharper-eyed followers among can run your own little test trying to spot the projects of which they're the remnants... click the links for the answers!

Since I know there are a few non-crafters following, I should probably do a little explanation of ATCs.  It stands for Artist Trading Cards - cards measuring about 2½ by 3½ inches, on which you can create a piece of work which can then be swapped or traded (or hoarded for oneself!).  

As they're the same size as collectors' cards, such as baseball cards, they can be stored and displayed in similar ways, and have become a big way of sharing work in the artworld and in craftland.  Wikipedia has more here if you're interested...

My little selection, as I say, are made out of what was around on my desk, with some extra stamping and embellishing, obviously.  Since lots of stuff I've been playing with recently has been in a vintage monochrome world, I think they sort of work as a set.  

And since my favourite game is combining Words and Pictures, they are each built around their own sentiment.  The choice of sentiments comes straight from the life project and life events I'm in the midst of at the moment.  Here is what I have to say for myself at present...


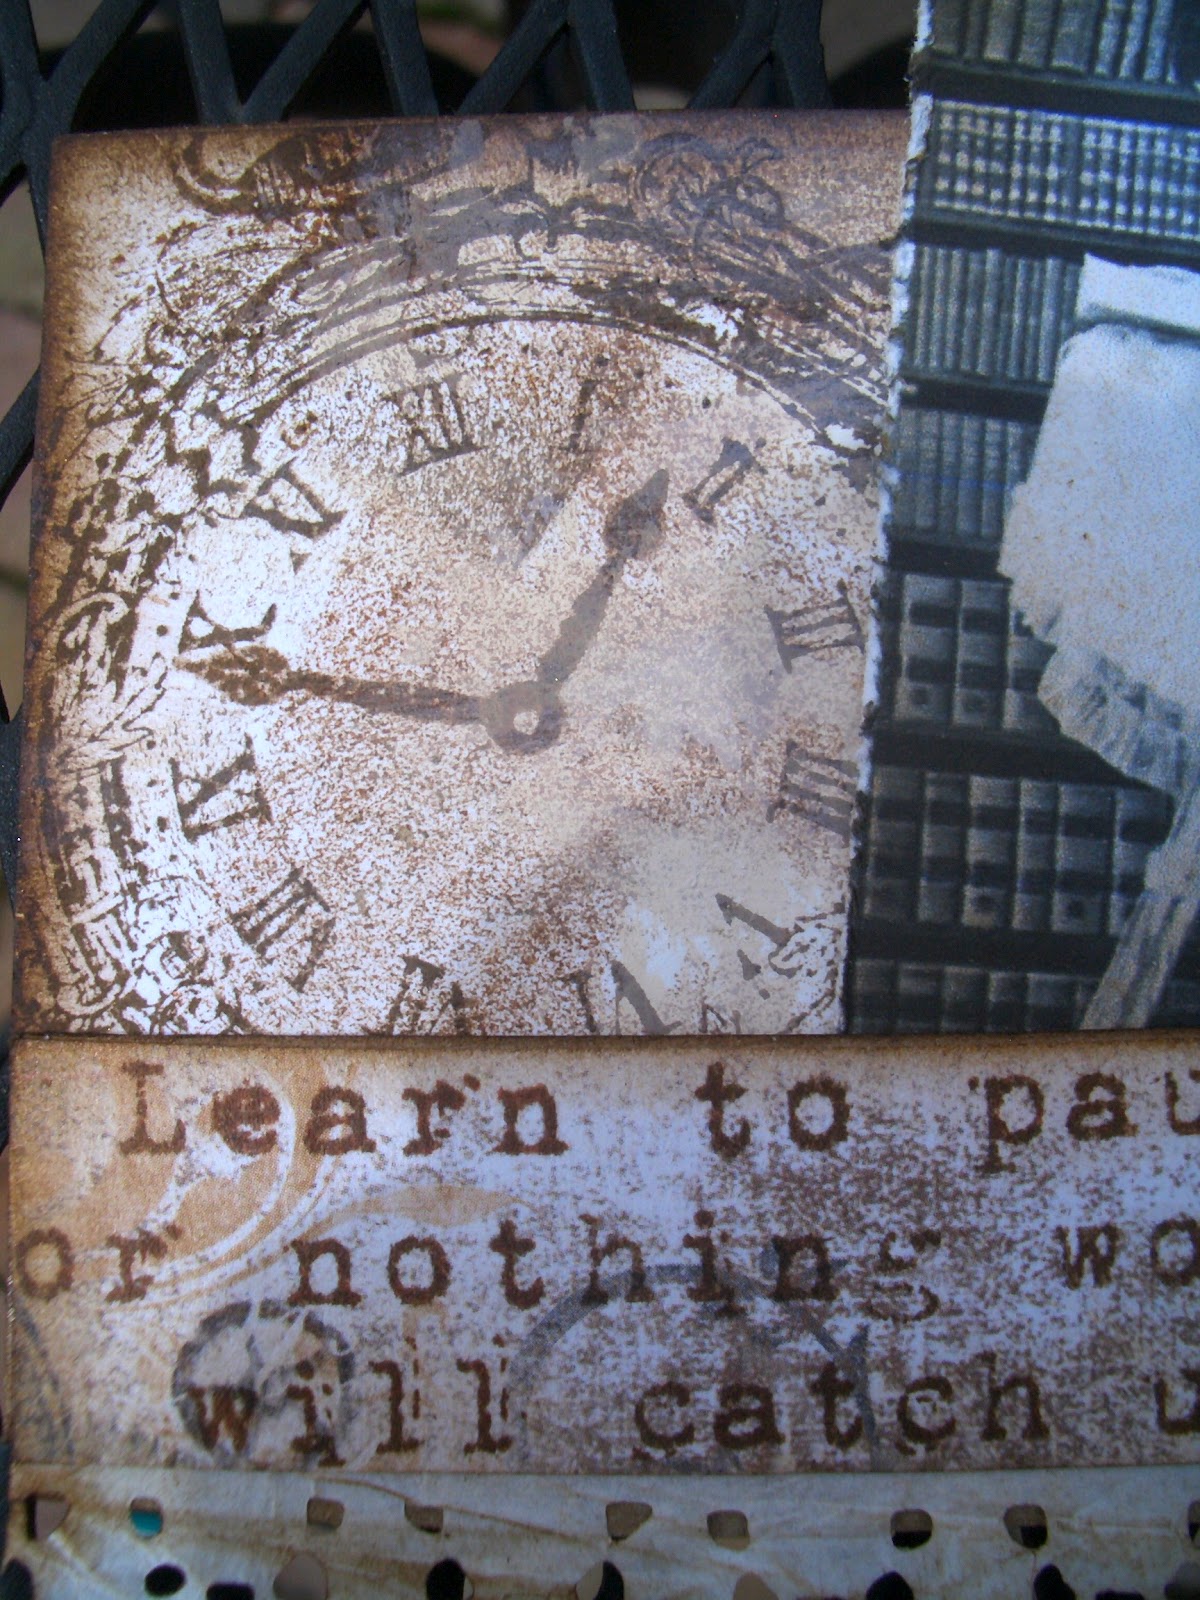
The first sentiment is one I love (it's a Tim Holtz stamp, inked with Vintage Photo and Walnut Stain onto a scrap of BoBunny's Timepiece paper) - and something I'm trying very hard to work with in re-creating my life.  There hadn't been very much time for pausing in the job I was in, and I was starting to feel that life outside of work (for all that it was hugely stimulating and rewarding work) was slightly passing me by.

I couldn't even, when in the thick of things, spare any mental energy for reading (apart from things related to the work)... which is one of my havens of escape.


So, I loved this photograph I found when on a vintage image crawl.  Two pictures from the same haul found their way on to a favourite card of mine, and this library lovely was left on the sheet I'd printed out.  She got the Vintage Photo and Paper Distresser treatment!

The stamped clock is from BoBunny's Timepiece stamp set - it's a gorgeous pocket watch, and a gorgeous stamp.  


And there's one of the little metal clock charms I got from the Bead Shop (you've seen one before... here).  This one got a coat of dark brown acrylic, then I dabbed on some white acrylic very roughly using the end of the bristles on a very firm paintbrush.  Finally I sanded it in places with an emery board to get some of the dull gold to show through again.

The 'lace' on the bottom is leftover from yet another project.  It's cut with Tim Holtz's Decorative Strip Die called Vintage Lace, from delicate paper ribbon, so it has a lovely fragility...  There are three different laces on the Die, so unless you trim the paper first, you get three bits of lace whenever you use it - and it's great to have the spares around, until you come to packing away your whole craft area, of course!  This has had a bit of distressing with Antique Linen and Walnut Stain Distress Inks.


You don't have to look very far back in the posts for the next place things are left over from... This was in fact a leftover idea rather than a scrap.  The Renaissance Men challenge over at Frilly and Funkie asked us to use one of four great master artists as inspiration.  

I went straight for Leonardo da Vinci, and my first thought was that I would use something from his Notebooks where all his plans, inventions and engineering ideas are (as well as preparatory sketches), including the infamous helicopter.

I got this grinding mill image from a Google search, and for a while was playing with the idea of combining it with cogs and gears from the TH Idea-ology range.  


In the end I went a completely different way, but I'm so pleased to have found a small way to honour that first idea... And, as you can see, I've also deployed some of the mesh ribbon I used in that same project.  It started out plain cream, but Vintage Photo and Walnut Stain soon put an end to that!


I love this sentiment (again a TH stamp - embossed in copper over Versamark Watermark) - and it's so apt right now, at a point when I'm not only reinventing myself as a freelance, and exploring an emigration to a whole new country, but also having so recently discovered this whole new world of crafting and expressing my creativity through visual means - quite new to me.  


The last one of the three comes straight from the heart - and that's probably why it ended up with a heart as its focal point!

I claimed I was making these ATCs to use stuff up so as to reduce how many tiny little scraps of this, that and the other I would be packing up and transporting.  The truth is that I was making them to delay having to start the packing, as I was so reluctant to do it!!  

I was doing my utmost to stay in a state of denial about having to leave the Czech Republic and head back to a chaotic month of busy-ness in the UK... so I certainly did not want to 'speak of parting'!


You'll have seen the sheet music appearing in many projects - it's from an actual old music book.  Music is one of the great joys of my life, and I'm lucky enough to be able to include it in my work quite often, and so it is only appropriate that I also include it in my craftwork quite often.  

Besides, I find manuscript music beautiful in itself.  I think the treble clef is one of the most beautiful symbols there is, and I love sharps and flats too... This piece being in E flat, you get three flats next to the clef in the key signature!


The background was created using the TH tissue tape, covered with Picket Fence Distress Stain; and I used Antique Linen and Walnut Stain Distress Inks to edge and colour it.  The tissue tape is also backed onto tissue paper to make the ribbon (leftover from this).

The heart, meanwhile, is leftover from a project which is still in the making, and which is travelling back to England as yet unfinished... you'll get to see it in a future post. 

That project is based around kraft paper with clear embossing of various flourishes to create a homemade Kraft Resist.  Then there's gesso and white acrylic applied and wiped away to get the shabby chic look you see here.


This was a whole spare 5x5 inch piece, so once I knew I wanted a heart, I drew one on the back and cut it out.  It's edged with some more of the leftover paper lace, this time trimmed to change the shapes, and stuck onto some padded tape to lift it away from the background.

So, my last minute crafting, procrastinating, ATCs of denial speak out loud and clear about what's going on with me at the moment... but I hope you can also take pleasure in them on a surface level.  I can see I'm going to become slightly obsessed with the browns/kraft/creams and weathered whites... they please me greatly - in lots of amazing projects I've seen by others, I hasten to add, not just here!


A big thank you  for joining me here today for some more Words and Pictures, and have a wonderful time doing whatever it is that gives you joy, until we meet again.

I'm entering this set of ATCs in the following:
Simon Says Stamp and Show's challenge based on words: What do you say?
Try It On Tuesday's current challenge Anything Goes
Fussy and Fancy would like to see Vintage with Distressing and Lace
Make It Monday's 100th (!!) Linky Party
Incy Wincy Designs are having an Anything but a Card challenge

Parting is such sweet sorrow,
That I shall say goodnight til it be morrow.
Romeo and Juliet II.ii, William Shakespeare

A wandering minstrel I, a thing of shreds and patches, of ballads, songs and snatches...
from The Mikado, Gilbert & Sullivan

The most remarkable thing about my mother is that for 30 years she served the family nothing but leftovers.  The original meal has never been found.
Calvin Trillin