I'm travelling into a new way of working, a new country, a new language, and a new hobby which I'm passionate about. Come with me for some of the journey...

Showing posts with label steampunk. Show all posts

Saturday, 26 October 2013

Keeping time...

Hello everyone!  Hope you're all having a great weekend.  It's catch-up time here at Words and Pictures (and yes, I'm still trying to do some catching up with all of you too) with a piece I made as a Guest Design piece for the Calico Crafts blog in June.  At the time, I pretty much just showed the finished project, but promised some more process photos in due course... well, here they are.

If I remember rightly, I spent much of the making of this not being sure about it, and wondering where the heck it was going, but ended up fairly happy.  I hope you like it!


It grew into being a piece about what we hold on to, what we preserve in the face of time's onward march, how we keep hold of memories and mementos... with a play on the words "Keep Time" - about a clock keeping good time, and also how we try to keep hold of time, not letting it run away from us too quickly.


I started with one of the little specimen trays, but did away with the sliding lid...


... or rather, did away with the acetate and glued the extra bit of frame into place.


I layered up DecoArt paint and crackle glaze... 


... and more paint...


I lined the rear wall with one of Calico's large vintage collage sheets.  These are amazing - really huge and great quality.


Although I liked the weathered paint all over the frame, I decided to go for a papered exterior, to match the rear wall of the interior.  

And I've still got about 2/3 of the sheet left to use!


I added yet more paint, as well as ink and Treasure Gold white fire...


... to create my weathered look on the frame and within the compartments.


I stamped the Kaisercraft Tic Toc texture stamp onto the paper for some extra "time" texture.


I also stamped it onto the large rusty heart using Coffee Archival ink.
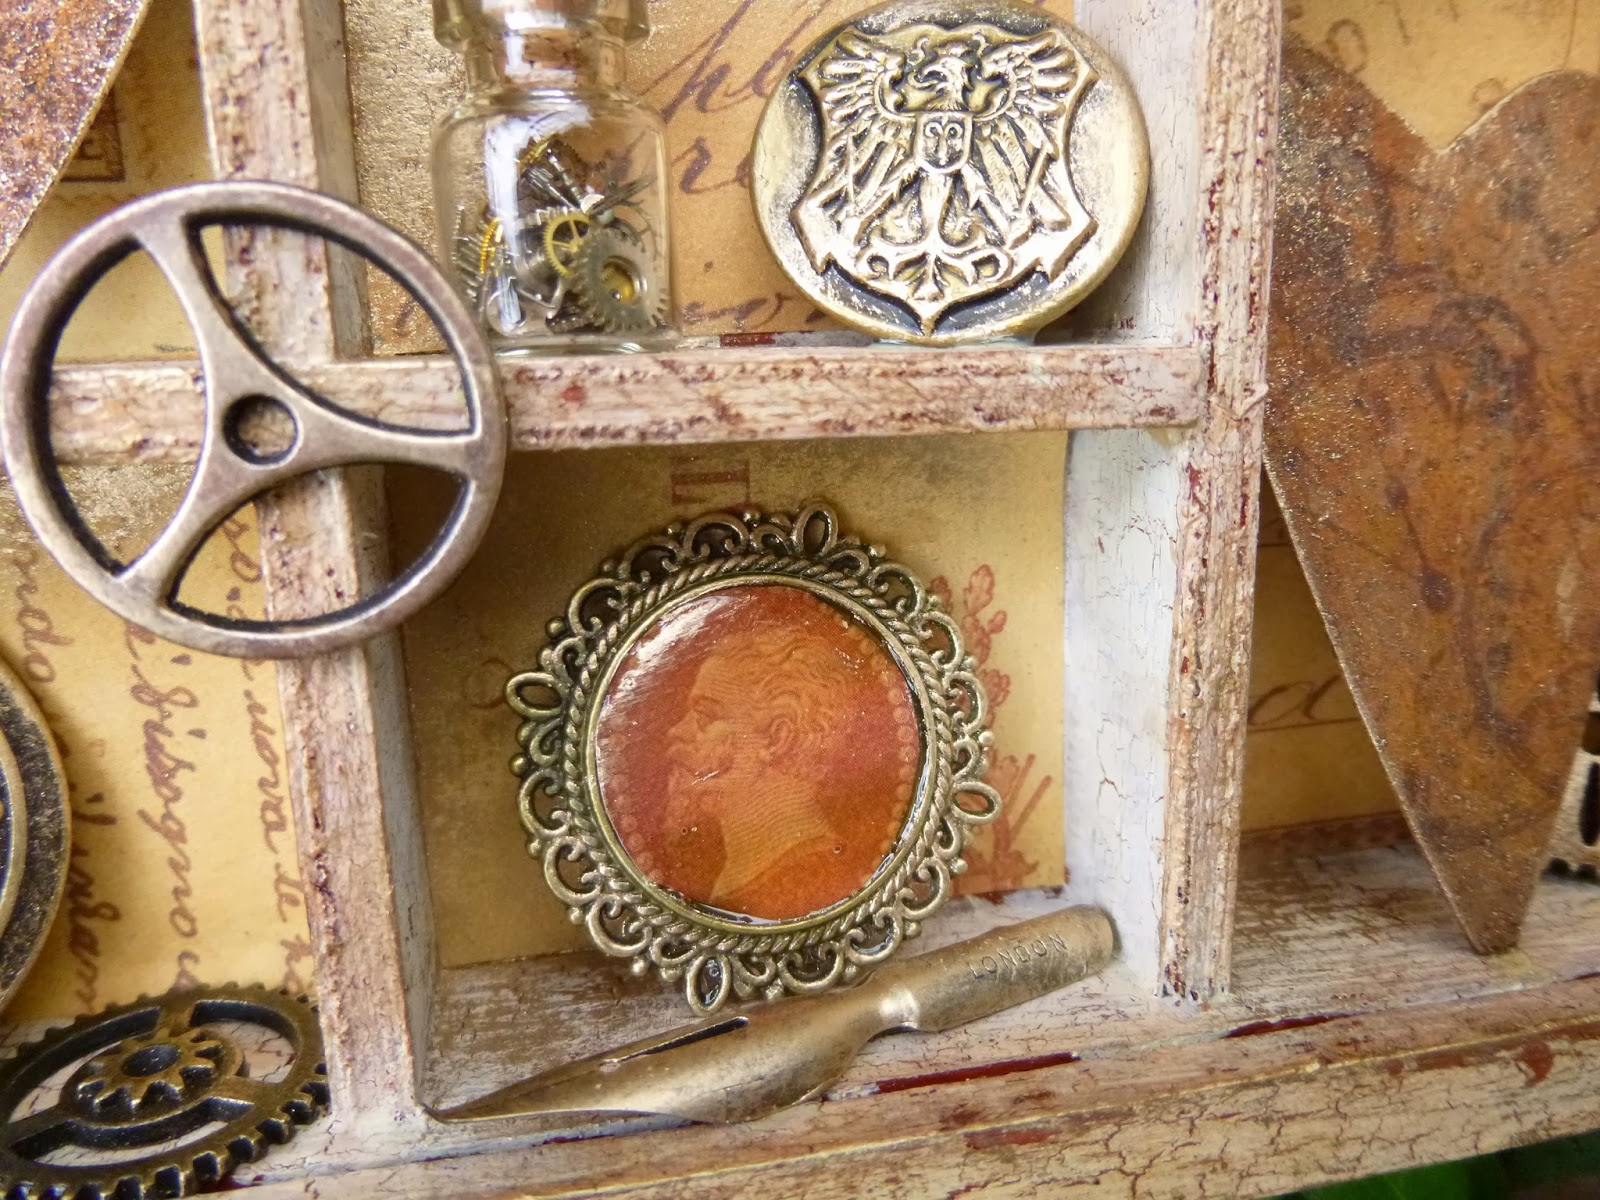


I cut out part of the paper to use in the little round frame from my stash, covering it with Glossy Accents and leaving it to dry overnight.


All the embellishments and doodads have had a touch of Treasure Gold in White Fire so that they all tone in with one another.


I put some of the fabulous Steampunk Watch Parts into a tiny corked vial - how's that for another way of "keeping time".


And there's one of Artemio's Oldies Vintage clock faces, gilded with the Treasure Gold.  I love the antique-y look that gives it.


On the back of the tray, also papered, stamped, inked and gilded, I decided to add the phrase KEEP TIME.

I cut out letters from the scrabble tiles sheet from the Kaisercraft Timeless Classics collection, stuck them onto card, and inked and gilded them. 


Very happy with my homemade scrabble tiles!


I cut the Tim Holtz Weathered Clock out of Grungeboard ready for some hefty treatment. 


The joy of Grungeboard is it will take any amount of paint, medium, texturising and inking without falling apart - in fact, it stays completely flexible throughout - amazing stuff.


I patted on some DecoArt texture paste with my finger tips, so that it would have lots of texture to it. 


Then it got some paint and some gilding, some more paint, some more gilding and some inking until I was happy with the look.


Everything was glued in place using Glossy Accents...


... and the whole thing got a sealing coat of Studio Extra Time Medium.


(It didn't need to be Extra Time, but I'd run out of all the others!)


A final dusting of White Fire Treasure Gold, and we're done!

I had a wonderful time again with the amazing Calico Crafts goodies. Huge thanks to Helen of Calico Crafts, and the fabulous Louise (a.k.a. Zuzu) who co-ordinates the team, for having me back.


Thanks so much for taking the time to stop by today.  I'll see you very soon, somewhere out there in Craftyblogland!

How did it get so late so soon? 
It's night before it's afternoon. 
December is here before it's June. 
My goodness how the time has flewn. 
How did it get so late so soon?
Dr. Seuss

Ingredients available from Calico Crafts:
Small Wood Specimen Tray with Sliding Lid
Treasure Gold - White Fire
DecoArt Americana - Burnt Sienna, Burnt Umber, Buttermilk, Whitewash
DecoArt Weathered Wood Crackle Medium
DecoArt Decorating Paste
Claudine Hellmuth Studio Extra Time Medium
Kaisercraft Tic Toc Texture Stamp
Rusty Hearts
Steampunk Watch Parts
Kaisercraft Timeless Classics paper pad
Artemio Oldies Vintage Style Metal Clocks and Cogs
Tim Holtz Grungeboard
Tim Holtz Sprocket Gears
Tim Holtz Corked Vials
Tim Holtz Trinket Pins
Large Vintage Collage Sheet - Postcards (discontinued, but there are lots of other lovely ones)
Antique Ivory Cotton Crochet Lace
Ranger Glossy Accents
From my stash: Vintage Photo Distress Ink, Weathered Clock Die, various embellishments and doodads

Tuesday, 5 March 2013

Glampunk Birdhouse


Hello, and thank you for stopping by today.  

Some of you will have seen bits of this Glampunk Birdhouse on the Calico Crafts blog, but here's the roundabout story of its creation, as well as lots more pictures! But it's absolutely not compulsory viewing if you've already had your fill.

I wanted to share these extras straight away, because I'd like to enter the project for two brand new challenges.  

I can't believe my luck at this fitting in with the inaugural Steampunk Challenge set by SanDee and die amelie - they want to see our version of a steampunk cuckoo clock.  I'm not sure this will tell the time very well, but all the watch parts are there!  

UPDATE: Just to let you all know - SanDee and die amelie have decided to include a 3D section to the challenge as well as a Papercrafting one - just make sure you get your project into the right category when you link up - Yippee!!

And another brand new challenge blog is starting at Country View Crafts Challenges and their first theme is Pick and Mix - where you can Pick what you want to do, and Mix your colours any way you like... so basically it's Anything Goes!  For both challenges, you've got the whole of March to play along... 


I loved making this one... setting off without a destination in mind and, after a number of detours, arriving somewhere that I think is really quite fun!

I knew I wanted to alter one of the adorable tiny birdhouses, and I knew I wanted to use some of Calico's gorgeous papers.  And there's one other major ingredient that I'd had in the back of my mind to use, and had completely forgotten about until I suddenly realised it was exactly what the project needed!


These birdhouses are so cute, just over 3 inches tall and two inches deep, so about the size of a 3D ATC, really.

(Don't get distracted by the fellow in the background... that's for another time!)

I honestly didn't know where this might go, so I started with a coat of paint over the whole thing.


I tried doing some stamping next, using the lovely Conservatory set by 7 Gypsies, but it wasn't really hitting the mark for me (though you can see still the remnants on the bottom).


Then I covered the roofs and side walls with some of this gorgeous paper from the Vintage Letters paper pack (and I seem at this point to have forgotten to take any process pictures!).


That vastly improved the papered parts, but I still had to decide what to do with the front and back.  (Useful to have the back to experiment with - you can always pretend you never meant it to be seen in the first place!)


First I painted over my stamped surface using the amazing Liquid Leaf  which gave me a very glamorous look, but still wasn't quite "it".  So I went to my go-to texture technique and grabbed some tissue paper and glued it wrinklily onto the surface.

I then used the paints again to echo the look of the paper - starting with the pale bluey turquoise, and then stippling on some browns before giving the whole thing a good going over with some White Fire Treasure Gold wax.  Now we were starting to cook...


So now I had loads of texture front and back, and the side walls and roofs looked a bit boring, so I whipped out the texture paste and created some interest!


Once it was dry, I inked it and then added some more White Fire wax to gild it.


I was pretty pleased with that, but it still needed something... and it was then I remembered the ingredient I'd always meant to use - the fabulous Steampunk Watch Parts and Findings.  I glued some of the tiny cogs and gears onto the front of the birdhouse... fiddly, but so worth it.


I added some larger gears, with a coat of Liquid Leaf, to the roofs, and a few more watch parts, coated the edges of the roof with some more Liquid Leaf, and sat back to admire the finished effect...

Trouble with that was it started me thinking: "Now, who would live in a house like this?"  And then, of course, I had to find out.


(Trace of Inkypinkycraft's wonderful Steampunk bird  - though probably influential - simply wouldn't fit through the doorway.  I think he's bigger than the whole house!)

I toyed with and discarded a number of ideas before I came up with my tiny glampunk bird. (Yes, I know really he should be steamglam - it's the punk that's been replaced with glamour not the steam bit - but it's just not as good as a word!)


Quite simply, he's one of the tiny bird stamps from the 7 Gypsies Conservatory set, stamped in Coffee Archival onto some card.

I then "coloured in" the rest of him with Liquid Leaf before sticking on some carefully selected watch parts to recreate the whole shape of the bird.


Now to get him to perch in his doorway.  I couldn't glue him straight to the wall, he would just blend in to the background and get lost.  No, he had to sit forward on the perch and balance there - hmmm...


Solved with a straw (and quite a bit of strong language whilst gluing).  I cut the straw to the right length, gave it a coat of Liquid Leaf so that the visible bit would still look gorgeous, and then glued it to the back of the inside wall and to the bottom of the doorway.


My bird then had to be glued to the tip of the straw and to the perch - precarious work, patience and quite a bit of Glossy Accents required - but, again, so worth it, I think!


And my customary tree really is the perfect place to display this particular project - I think it looks right at home...

I hope you've enjoyed visiting my Glampunk Birdhouse.  I've had a ball with these projects for Calico Crafts, and I'm so grateful to Helen and Louise for offering me the opportunity to Guest Design for them.  And thanks, of course, to you too for taking the time to stop by.


Ingredients, all available from 
Calico Crafts - click on the link to find the product:
Birdhouse
Americana Acrylic Paint - Indian Turquoise, White Wash, Burnt Umber, Burnt Sienna
Vintage Letters Paper Pack 6x6
Treasure Gold Liquid Leaf - White Fire
Treasure Gold Gilt Wax - White Fire
Steampunk Watch Parts and Findings
DecoArt Decorating Paste
Idea-ology Sprocket Gears
7 Gypsies Conservatory Clear Stamps
Glossy Accents

I'd like to enter this for the inaugural challenge at the very exciting new Steampunk Challenge created by SanDee and die amelie, where the theme for this month is Steampunk Cuckoo Clock... in the 3D category.  I'm no ornithologist, but I'm going to stick my neck out and claim he's a cuckoo!!
Country View Challenges are playing Pick and Mix for their inaugural challenge - pretty much Anything Goes!
At Crafty Emblies the Altered Art challenge this month is Wings (only one is visible, so I hope it'll count!)
And Simon Says Stamp's current challenge is Anything Goes

“How is the birdhouse coming along, Charlie Brown?"
"Well, I'm a lousy carpenter, I can't nail straight, I can't saw straight and I always split the wood... I'm nervous, I lack confidence, I'm stupid, I have poor taste and absolutely no sense of design... So, all things considered, it's coming along okay!”
From Peanuts by Charles M. Schulz

Tuesday, 19 February 2013

Who would have thought...


Hello everyone... I just want to say thank you so much for your visits and feedback over the last week or so of crazy full-on posting.  It makes a world of difference having you along for the ride.

I'm back with a tag today inspired by a new Nicecrane Designs release, Steampunk Girls.  The fabulous Buttons shared some brilliant cards recently using the same set of digital images, plus one other.  Do check them out - they are completely fantastic.

Buttons (a.k.a. Jenny, but she'll always be Buttons to me!) challenged us to work out what caption we would use with these great images.

Funnily enough, I'd already planned a caption for mine, inspired by a visit to another brilliant crafter's blog - Alie Hoogenboezem de Vries (and isn't that just a name to conjure with?!).

Amongst her amazing art she'd shared a badge she found on Pinterest with a sentiment I think most crafters will recognise.

I tried to find the post again, or even the original pin so that I could get the wording right and give the credit where it's due, but had no luck... so I've stamped it out as I remember it.


With this tag I'm back on the watercolouring with Distress Stains.  I did this for quite a lot of my PaperArtsy samples and, to be honest, I could've sat there all day colouring in those JOFY flowers...

For some reason I find it immensely relaxing: splodge some stain on the craft mat, pick it up with a water brush, and play!


The stains blend so beautifully, and it's so easy to blot away colour if you've used too much, or add water through the brush to dilute the tone.

Because I'd printed out these images they weren't on watercolour paper, so there was some getting used to the different response of the stains on the surface, but that's all part of the fun.


I loved playing with my favourite blues, greens and turquoises to create all the glass tubes, jars and implements.


I certainly would never have imagined a year ago that crafty stash would have taken over my life and my room quite so completely... so I fell in love with these images immediately.


There's a speculative look in her eye as she looks at all that exciting equipment that I absolutely recognise - it's how I feel when I'm looking at crafty stash online (or, even more dangerously, in real life), and the thought running through my head is: "Ooh, now just think what I could do with that!"


And then the absorbed look as she waits for some reaction to occur reminds me of how the hours just slip away from me as I play with crackle or embossing or all the other potions and techniques, exploring their possibilities.


Even though I love my new Hero Arts alphabet, I had to resort to my trusty £1 set for the punctuation marks... no punctuation in the Hero Arts set - they choose instead to give you a tiny flower and a tiny dragonfly - yeah, cute, but come on!


I used Distress Stains in Pumice Stone and Stormy Sky to dye some seam binding to go on the top of the tag, tying multiple bows in differently coloured bits of ribbon.


After all the "watercolouring" was done, I cut the images out using the mini-Baroque die (holding my breath, trying to position it so that I didn't chop off bits of the image).

And I cut a label to stamp the quote onto.  This and the embossed background of the tag were inked with Pumice Stone and Stormy Sky Distress Inks to tone in with the colours of the images themselves.

And that was pretty much that.

The images from Nicecrane are so fabulous, and so detailed, that I really wanted to let them speak for themselves.  If you'd like to have a play you'll find the set here.

There are three more great cartoons in the set, as well as a great new male steampunk set... 


And there are lots of other amazing images available, so do have a browse while you're there.


A scientist in his laboratory is not a mere technician: he is also a child confronting natural phenomena that impress him as though they were fairy tales.

Be less curious about people and more curious about ideas.

Nothing in life is to be feared, it is only to be understood. Now is the time to understand more, so that we may fear less.
All quotes by Marie Curie