Hello all! It's been a while since I've managed to put in an appearance over at the PaperArtsy blog, but I'm delighted to be there today with some puddles of paint.
It's a slight hop out of kin project for me... but it was one of those ideas which just sprang into my mind and then wouldn't leave me alone until I'd managed to turn it into reality. I hope you'll have time to hop over and check it out. As far as I'm concerned, there's almost nothing better than watching paint dry!
Thanks for stopping by today, and for hopping, and I'll see you again soon.
I could watch you watching paint dry, and I still wouldn’t be bored.
From The Deal by Elle Kennedy
If you're willing to hop over to PaperArtsy to see the full project, I'd love to share this at the Simon Says Stamp Monday Challenge. Given it's created in a reverse canvas frame, I think it should fit in perfectly with this week's Frame It theme.
I'm travelling into a new way of working, a new country, a new language, and a new hobby which I'm passionate about. Come with me for some of the journey...
Showing posts with label gel medium. Show all posts
Wednesday, 29 May 2019
Sunday, 24 December 2017
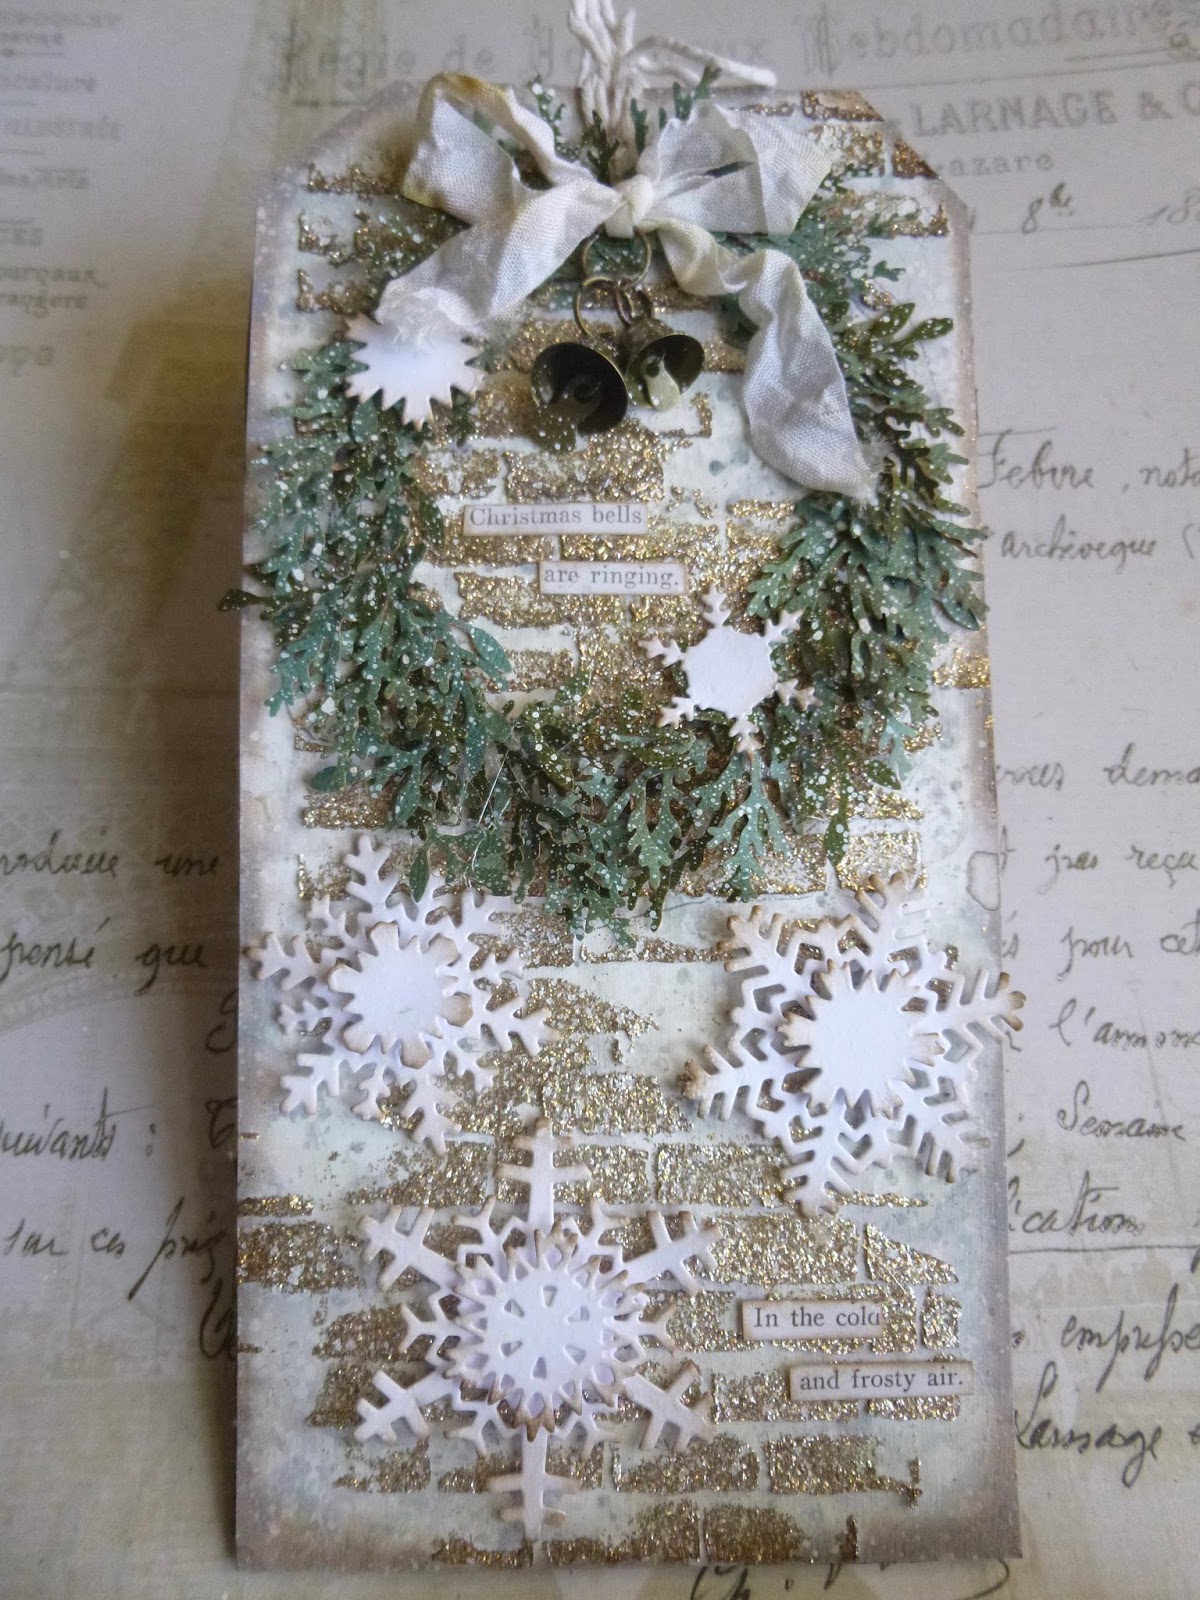
Christmas Bells Are Ringing
Hello all! We've reached Tag 10 of the Funkie Junkie 12 Tags of Christmas and, more importantly some would say, it's Christmas Eve.
So this tag comes with my very best wishes to you all for a peaceful and joyous Christmas, however you celebrate it. The Christmas bells are ringing tonight.
(Oh, and if you like the jingling bells, there's lots more Christmas music going on over at Cestina's Dollshouses.)
To suit the occasion, there's more glitter on this tag than you've probably had in the whole history of Words and Pictures.
I'm happy to say, though, that the glitter is firmly in place. There's no chance of this getting everywhere - it's entirely hardened and built in to my distressed brick wall background.

My main inspiration was the wreath hanging on the wonderful Tag 10 created by the Funkie Junkie, a.k.a. Linda Coughlin.
I combined that idea with my memory of the garland wreath from one of Tim Holtz's 12 Tags, back in December 2015.
Then I thought if I was going to have a Christmas wreath, I might as well hang it on a wall so that's how this tag came to life!
Thanks to the gleaming glitter, this one is very different in different lights, which is why you're getting two main photos of it.
I haven't the time just now to flick from one to the other trying to work out which one is the best. Also, it's Christmas Eve - so you can have both in your stocking!

I don't have any glitter texture paste like the one Linda used, so I decided to make my own. I mixed some of the Vintage Platinum Distress Glitter Dust into some semi-gloss gel medium and used that with the TH bricks stencil.

The background for the bricks is some smooshed DI in Pumice Stone and Frayed Burlap.
Since the gel dries clear, you end up with this fabulously glamorous brickwork... not a look I'd go for most of the year, but I don't mind a touch of glitter at Christmas... especially since this glitter is not going to come off every time you brush past it.
The wreath itself is made with punched greenery (TH punches) in several colours of card. Once you've punched them all (you can see a few in the photo above), it's just a question of alternating, scrunching, layering and gluing.
I followed Tim's instructions pretty much to the letter, so you can find all the details in his inspiration post here.
I cut plenty of snowflakes from the Mini Snowflakes Thinlits...
... and layered them up with padded tape...
... with a touch of inking around the edges.
I thought of adding Distress Dry Glitter to the snowflakes too but decided that, in fact, there is such a thing as too much glitter - for me at any rate!
The Idea-ology bells are hung on to the crinkled bow with jump rings.
And the white seam binding used to make the bow had just a dash of Vintage Photo DI to give it a golden glow to match the bricks.
The bells even make a nice jingling noise when you move the tag!
And I found some Christmas Clippings words just right for the occasion - not only to mention the bells...
... but also to include the falling snowflakes. I do enjoy finding the right words, as you know!

So that's my weathered wall, decorated with a wreath, though pretty sparkly and festive all by itself in truth, especially when the light catches it.
This tiny snippet of video - a little Christmas extra - is late at night and pre-splatter, but I wanted to capture the gleam of the home-made glitter paste for you.
Thanks so much for stopping by, and a very Merry Christmas to all!
Christmas Eve was a night of song that wrapped itself about you like a shawl. But it warmed more than your body. It warmed your heart...filled it, too, with melody that would last forever.
Bess Streeter Aldrich
I'd like to share this as my Tag 10 in the Funkie Junkie 12 Tags of Christmas, sponsored by the Funkie Junkie Boutique
Friday, 1 September 2017
Haunted Jars
Hello all! I'm very happy to be hosting this month's A Vintage Journey challenge. We're looking for Altered Art, and I can't wait to see the journeys you go on with this one. As always, the Creative Guides have been busy making inspiration projects to get your creative engines started, and I think they've outdone themselves yet again. Do hop across to A Vintage Journey to see what everybody else has been up to... after you've taken a look at my offering, of course!
As you'll know if you saw my sombre ATCs I've been a little low on mojo lately. I started on a couple of altering possibilities which didn't really go anywhere, before deciding to simplify things, and to borrow the ideas from my own Candlelit Foliage jars to create some Halloween lanterns. There's nothing quite so eerie as the flicker of a candle flame as the night draws in...
They're really very similar to the Candlelit Foliage jars. There's a detailed how-to for those over at last month's Destination Inspiration post, so I won't go through all the steps again. I kept things even simpler this time. Since these new Tim Holtz Thinlits are so fabulous in themselves, I didn't feel they needed much help from me!
I know we're a little early for Halloween but, as you'll see over at A Vintage Journey, I'm not the only one who got tempted in that direction. It must be the distinctly autumnal weather that's fooled us into thinking All Hallow's Eve is around the corner.
I'm in love with the intricate detail on these dies. Just look at the lacy cuffs on the glorious witch, for instance...

... or the gnarled twigginess of her broom. I'm not surprised the cat is alarmed!

The large cobweb is almost unbelievable in its delicate fragility.

Okay, you have to do quite a bit of poking to get all the pieces out, but it's completely worth it as far as I'm concerned.

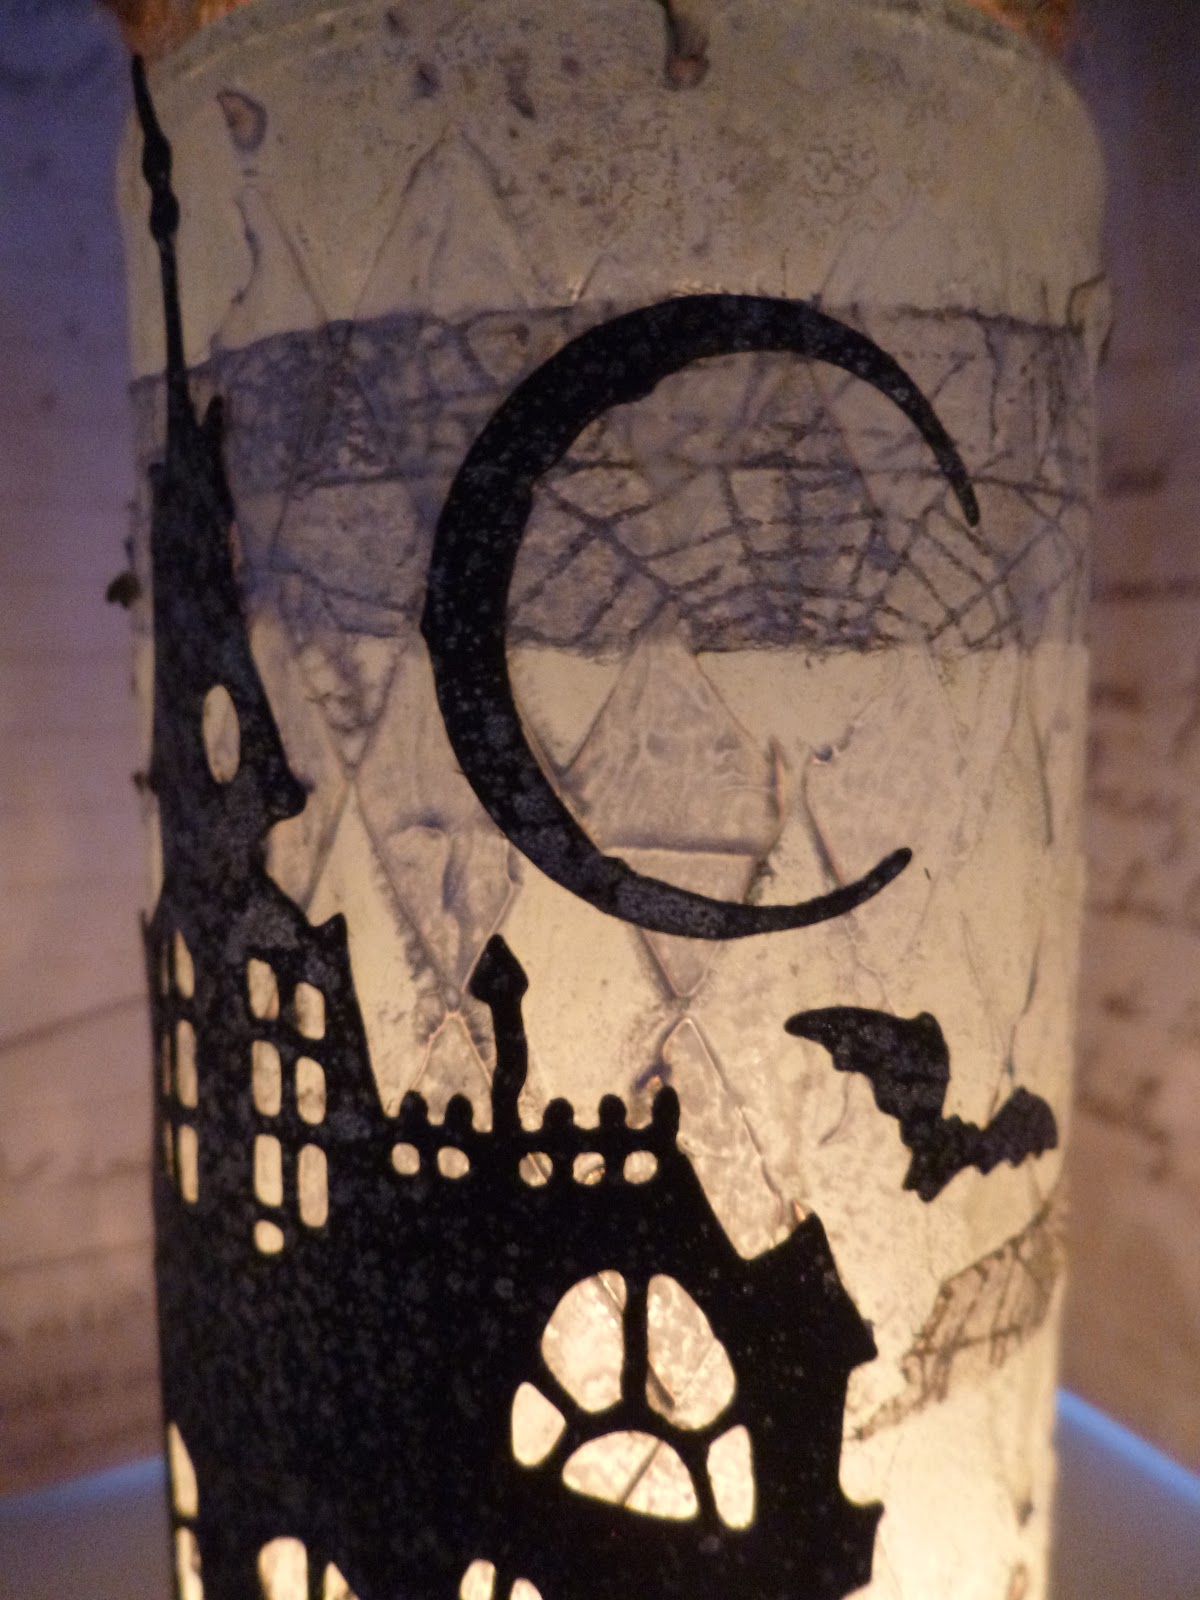
The haunted house is one which I think might get some usage at other times of the year.
I love the candlelight shining through the windows.

And the shadowy crescent moon and the bat silhouettes are the perfect accompaniment.

You've already seen the crows in action on my Autumnal Oxide Journal. There, they were just being nicely autumnal, but now they've got their Edgar Allan Poe spook on!

And it's the only one of the set that has a different silhouette to enjoy around the other side...

... as well as following the migrating birds in between.

(Mind you, the little scene with the witch and the cat does go much of the way round the tall slender olive jar, to be honest - stars and all.)

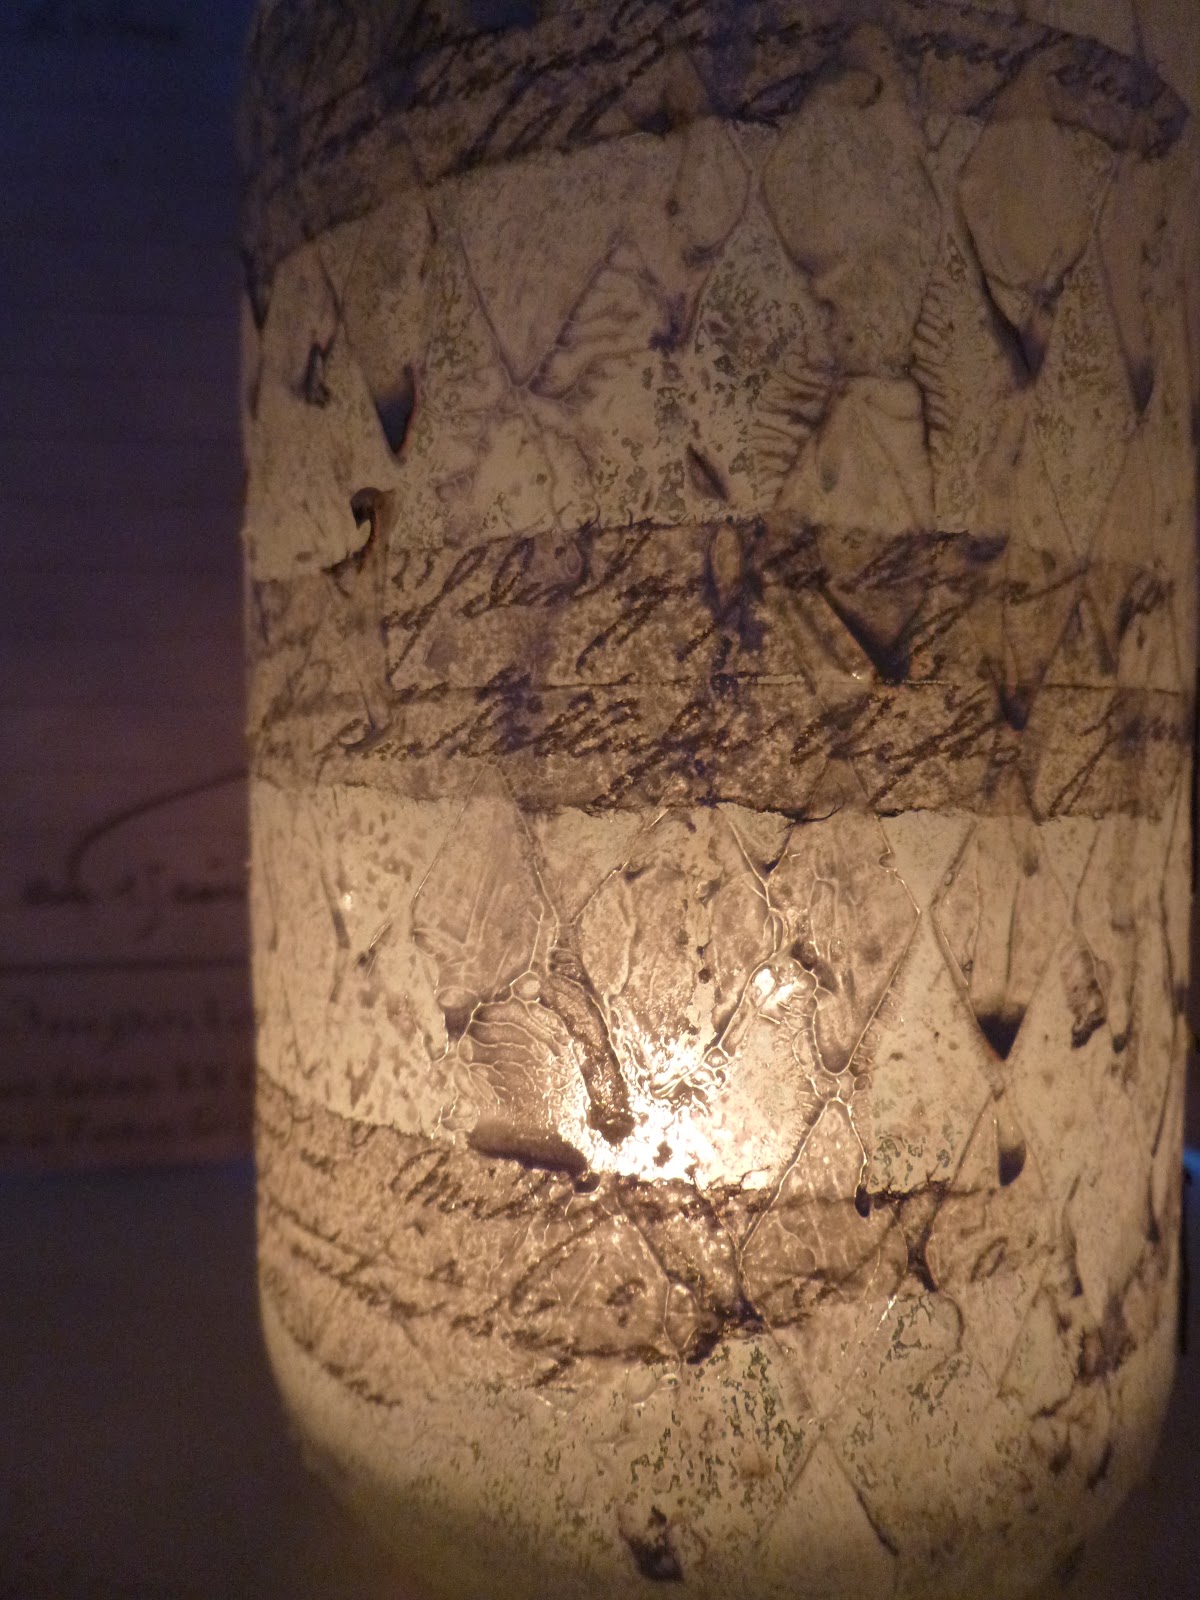
Just as with the foliage lanterns, I created the background detail using the Harlequin stencil, this time with gel medium for the transparent texture.

I selected the spookier tissue tapes to add extra interest. There are some cobwebby strips, like clouds drifting across the sky...

... and some old-fashioned script, spelling out a spell or charm, perhaps.

As I said, it's only the crow-jar which has die-cuts all the way round. With the others, you can turn them the other way and just enjoy the textured candlelight if you so desire.

I used a little more of my discoloured Pumice Stone Distress Spray than I did on the foliage lanterns (I think I've mentioned before that it has aged with a sort of greenish tinge).
I like how it gives the jars a slightly more mottled, murky look.

As you can see, I've given my black card a spritz or two of the same DecoArt Shimmer Mister as I used on the jars themselves.
It tickles me that you can't really tell whether it's a silvery moonlit gleam or a hint of mouldy decay!

Some simple twine finishes them off - nothing to distract the eye too much.
So those are my haunted jars. I think they'll look great on the windowsill or on a festive Halloween table. I prefer my Halloween eerie rather than full on gory, so these definitely fit the bill for me.
I do hope you'll hop over to A Vintage Journey to see the incredible altered artwork from my fellow Creative Guides, and I can't wait to see what you'll come up with for this month's Altered Art challenge. See you there soon.
Oh, and I'll be back in just a few hours with a really exciting piece of news, so I hope I might see you again even sooner!
It is the middle ground between light and shadow, between science and superstition, and it lies between the pit of man’s fears and the summit of his knowledge. This is the dimension of imagination.
From the introduction to The Twilight Zone by Rod Serling
As you'll know if you saw my sombre ATCs I've been a little low on mojo lately. I started on a couple of altering possibilities which didn't really go anywhere, before deciding to simplify things, and to borrow the ideas from my own Candlelit Foliage jars to create some Halloween lanterns. There's nothing quite so eerie as the flicker of a candle flame as the night draws in...
They're really very similar to the Candlelit Foliage jars. There's a detailed how-to for those over at last month's Destination Inspiration post, so I won't go through all the steps again. I kept things even simpler this time. Since these new Tim Holtz Thinlits are so fabulous in themselves, I didn't feel they needed much help from me!
I know we're a little early for Halloween but, as you'll see over at A Vintage Journey, I'm not the only one who got tempted in that direction. It must be the distinctly autumnal weather that's fooled us into thinking All Hallow's Eve is around the corner.
I'm in love with the intricate detail on these dies. Just look at the lacy cuffs on the glorious witch, for instance...
... or the gnarled twigginess of her broom. I'm not surprised the cat is alarmed!
The large cobweb is almost unbelievable in its delicate fragility.

Okay, you have to do quite a bit of poking to get all the pieces out, but it's completely worth it as far as I'm concerned.

The haunted house is one which I think might get some usage at other times of the year.
I love the candlelight shining through the windows.
And the shadowy crescent moon and the bat silhouettes are the perfect accompaniment.

You've already seen the crows in action on my Autumnal Oxide Journal. There, they were just being nicely autumnal, but now they've got their Edgar Allan Poe spook on!

And it's the only one of the set that has a different silhouette to enjoy around the other side...
... as well as following the migrating birds in between.

(Mind you, the little scene with the witch and the cat does go much of the way round the tall slender olive jar, to be honest - stars and all.)
Just as with the foliage lanterns, I created the background detail using the Harlequin stencil, this time with gel medium for the transparent texture.
I selected the spookier tissue tapes to add extra interest. There are some cobwebby strips, like clouds drifting across the sky...
... and some old-fashioned script, spelling out a spell or charm, perhaps.
As I said, it's only the crow-jar which has die-cuts all the way round. With the others, you can turn them the other way and just enjoy the textured candlelight if you so desire.
I used a little more of my discoloured Pumice Stone Distress Spray than I did on the foliage lanterns (I think I've mentioned before that it has aged with a sort of greenish tinge).
I like how it gives the jars a slightly more mottled, murky look.

As you can see, I've given my black card a spritz or two of the same DecoArt Shimmer Mister as I used on the jars themselves.
It tickles me that you can't really tell whether it's a silvery moonlit gleam or a hint of mouldy decay!
Some simple twine finishes them off - nothing to distract the eye too much.
So those are my haunted jars. I think they'll look great on the windowsill or on a festive Halloween table. I prefer my Halloween eerie rather than full on gory, so these definitely fit the bill for me.
Oh, and I'll be back in just a few hours with a really exciting piece of news, so I hope I might see you again even sooner!
It is the middle ground between light and shadow, between science and superstition, and it lies between the pit of man’s fears and the summit of his knowledge. This is the dimension of imagination.
From the introduction to The Twilight Zone by Rod Serling
Friday, 4 August 2017
Sunshine Watercolour Dwellings

Hello all! It's time for the new challenge at A Vintage Journey. The theme chosen by our fabulous host, Amanda, is Watercolour, so I wasn't going to miss that one!
As most of you know, I've been experimenting and dabbling in watercolour this year, but for this I've been using them in a more mixed media kind of way, and here's what I came up with.
If you've been visiting recently, you'd be forgiven for thinking that I only ever deal in blues and browns and soft neutrals.
Not so - there have been occasional departures from the neutrals, blues and greens in the past (try this, or this, or this, for instance!), and I've done it again for this project.
I'm always inspired by vivid colours - Andrea Ockey Parr, Marjie Kemper, and our own Tracy Evans all use brights in ways that really excite me, with a freshness and a life and a positive energy. And when I have dabbled in the past, it's often been to this contrasting colour world of pinks/reds/oranges.
Believe it or not, this is made with just two watercolour paints... Daniel Smith's Quinacridone Lilac and Aussie Red Gold. Then of course there's some gesso and white acrylic paint involved too.
But one of my chief delights with the watercolours, as with inks, is watching how they blend and play with one another, and the unexpected tones and shades which appear as a result of combining pigment with another pigment with water.
For these tiny houses, I started by adding gel medium through the Tim Holtz stars stencil onto a 12x9 inch sheet of watercolour paper.
Once the gel was fully dry, I started to add washes of colour, enjoying all those moments where the water and the pigment dance together.
It makes me so happy... the splatters and edges and washes and brilliant clashes of colour which make the senses tingle.
Of course when it dries, watercolour always becomes much paler, so I went in with a second application (a glaze, in official watercolour terms, though a glaze is very different in mixed media/acrylic world).

I'd fallen in love with the full on vivid colour tones, so that's what I wanted to build with the extra layers.
Once I liked the effect, I ran the sheet through the BigShot with Tim's Tiny Houses die a couple of times to get my walls.
I stamped the tiny text from the Stuff 2 Say set in Snowflake Fresco paint. I generally just "paint" a bit of the paint onto my craft mat and press the stamp into that to get my impression.
I used a couple of differently sized lids to add gesso circles... one was from a mini jam jar which appeared on my craft desk while I was away (!?), and one was a Distress Paint lid. And of course there's some white spatter too.

For the roofs, I cut some corrugated cardboard with the die and applied a couple of coats of gesso and one of watercolour ground. I love this stuff - it turns any surface into a watercolour-suitable surface, and it has a lovely grainy quality which gives great textural detail.
I added spatters and splotches of my same two watercolour paints - some pure and some mixed for a nice range of colour tones.
And I sponged up some of the spare paint washes to blend onto the edges of the roofs.

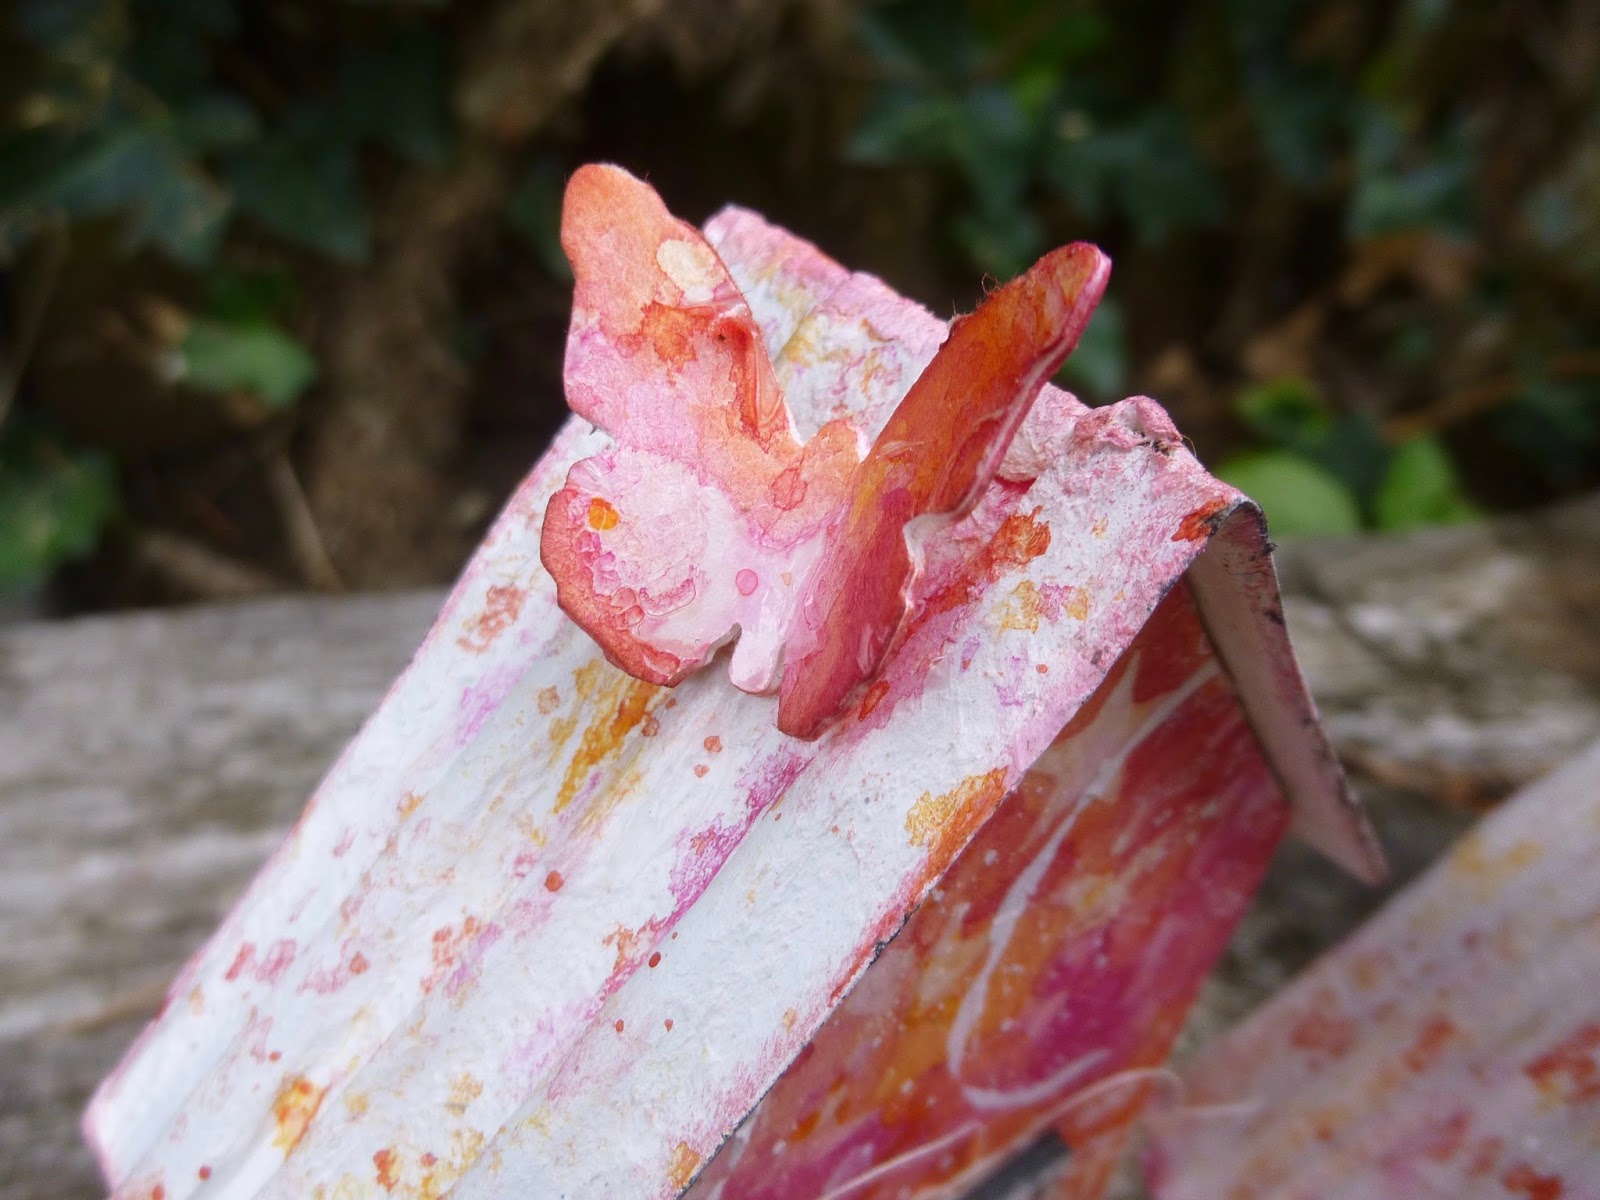
I used Tim's large butterfly punch to punch out a few butterflies from some of the leftover starry sheet.
It's symmetrical enough that you can glue two butterflies back to back.
That means you get a) colour on both sides and b) a much sturdier butterfly.
(I know that butterflies aren't meant to be sturdy, but it does help when they're perched on a rooftop.)
Now's the time when going for the really vivid watercolour tones pays off - the white is all the more dramatic against the brights.
Some wild threads add extra movement, tucked behind my two selected Idea-ology Quote Chips.

I do feel so lucky to be able to spend my life creating art - whether in my working life with words, or here on the blog with pictures (and some words!).
As a final finishing touch, I added some tiny wooden Scrapiniec stars (you also saw them in action along with some Neutral Blues very recently).
They've had a touch of the watercolour ground for texture. I love how they echo the gel resist stars in the background.

And if you just want the full-on colour effect without any interruptions you can take a trip round to the back of the houses!
Thanks so much for stopping by today. I hope you've enjoyed this trip to the other side of the colour wheel... I know I have!

If these sunshine watercolour dwellings haven't already fired your imagination to play with Watercolour this month, you'll find lots more inspiration over at A Vintage Journey where my fabulous team-mates have once again provided an incredible range of glorious projects for your delectation.

There's a prize voucher on offer from the brilliant Craft Obsessions online store for one random winner, and you might be picked as one of our Pinworthies by the Creative Guides. We hope we'll have the pleasure of your company on the road some time this month. Happy crafting all!
The nature of watercolour... Its unpredictability, its sensuousness, the textures it seems to make of its own accord, and its legendary luminosity are some of the qualities often lauded.
Rachel Rubin Wolf
I'd like to share this at Stamps and Stencils where they are hosting a Technique School for this month's challenge. You need to share at least one process photo - mine are about using using watercolour paints and watercolour ground in mixed media work
At That's Crafty Challenges they are looking for Anything But Cards - I'm always happiest when it's not a card!
And I'd like to play along with the August Watercolour Challenge over at Happy Little Stampers
Subscribe to:
Posts (Atom)