
Given that, this seemed like the perfect Encore post to share while I'm working by flickering candlelight all week in the theatre. It's some altered jars made into candle lanterns for a Destination Inspiration post at A Vintage Journey back in August 2017. Here's what I wrote back then...
_______________________________
Hello all, Alison here from Words and Pictures, arriving at Terminal 2 of Destination Inspiration.
As a reminder, here's what's in the travel bag this month:
As a reminder, here's what's in the travel bag this month:
Product - texture paste
Technique - layers
Colour - neutrals
Substrate - glass
I have to confess I really enjoyed this one, so this is one of my long posts.
Cups of coffee at the ready? Then off we go... here are my foliage lanterns.
Cups of coffee at the ready? Then off we go... here are my foliage lanterns.

And here they are when they are candlelit from within.

Since the technique element this month is all about layers, I have to share at least some of them with you.
I started with my plain glass jars (always happy to recycle a glass jar).
I started with my plain glass jars (always happy to recycle a glass jar).

First layer for jar one was some Transparent Gloss Texture Paste applied through a harlequin stencil.
Of course the paste goes on opaque, and then dries to transparency.
Of course the paste goes on opaque, and then dries to transparency.

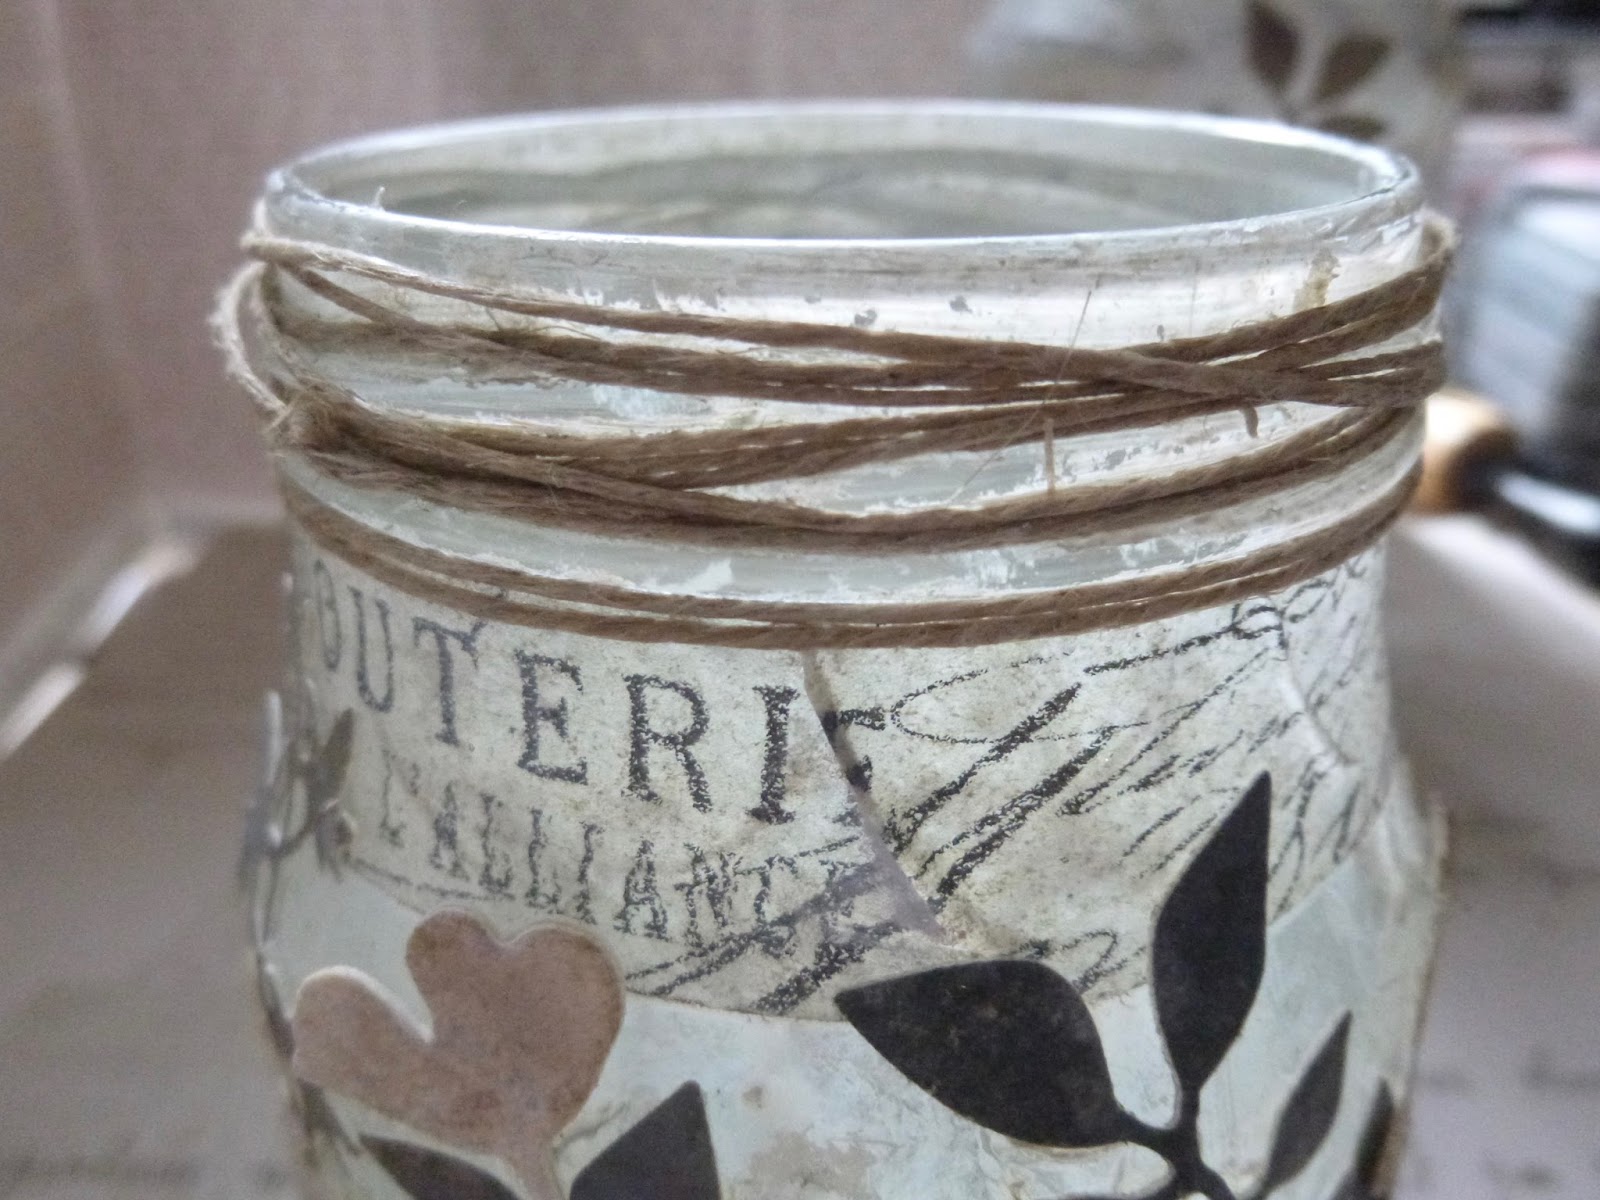
I was hoping that I'd be left with some clear "windows" for the candle to shine through. It didn't go quite according to plan in the end, but I like what I ended up with maybe even more so not to worry. Jar two had a layer even before the texture paste - some strips of tissue tape, which I thought would show through nicely.

And then the texture paste went over the top of the strips.

Jar one has its tissue tape around the neck instead. I quite like both looks!

At this point, I was enjoying the transparent texture over the transparent glass,
especially with the tissue tape strips showing through.
especially with the tissue tape strips showing through.

Next layer was some spritzing with the DecoArt Media Mister in White.

It's a shimmer mist, so you get a lovely soft mother-of-pearl effect. It didn't leave entirely clear windows (well, the gloss paste is no more of a resist than the glass underneath, of course) but I do like that the texture still shows.

And when the light hits it... wow!

I mopped up the excess shimmering white liquid onto some spare card - and that's going to come in handy very soon. The grid pattern you can see is from the internal structure of the cardboard I was using as my spray area - the texture printed as I was mopping up the spray.

Next I did a couple of spritzes with Pumice Stone and Old Paper Distress Sprays. It adds just a little extra depth to the texture, but it looked a bit grubby in places, so I finished off with another spritz of the Shimmer White.

While that was all drying thoroughly, I started inking up my mop-up card with subtle neutral tones of both Distress Ink and Distress Oxide. There's Pumice Stone and Iced Spruce and Vintage Photo.

Later on I blended on some Walnut Stain and Gathered Twigs, I think, with maybe some Black Soot thrown in for good measure in places. From that I started cutting lots of foliage using the Tim Holtz thinlits.
I loved these, even before I'd done anything with them!
I loved these, even before I'd done anything with them!

And I preserved the paler card for cutting some wildflowers.

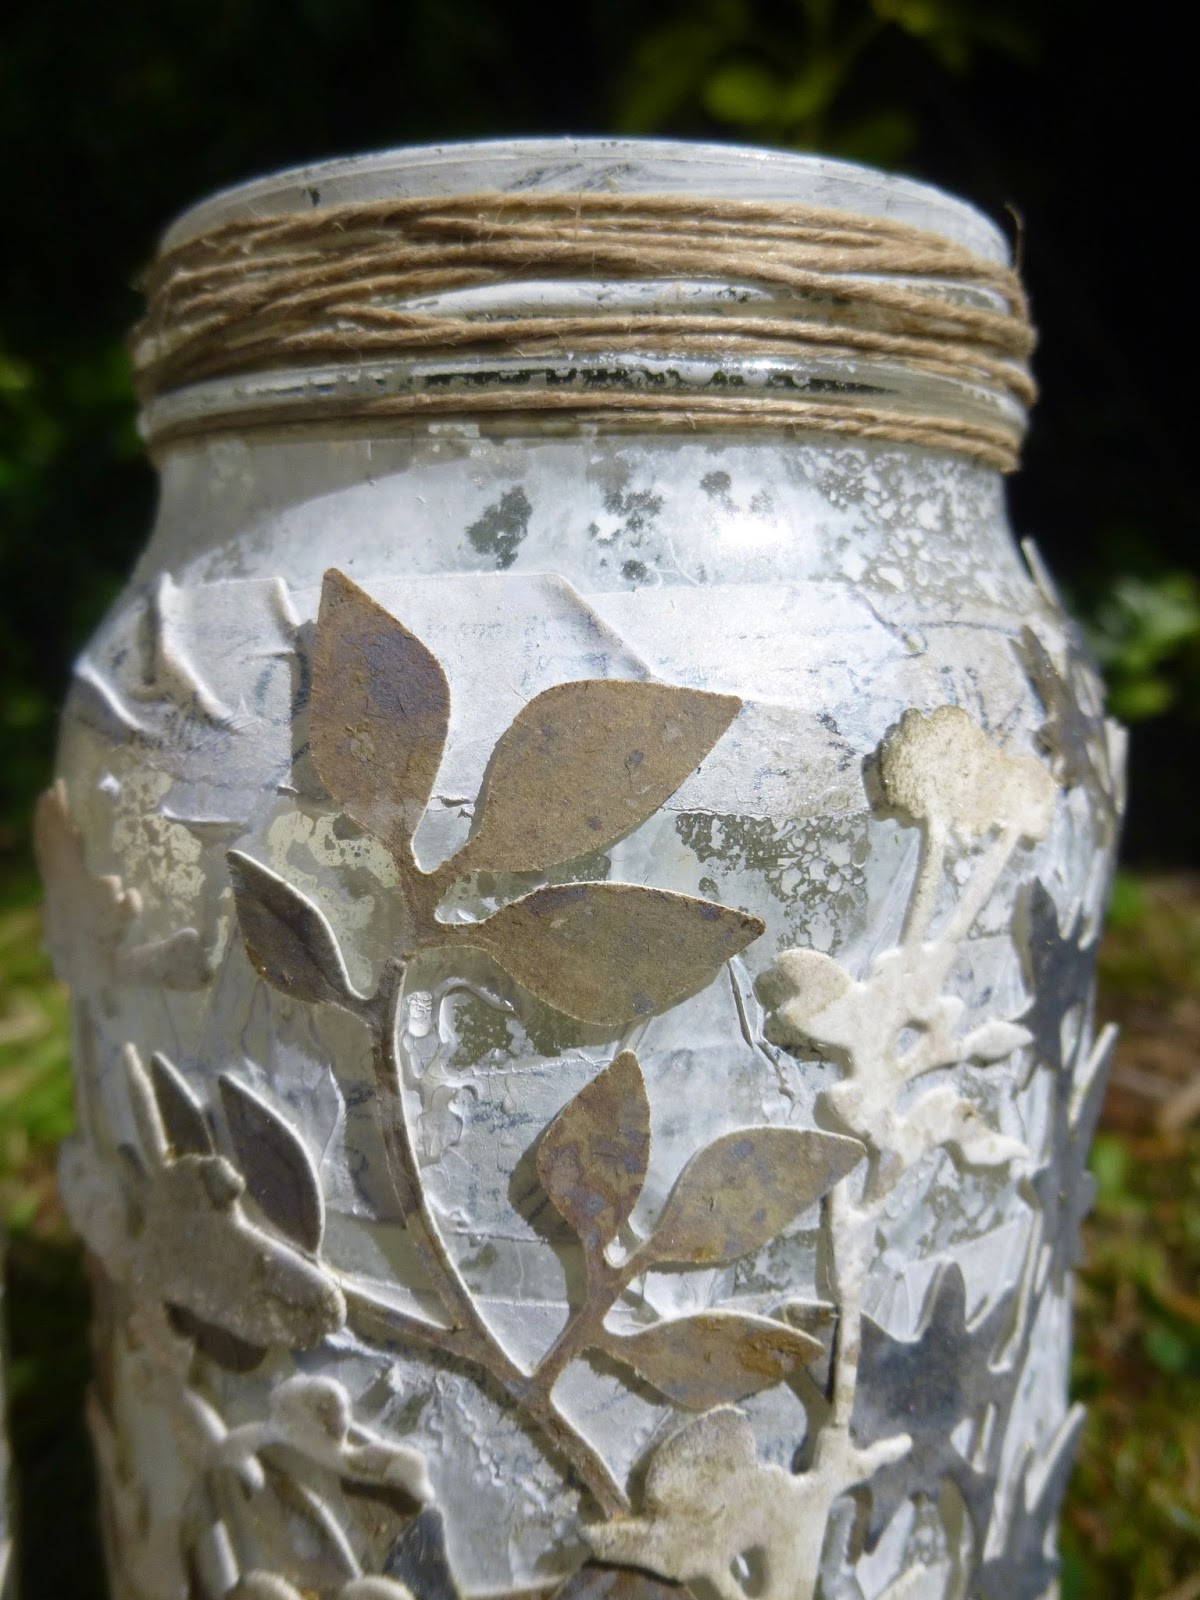
I started layering the foliage onto the jars from dark to light. Darker fronds and branches in the background...

... to the pale off-white wildflowers for the top layer.

(I always like to keep an eye on how things are going from the inside.)

At least, I thought it was the top layer, until I decided that I needed some words.

So the actual top layer is formed by some of my quote stamps from EAB02 Darkness and Light.

They're stamped in Ground Espresso (Archival version) on some more of the inky card which gives a lovely soft effect.

And I mounted them on padded tape, so that they stand a little way proud of the foliage,
giving that top layer a touch more dimension.
giving that top layer a touch more dimension.
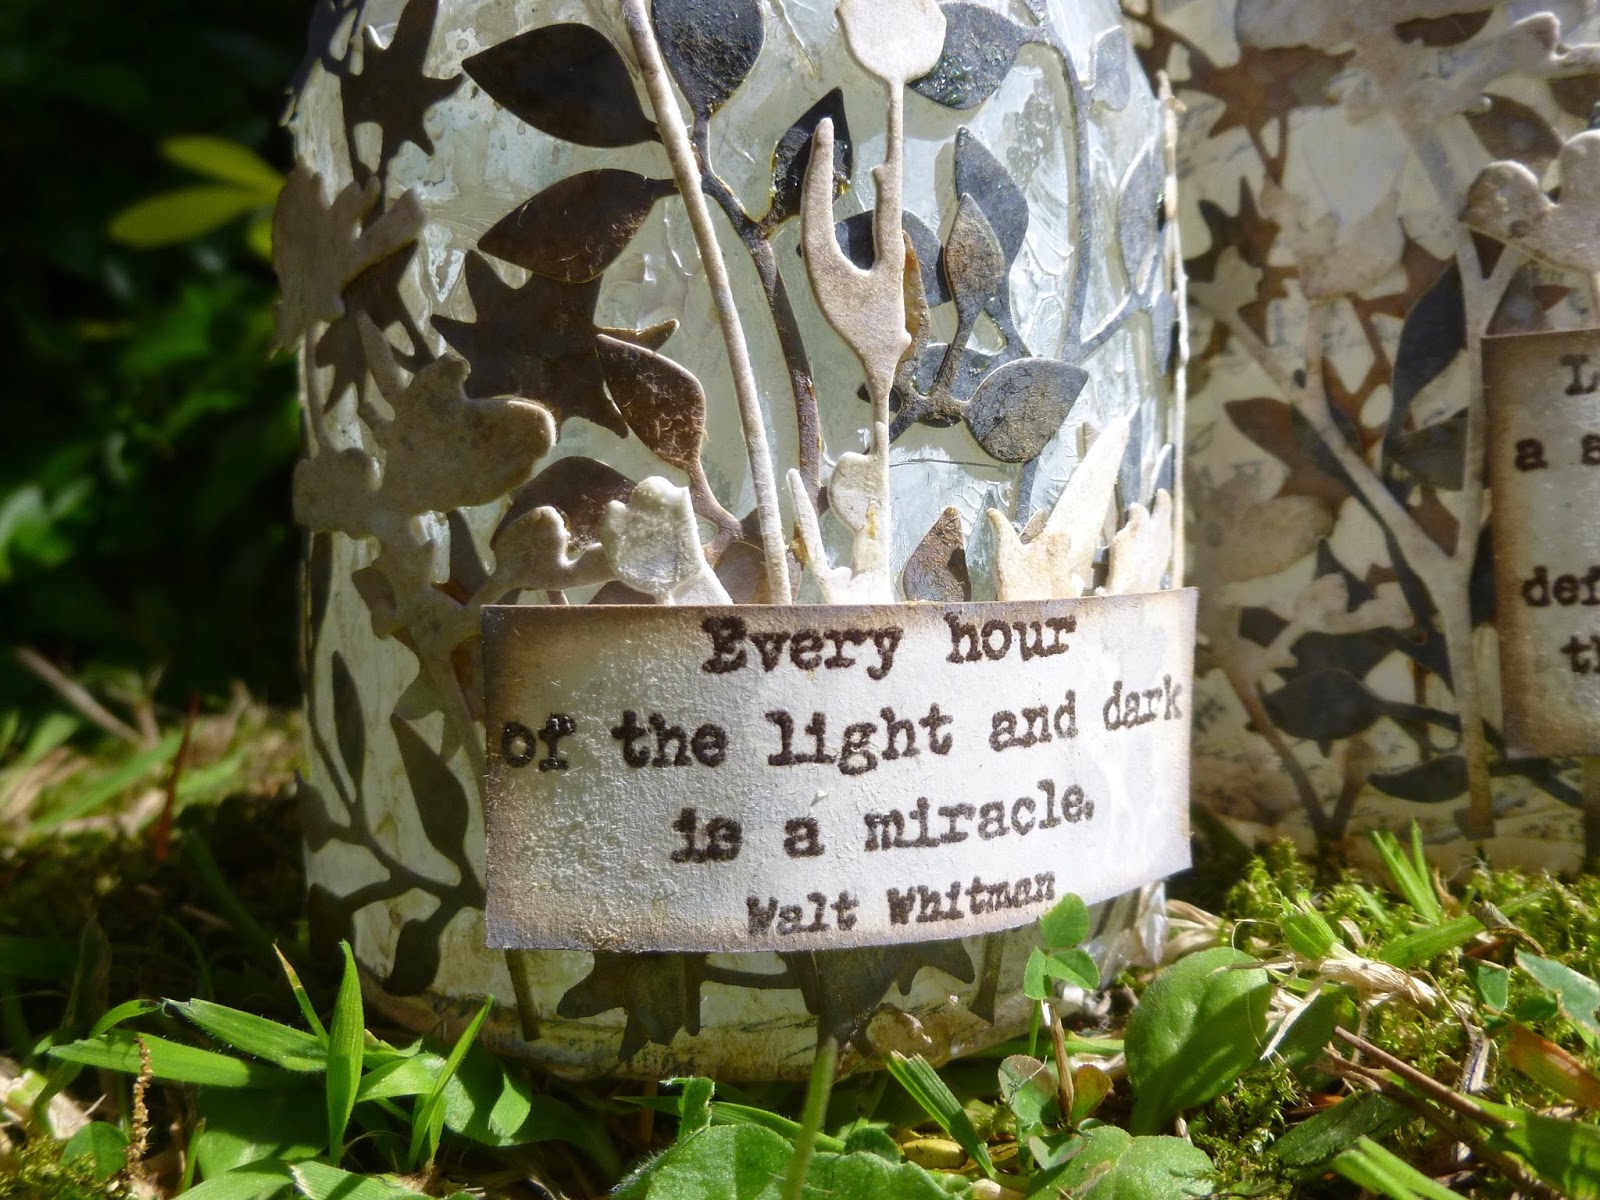
Some simple twine around the grooves at the tops of the jars finishes them off.
It's another tricky photography challenge... these change so much in different lights.
In full daylight, with the light falling on them, they look almost like stone.

When they were on my desk, with the daylight falling inside, they were already glowing beautifully.

And when you put the candles in and light them in the dark, the foliage turns into glorious silhouettes.

If you want an altogether simpler look, you can turn them around
and just have the mottled harlequin texture and subtle tissue tape text.
and just have the mottled harlequin texture and subtle tissue tape text.

Also pretty by candlelight...

And when they're lit both within and without, then you get pretty much the best of both worlds...

... as seen in the candlelit photo near the start of the post.

__________________________________
Thanks so much for stopping by today. I hope you enjoyed revisiting these glowing jars. I've already done one variation on this technique to create some Haunted Jars, and now I'm thinking I need to create some new ones with my new Magic & Wonder set - there are quotes there which will be just lovely by candlelight!
I don't know how much time I'll have for visiting over the next few days, so for now I'll just wish you a wonderful week and hope to see you again soon, either here or elsewhere in Craftyblogland. Happy crafting all!
Thousands of candles can be lighted from a single candle, and the life of the candle will not be shortened.
Buddha
Encore Posts
Projects which made their first appearances elsewhere for Design Team duties or Guest Designer opportunities, but which only had a sneak peek here, are being gathered together in the pages of my virtual scrapbook while I'm busy.
As always, the Encore Posts are formatted differently from the regular ones, so that you can easily spot them. Please don't feel that you have to comment all over again!
19 comments:
These are stunning Alison! I loved seeing your process and that gorgeous texture!
Have a great week,
Alison xx
Loved seeing this project, love the harlequin texture coming through!
Beautiful projects Alison, so inspiring. This really makes me want to pull out some jars :)
Gorgeous , these are stunning Alison!
Alison they are stunning and definitely worth a second look! Love seeing them lit up. Anne xx
These are so pretty Alison, really good to see them again! A very good week to you too, Sue xx
I'm so sorry I've been MIA. FIRST...I got to see your stamps at Creativation and I even took pics of the booth and everything. I loved them all, and love to see them here and EVERYWHERE. Big congrats to you again. LOVE this lantern...what a great idea.
Such beautiful lanterns Alison. The decorations look so gorgeous and it's so lovely to see them again.
Hope all is going well at the theatre.
Fliss xx
I have no idea why this didn't show up sooner on my sidebar, because I seem to be quite late visiting, The layers and layers you created were incredible. I like how the light catches the jars differently from different angles. It's obviously difficult to photograph. I think the harlequin pattern shows better from the reverse side because I felt it got lost from the front side. Both jars turned out gorgeous and I'm glad you shared this post again, since I'd never seen it before. That old theater sounds incredible. I can only imagine what the play must look like without "modern" lighting.
Oh yes! These lanterns are definitely worth showing again Alison! I love the textures and the foliage and they look so beautiful when lit up! xx
I hope the technical rehearsals are going well Alison? I love the idea of the shows being done entirely by candlelight...how magical and special. Your jars are beautiful and magical too. Thank you for the step by steps and the layering effect looks fabulous x. So unique and absolutely beautiful x.
Gorgeous seeing again Alison, they are so wonderful also when lit !! Hugs, Dorthe
You have used some of my favourite die cut leaves and a favourite stencil (or stamp) is always diamonds. So obviously thee jars are a winner with me but I am not sure I would be happy working by flickering light in a huge theatre. Unless there are a lot of other people around of course.
Stay safe (and don't get spooked)
Hugs, Neet xx
A beautiful review dear Alison, such a fantastic work with all the diecuts and lovely quots ,- I love the twine around the top , and the staines labels . Hope you are fine, dear friend. xoxo
Wow, the play sounds so magical! I bet the candlelight adds another dimension to the play, how wonderful to step back in time and experience this - amazing 😁. I'm loving your Haunted Jars too - beautiful! Wishing you a wonderful week! Hugs, Jo x
Absolutely gorgeous layers and the foliage and quotes are a perfect finishing touch! Magical!! Hugs, Chrisx
Recycling is always good and I'm loving What you've done with these jars. Thanks for showing us the process too. Happy creative week, Angela xxx
WOW Alison so beautiful ...
These are gorgeous Alison. I will have to figure out what I want to do first! Thank you!
Post a Comment