
What also helped was another creative Skype session with two wonderful crafting friends - Brenda (of Bumblebees and Butterflies) and Nikki (of Addicted to Art). For more than four hours on Friday we chatted and crafted, or created in companionable silence as we each got wrapped up in what we were doing. This is a long post, but then it was a long session - though it didn't feel that way. We were all astonished when we looked at the time at the end!
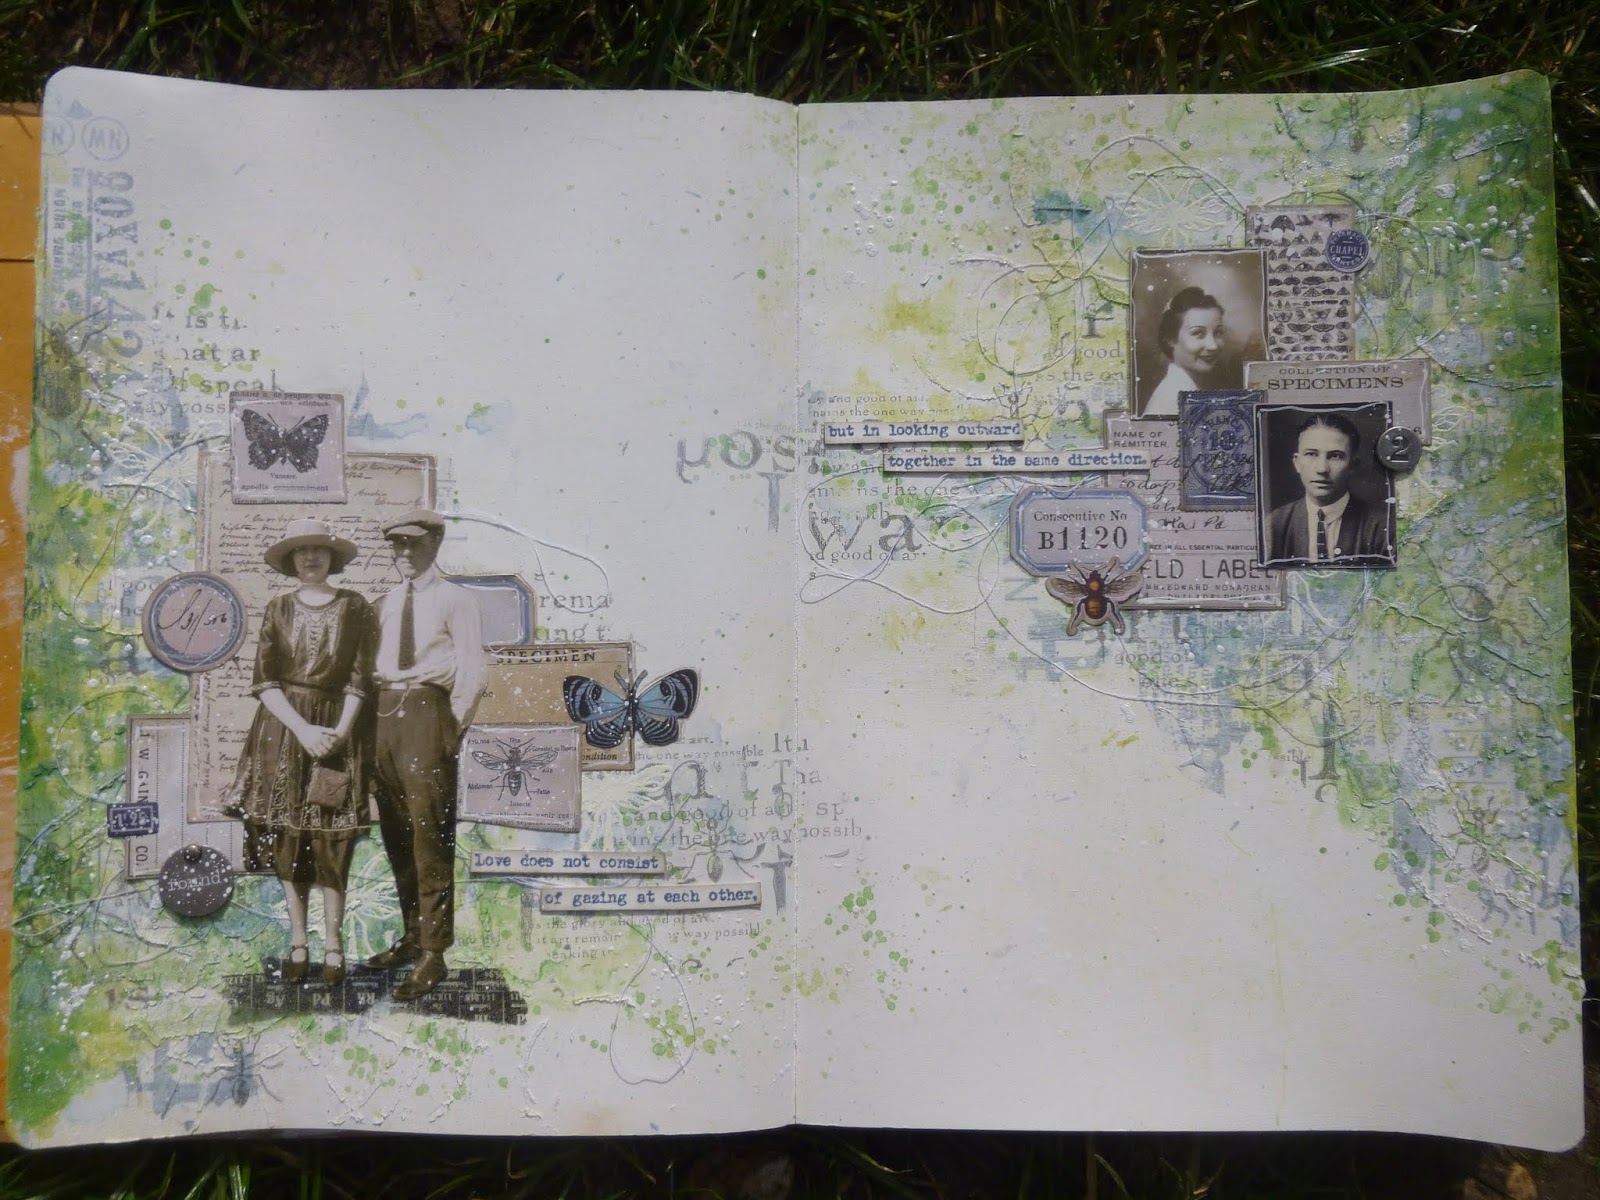
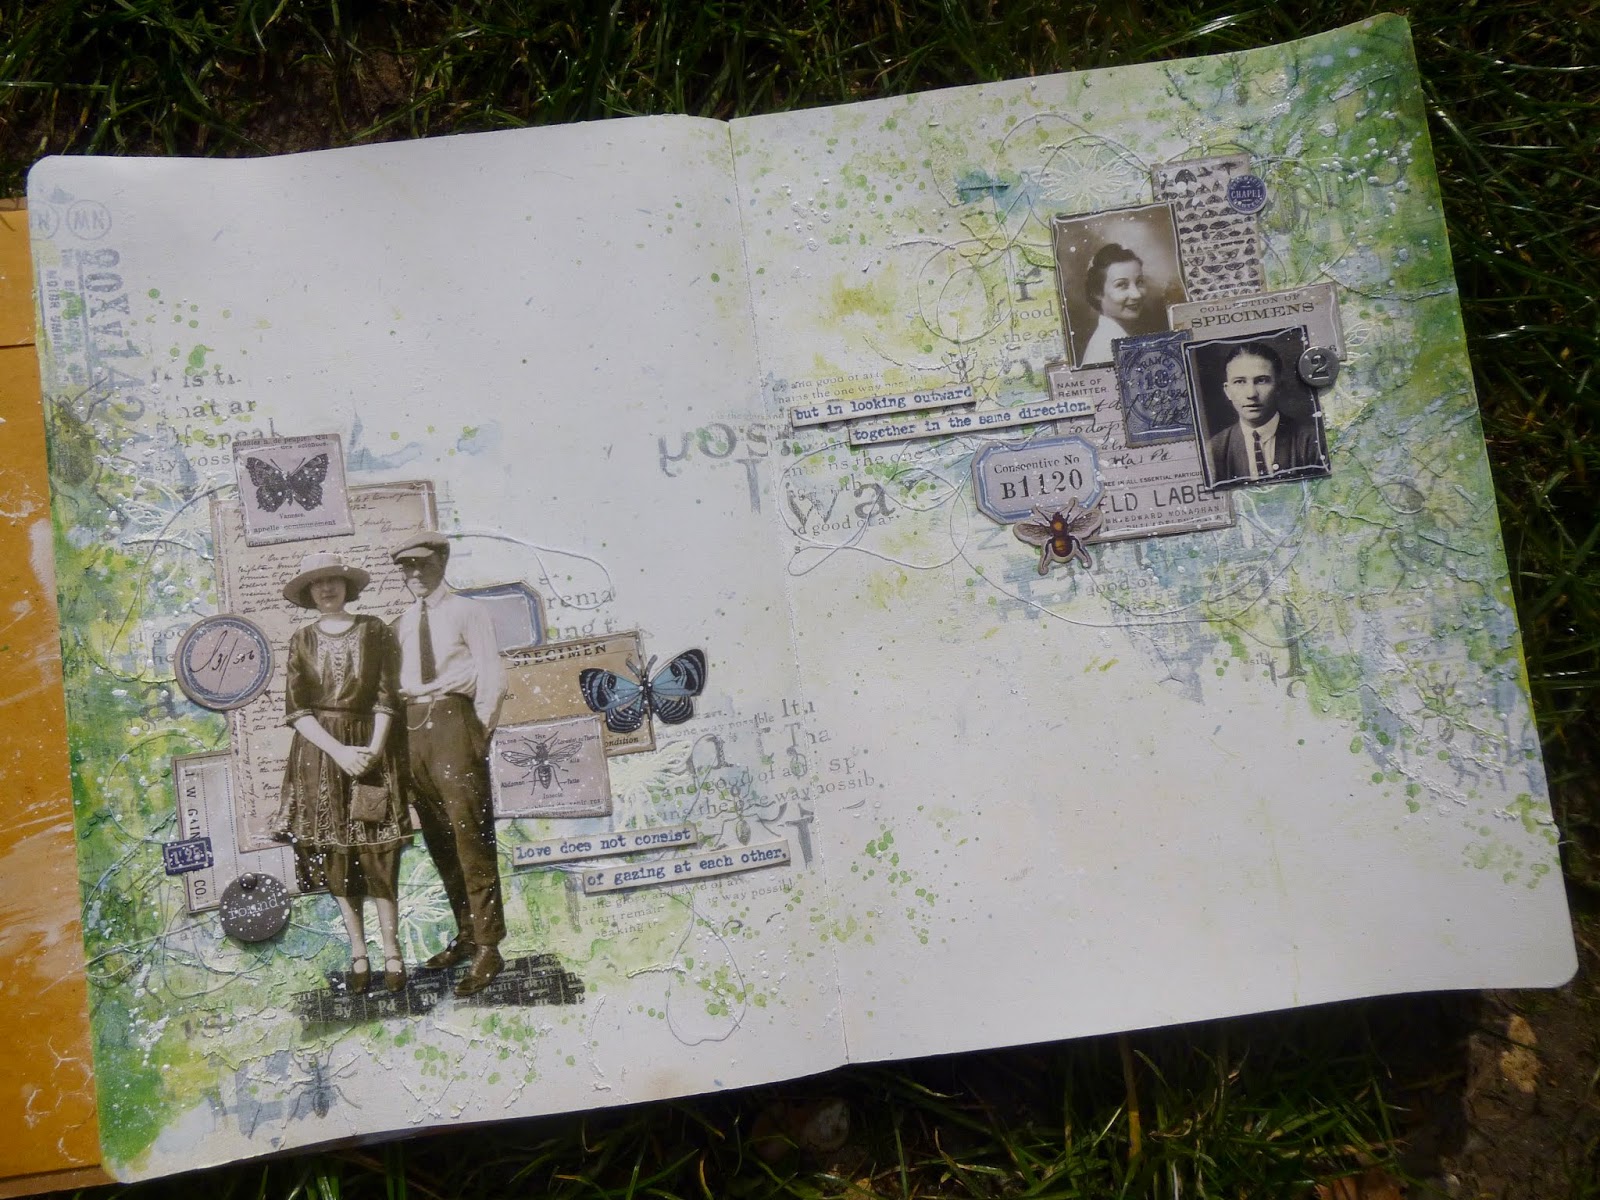
As usual, we took it in turns to suggest the next layer/activity and once again - although we were all following the same steps - we ended up with three completely individual pieces of artwork by the end. (You can check out the previous Skype adventures here if you'd like to.) Here's my double spread art journal page.
You'll find sneak peeks and links to Nikki and Brenda's posts at the end, but first let me share how it all happened on the craft table here at Words and Pictures. I've put the instructions in bold and listed them at the foot of the post in case you want to try out the process for yourself. It would be brilliant to see what other journeys people go on with the same steps.

So, process first... but if you want to scroll straight down to some finished close-ups, feel free!
We all prepped our various surfaces - a free choice, though we'd agreed to work fairly large format. I went with my Dylusions large journal, so the whole spread is 30x40cm.
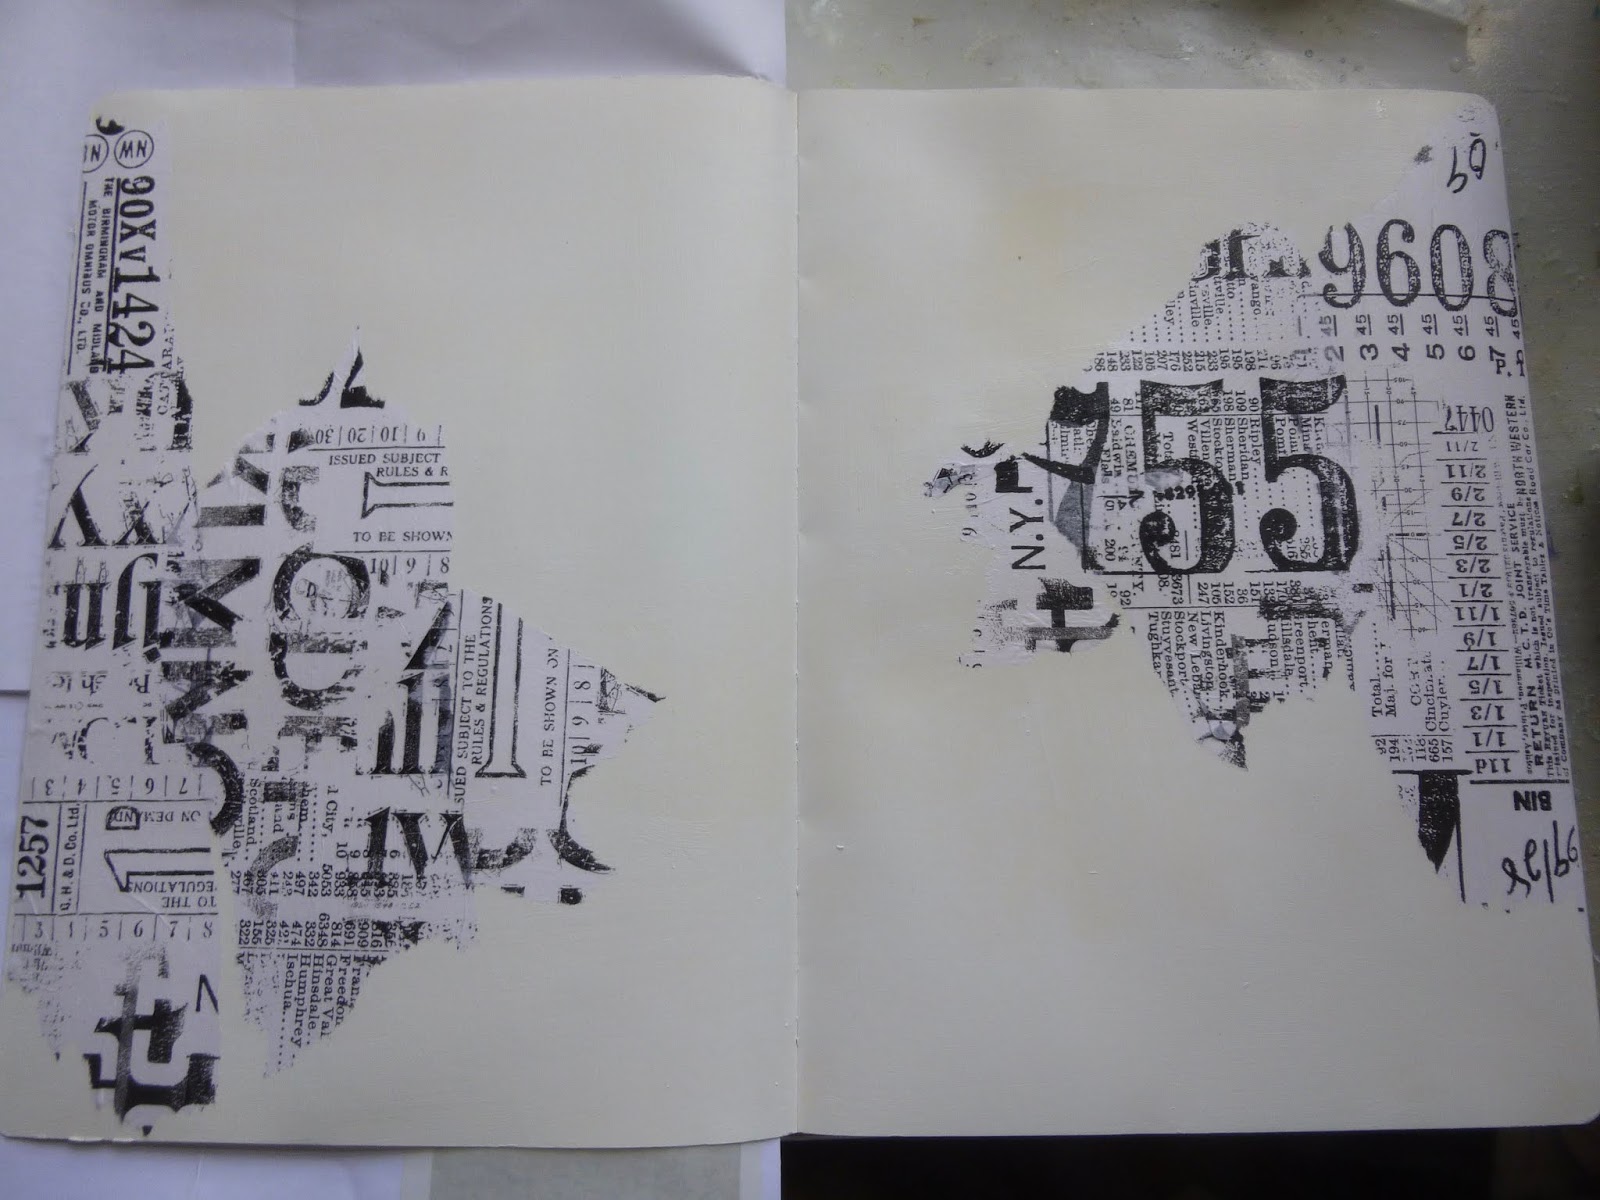
And then I (A) gave the first instruction - 1. use some tissue paper and/or tissue tape.
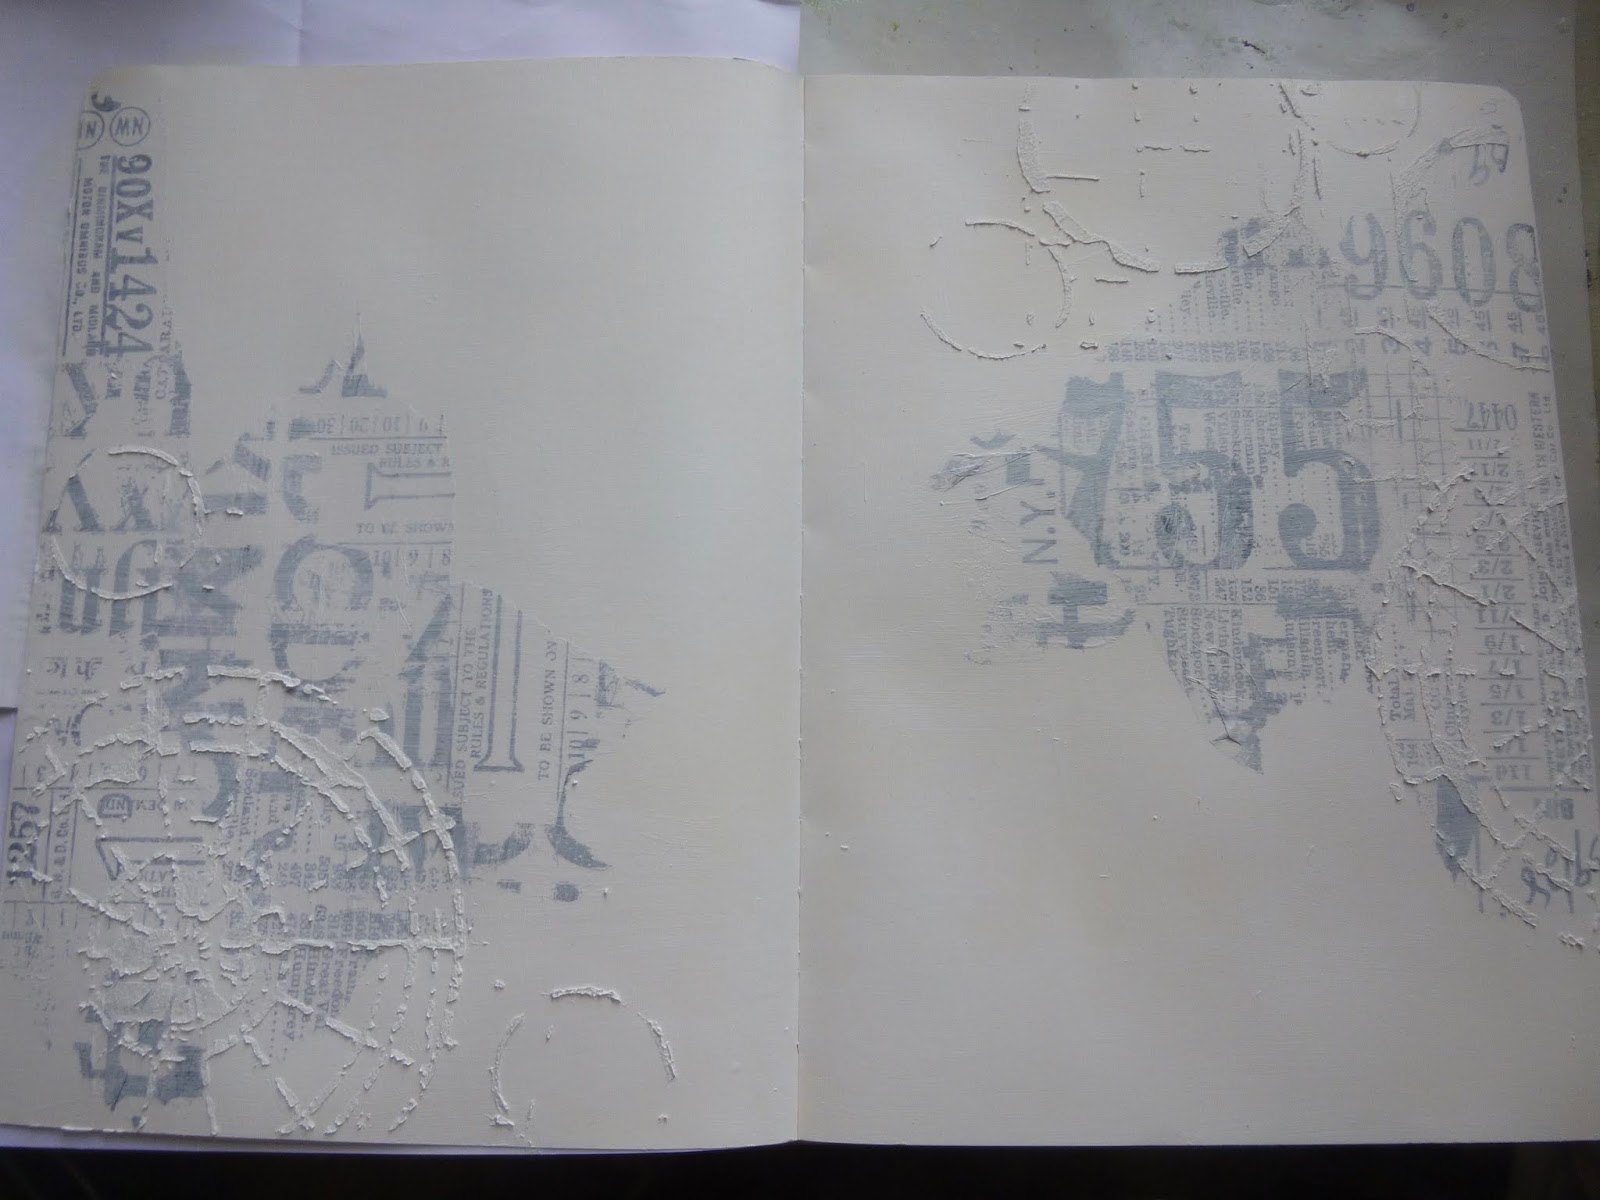
Nikki (N) then wanted us to 2. put down some texture through a stencil. I'd re-gesso'd over the tissue paper (Tim Holtz's Typeset/Composer collage paper) so that the surface would receive any mediums in the same way as the gesso'd pages underneath.

This is a giant 12x12 Crafters Companion stencil and I used some cold press watercolour ground as my texture paste - it has a lovely grainy texture.

Brenda (B) suggested 3. some stamping with text and/or numbers to fill in the gaps for her first contribution. I was really happy with that because it worked so well with the numbers/letters already on the go in my collage paper.

Next up: (A) - 4. add more than one colour of paint in any way that you want to. I used Granny Smith and Lawn Fresco paints - still obsessed with spring greens round here! - and applied watery washes to the edge of the page, spritzing them with more water to get them to dribble down towards the centre spine.

I dribbled the lighter green first, dried it, and then added the deeper one over the top, dabbing with paper towel when the drips and drops got too enthusiastic. (This shot's from later on, but I think you can see what I mean pretty clearly here.)

And since we were allowed to add our paint in any way we liked, I also spattered what was left on the craft mat across the pages.

(N) 5. create a resist using any product. Although we were all talking about Andy Skinner's Resist Paste, I ended up going another way... in fact, two other ways.
I repeat stamped one of the Entomology insects and used some Wow Vanilla White powder on that.

And I also flicked some of Tim's Resist Spray (unscrewed the top and flicked with the inside end of the tube) and put Bright White embossing powder over the splatters.

(B) 6. Use a colour medium to reveal your resist. Brenda originally said "paint" but I asked if she was prepared to be flexible and open it out to any colour medium, as I had a yearning to use ink so that I could have a nice translucent layer over my earlier paint layers. Happily, she was fine with that.
I opened up my bottle of Stormy Sky Distress Spray and applied some to the edge of the page, spritzing in the same way as I had with the paints.

After a few goes, there still wasn't enough blue going on, so I just dipped in a brush and applied some more wherever I wanted it and spritzed with water to let it move. It's still quite subtle, but I like it.
(A) 7. Add some more stamping but not text and numbers. This is where a theme really started to kick in for me. Yes, I had those resist insects in soft vanilla, but I wanted more!


So several more bugs and ants put in an appearance, stamped in Watering Can Archival ink (in case of more wet mediums in the future - I wanted something that would stay put).

(N) 8. Select a focal point (or points) and gather elements. And with the theme already cooking, this is the point at which the storytelling started to happen. I found myself reaching for the vintage photos... Paper Dolls to start with, and this couple wanted to be part of things.

I wanted a balancing focal point on the other side of the page, so I went in search of Photobooth photos which could play the part of the same couple in earlier days.
Clearly with all those insects around, they must be entomologists - each with their own field of study, so that in the early days of their relationship, they would each be pursuing their own studies in various parts of the world, in search of new or rare species.

Their only communication would be by letter... so that upper corner of the pages is almost like a memory of the start of their relationship, with that postage stamp reflecting their epistolary love affair.

But now here they are, married, working as a couple, and able to travel together on expeditions and tread the same path as they follow, collect and study the creatures they are both so passionate about.

I gathered all my ephemera from one place, to be honest - the new Field Notes pack by Idea-ology (and the mini version of the same set).

It had everything I needed, from postage stamps to note pages to specimen labels to species diagrams.

Oh, and of course the butterfly and the bee. We're on finished photos now, so the process has pretty much moved on to (B) 9. alter/colour up/prepare and position elements for your focal point/s.
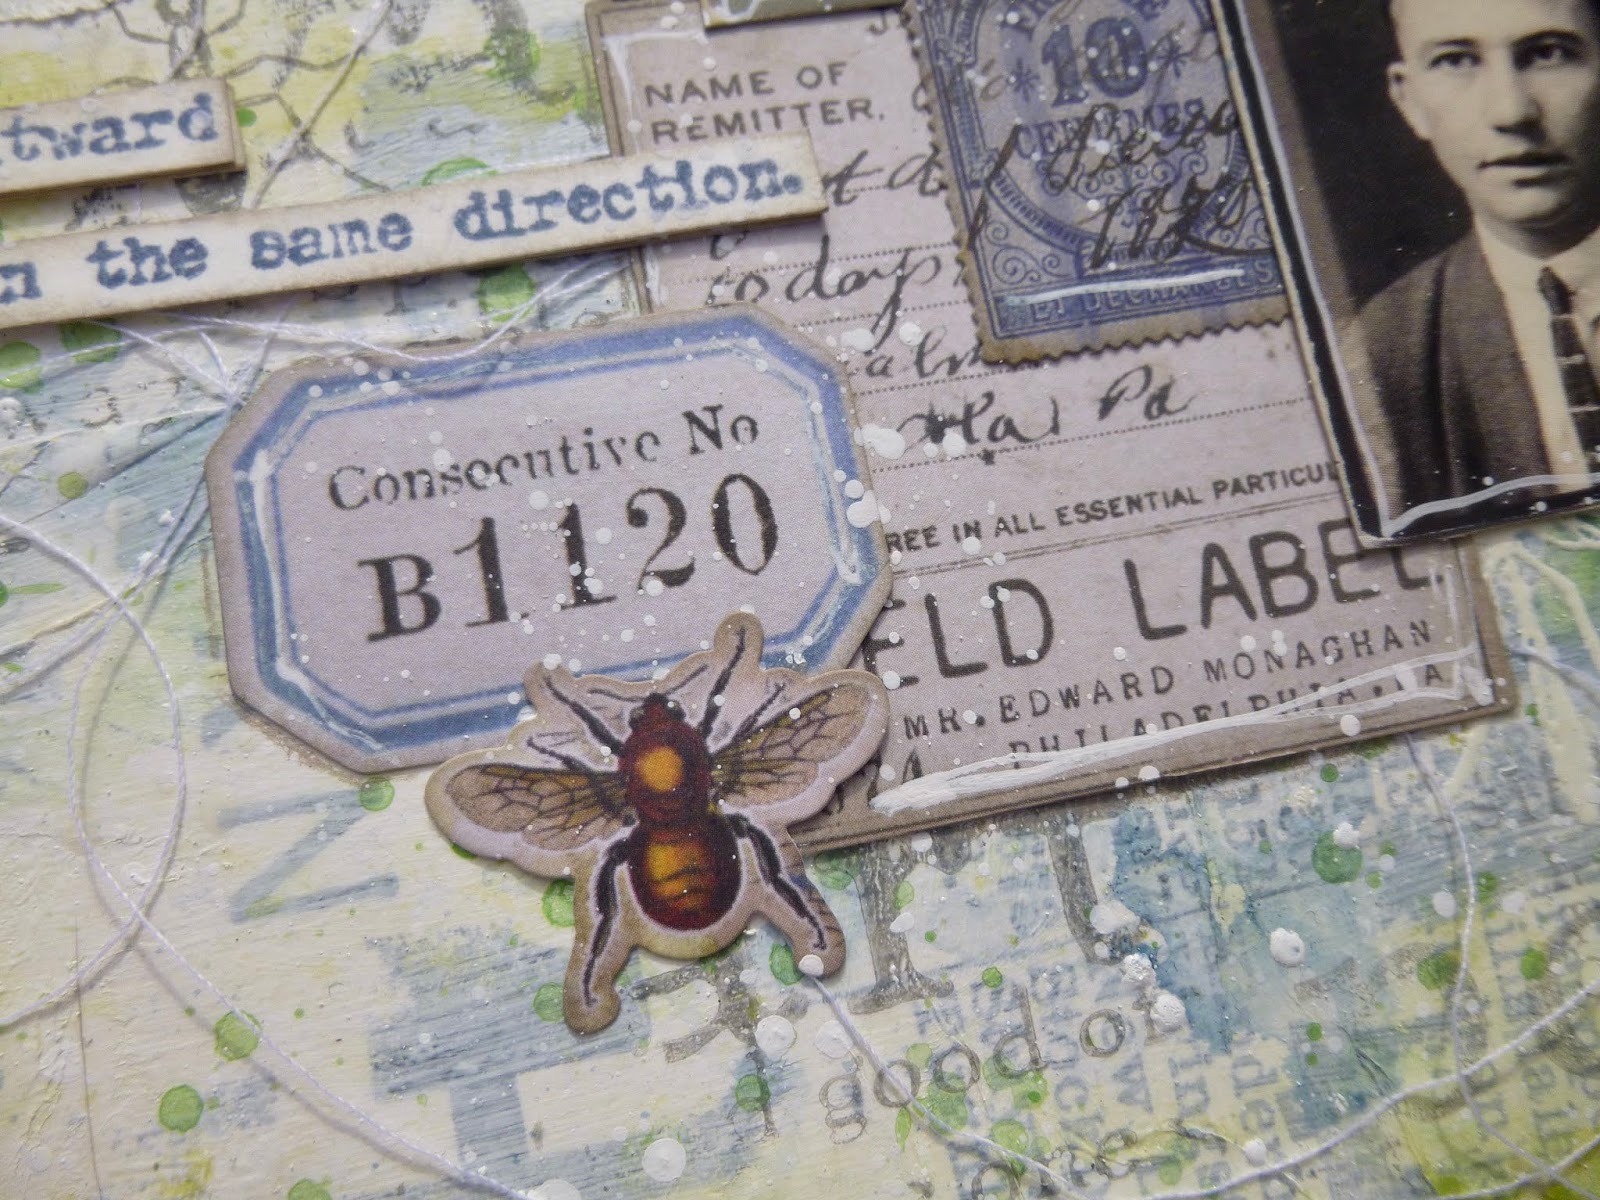
I didn't really do much in the way of altering. I mainly stuck with inking the edges of all my elements, and also did a bit of doodling with white ink and my dipping pen to frame some of them.

The quote needed to be part of the focal collages too. It's from my PaperArtsy set The Love Edition. I toyed with two different stampings - first in pale Stormy Sky...

... but I ended up using this version in Faded Jeans Oxide ink. It gives the words a bit more presence, and also tones in really nicely with some of the darker blue elements amongst the ephemera.

I also grabbed a couple of metal embellishments to add to the mix - the number two for the two life partners...

... and this little "found" token. How many insects have they found over the years together? How many have you found in these pages?

They're hidden all over the place in this spread - stamped, embossed, on paper - so you need to go exploring and hunting just like the two entomologists.

There are even creepy-crawlies hiding between their legs!

I kept my next instruction very open so that we could each do what we needed to do! (A) 10. highlight or refresh the original background before adhering the embellishments.

I tried sanding back the original stencilled texture to highlight it, but found I was losing my lovely grainy texture, so I stopped doing it!

I cut some lengths of white thread to wind behind the ephemera as I glued it all down. I do like this effect, just to add a bit of randomness and movement to a piece.

There was a sort of general agreement that we would all add whatever Finishing Touches were needed. For me, that was a bit more spatter - in white this time.

I love that this spread now has three different kinds of spatter... the leftover paint spatter, the resist spray embossed spatter, and the normal whitewash sort too.

All the layers make me happy - paint and ink...

... stamping, embossing, and ephemera.

Of course there's that scrumptious texture...

... and you can even see the tissue paper all the way back there somewhere!

So that's my result from the steps that we took. I hope you'll have time to go and see what Brenda and Nikki created. I've already seen them in slightly blurry form over the Skype connection, but can't wait to go and examine them in detail over at their respective blogs.
To tempt you further, here's a sneak peek of Nikki's project over at Addicted to Art.

And here's Brenda's at Bumblebees and Butterflies. Just click the links to go visiting.
You can already see how differently each of them turned out, despite having all the process steps in common!
I've only just noticed that we all have winged insects in common - even though nobody mentioned that!
It was such a joy to do some shared creating - even though it's usually a solitary pursuit for me. Don't get me wrong... I love it that way. But it's great to share the fun too - and dividing the task of deciding what to do next just adds to the fun and unpredictability of the creative process. Usually I create alone and then share via the blog. This just moves the sharing up a notch! And a big thank you to Nikki and Brenda... I wouldn't have done it this way without you.
Thanks so much for stopping by today to share in our creative playtime. I didn't manage as much visiting over the weekend as I'd hoped, but I'll be making my way round as the week progresses. I hope you're all doing okay, and look forward to seeing what kind of creative activities you've been keeping busy with in the safety of your own homes. Take care and stay safe, everyone.
Friends share all things.
Pythagoras
For pleasure has no relish unless we share it.
Virginia Woolf
Here's that list of instructions in full so that you don't have to search for them through all my ramblings if you decide to try them out for yourselves. Do let us know if you do!
Prep your surface - it can be anything you want, from an ATC to a tag, a canvas, a journal page...
1. Use some tissue paper and/or tissue tape
2. Put down some texture through a stencil
3. Some stamping with text and/or numbers to fill in the gaps
4. Add more than one colour of paint in any way that you want to
5. Create a resist using any product
6. Use a colour medium to reveal your resist
7. Add some more stamping but not text and numbers
8. Select a focal point (or points) and gather elements.
9. Alter/colour up/prepare and position elements for your focal point/s.
10. highlight or refresh the original background before adhering the embellishments.
Finishing Touches
At the Simon Says Stamp Monday Challenge Macarena has created a Spring Mood Board - I've definitely been in a Spring mood lately, and I particularly like the top left picture on the board with the blues and greens and book text
I'd like to share this at Art Journal Journey where Eileen's theme for March has been Green
The Sisterhood of Crafters are playing a Spring challenge
Anything Goes with an optional twist of Green over at the More Mixed Media Challenge
38 comments:
What fabulous playtime you all had, and your resulting double page spread is fabulous
Love
Amanda x
Sounds like amazing fun you guys had with Skype and crafting.. the results of your pages are brilliantly amazing and one to be admired....Once I get through all of my 60 emails to respond to I am coming back to 'study' your brilliant papges..hugs.xx
so fun to watch your creative process, you must have had so much fun in your virtual crafting session. I can't wait to try some of these creative ideas :)
Glad you have had a crafty virtual get together, and I love your resulting creation. Take care. Just getting ready for another "work from home" stint.
This sounds like a fantastic idea, glad you girls managed a Skype get-together with such beautiful and creative results. Love the pages you made. And being together is always better than being alone 24/7. Have a safe week, hugs, Valerie
Oh so happy to see this in so much more detail, it’s fabulous to look at the overall result, the interpretation of the steps and the unique impact your choices made to the finished project. The gorgeous couple have a wonderful storyline that captures the imagination and links so perfectly to the background textures and layers. These Skype days are refreshing and fun and I’m already looking forward to our next one. Thanks for sharing time with me and for being part of the creative day. Huge hugs. Brenda xxx
What a great way to get together with like-minded art friends while being shut in. I followed the process all the way through and I have to admit, I only have one product you used and that was a TH paper doll. I also have the black tissue tape/washi tape. Other than that, I have nothing. I DO love what you created, though, and I'm glad you not only shared it, you showed photos of the process along the way. I really enjoyed this. It is a beautiful spread. To make matters even better, you also linked it to Art Journal Journey using Eileen's theme.
The suggestions are deliberately very loose - any tissue paper (doesn't have to have a design on it - you could just use it for texture), any kind of paint, any kind of texture paste. Ephemera could easily be cut from magazines, or old travel tickets, and for stencils you can use the nets that fruit comes in, or a piece of lace would give an interesting result - anything really. I'm sure most people could scrabble together some of that! In fact, now I'm tempted to go again with the same steps using what I can find around the house... watch this space!!
Alison x
Now that was a really creative way to have an art session. And it must have been fun to be able to talk art and play with friends. The result is amazing. Nice journal spread! You are a detail lady and I like how you always give us so much to look at. The final results are beautiful and I am glad you linked up at Art Journal Journey. Thanks. Happy new week and stay healthy please. Hugs-Erika
What a wonderful idea Alison. Sounds to me like it could be a good recycling project. Guess we'll have to watch each others' spaces!
Gosh that sounds like fun Alison! What a fabulous way to scrap with friends while still staying safely at home. The resulting page is awesome! I love that you showed each stage of the process and the resulting page is amazing!! hugs xx
Awesome double page layout, I love the idea of the Skyping date to craft! I just wish I was savy as to how to Skype or use some other form of social media get together with my crafting buddy!
A fabulous afternoon of craft and chat and no doubt lots of laughter and I love the journal spread. Thanks for sharing the process and prompts as well as the story of the young couple.
Avril xx
Three fantastic artist had a session together! Fabulous!!!!
I love love love your textures ... I am in love with this wonderful spread!
You know you never cease to amaze me!
Thank you for all the steps!
Stay safe!
Elbow hugs,
Susi xxx
What a fabulous idea, and what great company - I only know Brenda but am sure Nikki is just as much fun as you two.
This is a lovely spread and takes me back to that day I met you in person for the first time on a workshop with Anna. Of course there are lots of "Butterfly" additions to this one which makes it so much your own. I love the soft gentle colours you chose to work with and your trademark spatters link it all together.
Another winner, Alison, you score every time with your work for me.
Hugs, Neet xx
What a lovely time you must have had! Your spread is stunning Alison.
Best wishes,
Alison xx
Very fun and creative use of "together time"! Love your spread as well.... luscious textures and layers, and of course that wonderful green throughout! This so inspires me to get back into art journaling - had forgotten what a wonderful playground it can be! Thanks so much for the reminder! xxx Lynn
This sounds like you had a fantastic day crafting with friends via the internet and I think you must of all enjoyed some laughter along the way.
Its a gorgeous journal spread and i really likes seeing the photos of the work progressing as the time went by.
Stay safe and well.
Yvonne xx
Wonderful journal page Alison..I LOVE your corners all layered up and beautiful pastel green background and stamping..
Luv CHRISSYxx
What fabulous journal pages and a wonderful way to spend the day. I'm a lone crafter too, so I always love going to classes and meeting other crafters. I really want to follow all the steps you've taken with something of my own. Take care and have a great week, Sue xx
Loving these pages. The colours and the white showing through are well suited to the focal images making them really pop out on the page. Bet you had a great day, there's nothing better than crafting with friends even if it is on-line. Take care and have a lovely creative week, Angela xXx
Absolutely stunning pages Alison and it was so lovely to read the imagined story of your couple. what a lovely thing to do and Brenda and Nikki's artwork looks stunning too.
The only online thing I've managed so far is my Tai Chi on Zoom!
Stay safe and well.
Fliss xx
Fabulous idea to skype with friends when creating. Your pages are awesome and I learned a lot reading your post. I love how you created a story as well. So cool and soooo beautiful. All the pages look so cool. I have so got to skype with some other crafters!
Thanks for sharing. I love to come by and see what you are up to.
How lucky you are to have good pals to craft with!
Sally. Xx
It is always a wonderful collaboration when you get together and this one is no exception. Your pages are gorgeous and I love the story you created for the characters too. The insects are a lovely touch too.
PS. The Magnolia is finally in flower! Stay safe and well. Anne xx
Creative Skypeing - what a fabuloous idea, Alison. The results - all 3 - are fabulous as well. I picked up a bunch of great technique ideas here.
Thank you for sharing another spread (and tutorial) with us at Art Journal Journey.
Stay safe and well.
Eileen xx
Sounds like you all had a lot of fun, the end results are fabulous.
xxx Hazel.
Oh, fabulous play and craft party with friends, that's great and the result is wonderful!!!!!
I'm going to have a look at Brenda's and Nikki's artworks too...
And thank you for hightlighting and repeating at the end all the steps, 4 hours looks not too much for such a result, regardingthe whole process and steps.
Really enjoyable, thanks for sharing Alison!
Hugs, Coco xxx
Stunning way to show the signs of spring in many colours and forms on this gorgeous creation. Many thanks for joining us in our current challenge of SPRING at The Sisterhood Of Crafters Challenge..good luck with your lovely entry.[aNNie design team member for The Sisterhood of Crafters Challenges
So very creative and beautiful and looks like a great amount of fun was was had! Thank you for joining our challenge at The sisterhood!
Diane TSH DT {Nellies Nest}
Such a great way to let go of the urge to control and let creativity take over. Plus crafting with friends is more fun! Lovely result too...
As stunning as I knew it would be! I am just in love with the white embossed insects! Bet you are glad I added resist. Lovely to spend time with you - looking forward to doing it again soon (no blues or greens for you) xx
Such beautiful pages! What a wonderful idea to spend crafting time with friends and it looks like you, Brenda and Nikki had such a fun time together too - perfect 😁. I'm loving your springtime pages, the colours and delicate design fills me with happiness! Take care and wishing you well! Hugs, Jo x
Love what you did. Thanks for posting the step by step photos as it helps inspire and demystifies the process.
This is a wonderful creation, and so filled with gorgeous details , Alison ,and I enjoyed seeing the many steps leading to the beautiful result.Love the story of the two in love,- and am so happy the creepy ones are mostly in whits, as then they are not too scary ,lol.
The 3 of you, must have had so much fun- isent it just wonderful to be able , meeting like that , each in your own home . Hugs, Dorthe xo
Alison, your spread is gorgeous! Thank you so much for sharing the steps. Hugs, my dear friend. You are a great artist!!!
Looks like you all had such a fun time Alison x Love the pages you created, each making a contribution to the other xx It’s a lovely idea to inspire one another as well as catch up x Take care xx
Great fun and delightful results! I was enthralled by your story and appreciated seeing all the steps and close-ups, too. The final list of instructs as well. I'm Pinning for future and off to see the others. xox
Post a Comment