
Here's the latest creation - a mobile - to have been filling my head, craft table and all my time, and it's been quite a ride...
(Photograph warning - there are a lot!)


Somewhere in the small hours one night, the revolving ideas began to take on the shape of a circus Big Top tent (ah... maybe the word 'top' in Top Tip Tuesday snuck in there!).
 And right near the beginning of this new, crazy craft obsession back in March, I was really lucky to get the Graphic 45 Le Cirque stamp sets on ebay for a great price...
I don't have the matching papers yet, so this project gave me a chance to play with lots of fun techniques to create papers for stamping the images on, for the tent, and for the reverse of the images.
I'd been trying to work my way round to some Altered Metal for the Frilly and Funkie challenge, even though I don't have any alcohol inks or patinas in my stash yet (right at the top of the list for when I'm home and have some money again, having seen what everyone's doing with them - really exciting!).
 I was also setting myself a little challenge to use some bright colours out of my comfort zone. I haven't got the Dylusions sprays which everyone in the universe seems to have, but I do have Distress Inks in Dried Marigold, Tumbled Glass, Wild Honey and a few others which I've barely touched. Time to get them out.
 And, finally, for Simon Says Stamp and Show this week, it's No Rules... so I really decided to let rip.
 I would say the result was semi-controlled mayhem for a while, but I think it worked out in the end!

I'd had three little woven carousels, found in a plant nursery, sitting on top of the wardrobe for a while, and that blinding light in the early hours about the Big Top was simultaneous with the thought - 'I could use one of those for it'.

I knew the Le Cirque stamps were ready and waiting, but I didn't really have any papers to meet my own challenge of brighter colours, so it was out with the Distress Inks.
I really had fun creating lots of variations on a theme.

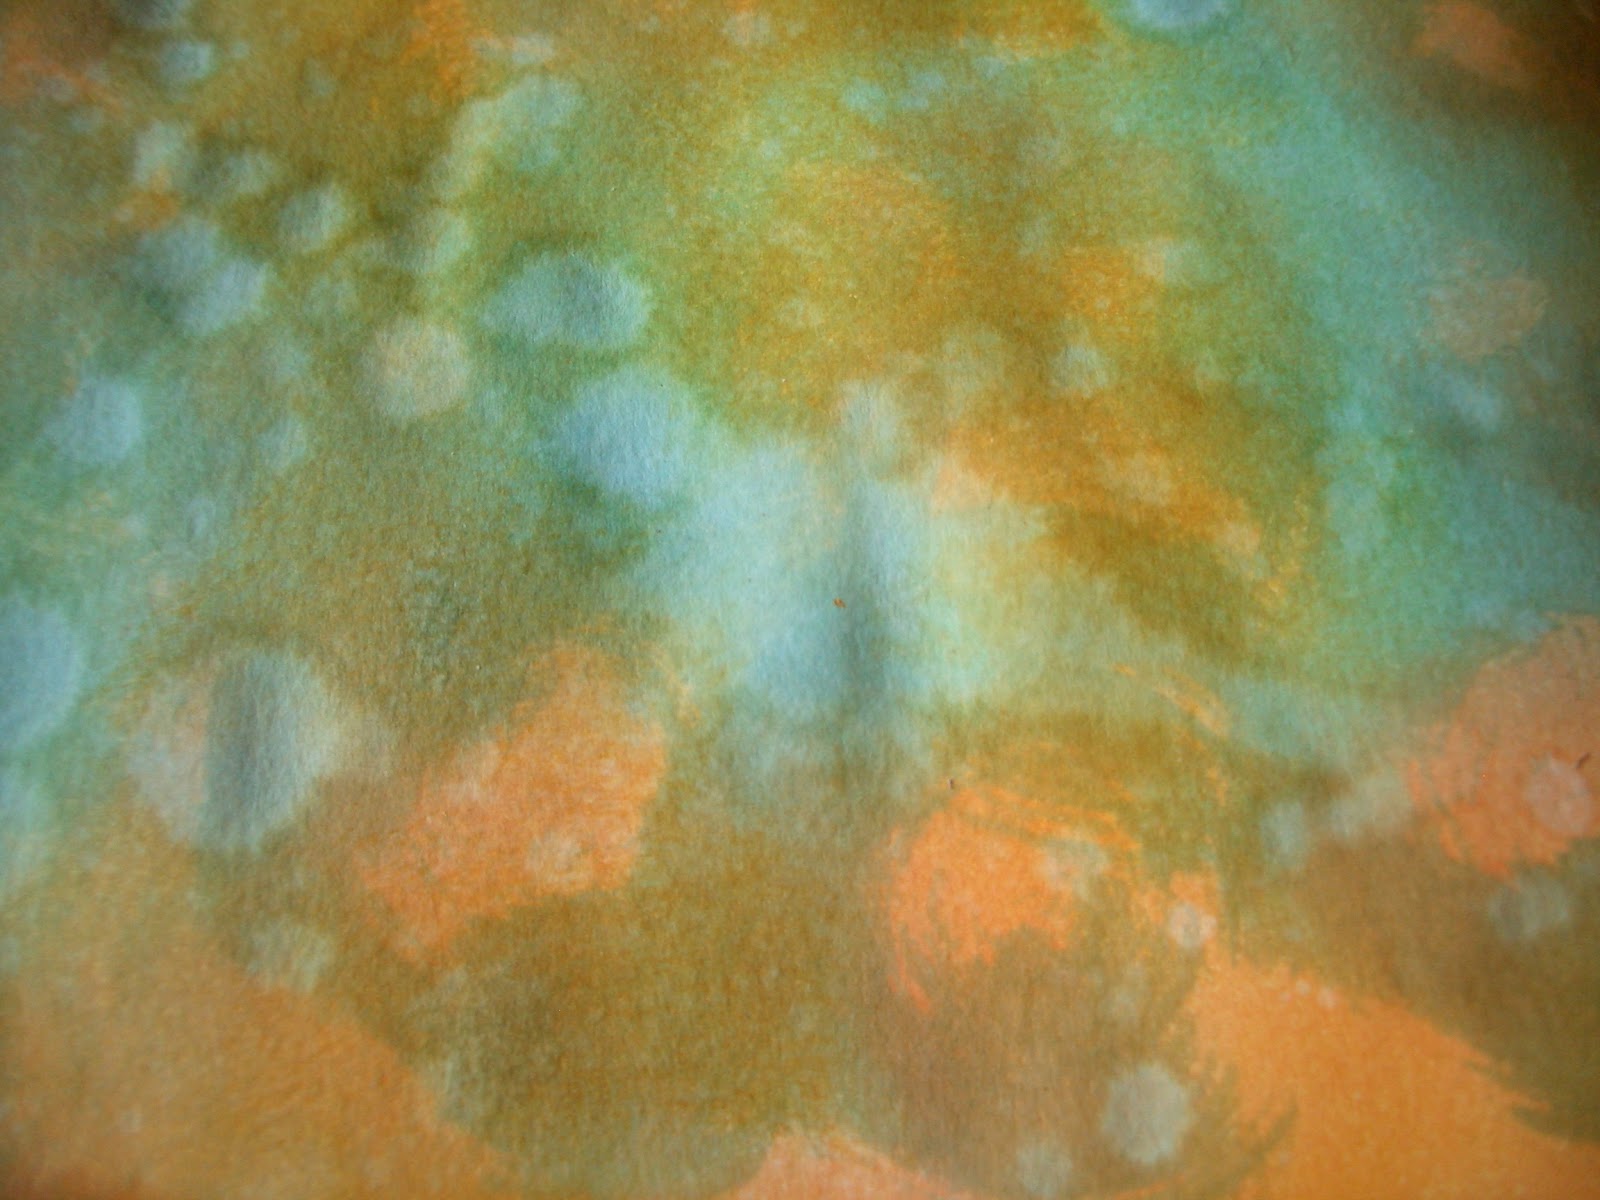
I did some blending, some spritzing, some flicking, some puddles on the craft mat combining variations of the colours I mentioned above.
I occasionally added some Peeled Paint to the mat from a Distress Marker (not having the pad in that colour).
(On the left, it's getting ready to be stripes of tent.)
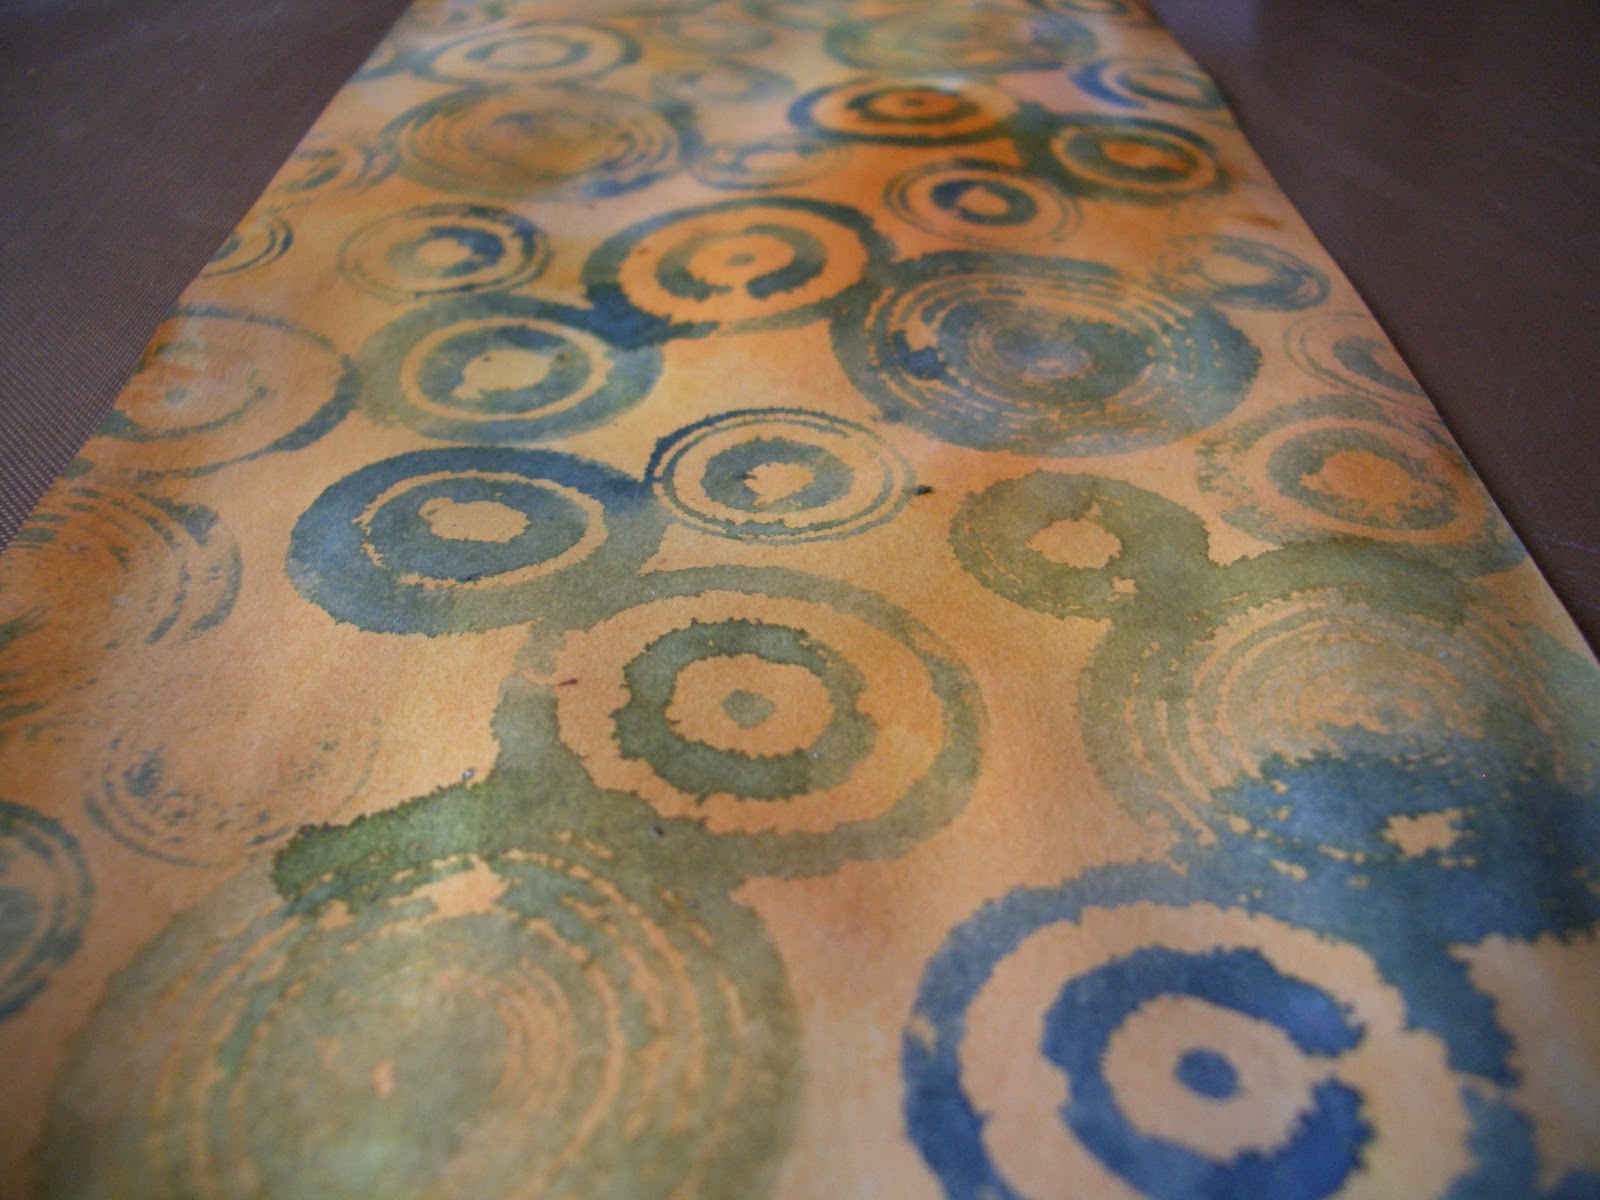

I used the TH retro circles stamp on one of the backgrounds using the wiggle-walk across the colours on the mat to ink up the stamp. Then with a spritz of water you get a nice watercolour effect on the print.


 I really wanted some dots (nice and circular) in the mix, but I don't have a stencil (here's another 'yet'!). What I do have are some Tim Holtz mask sheets, so with a hole-punch I created my own dots stencil.
 Of course, the hole-punch can't reach very far, so it was a pretty small stencil that I had to keep using as a repeat pattern.
To some parts I added the damask stamp from Recollections Lace Backgrounds set, stamped in Faded Jeans, for some extra texture. Having gone back and looked at the Graphic 45 papers for Le Cirque, I find there's a similar paper there, so again my subconscious was more on the ball than me! You can see my version on the reverse of the Mayhem pennant above.

 As I say, I used some of the papers for stamping the images on, and some were used as the reverse side. This fabulous laughing clown is the only circus figure to appear twice on the piece - clowns generally come in troupes, don't they... a hilarity of clowns?! On the reverse side, we have the damask again, with some more stencilled circles added, this time in gold acrylic.
 He was relatively easy to cut out (though circles are not my favourite thing to cut freehand, even following a carefully traced line round some washi tape). The other figures, once backed onto their respective papers, with some strengthening card sandwiched in between, all had to be fussy cut slowly and patiently.

 The acrobatic clown was okay, but I had some hairy moments with a couple of the others... the elephant (near the top of the page) nearly lost his tail.
 The trapeze artist has unfeasibly thin ankles (I think that, like Barbie, anatomically she'd be unable to walk without breaking them if she existed in real life), and the tricky space within her arms, but it was all worth it once I saw her holding on to the twisted gold wire (picture wire from the hardware store), which I wound round her own stamped rope.
All of them needed a UTEE coat for protection of those delicate extremities, but the glossy enamel was part of my plan anyway. I love it!

 The ringmaster hangs right at the centre of things of course, beneath the other element I really wanted to include - a lovely green marble (supermarket freebie, though I had to sand away a silly advertising transfer first)... not just circular, but globular now!
  I created a net of golden picture frame wire to hold it in place, and attached our glorious ringmaster beneath. With that belly and that cloak, there's plenty of space on the reverse to admire the gold polka dot stencilling!
 As well as the figures, there are some stars stamped on orange, backed with the damask papers, and those are mounted into some gold curtain rings, filled in both sides with Glossy Accents from Ranger. I love this stuff too - pour it over, spread it out, burst any air bubbles with a pin, let it set, and you have a gorgeous glossy dimensional finish to your image.
The other 'balloons' bouncing round the big top are my altered beer bottle tops. I flattened out the edges as much as I could with a French wrench, and then (whispering invocations to the goddess of the BigShot not to let it break) ran it through with the TH Gears embossing folder. I really didn't expect it to work (and there is a little bit of scratching on the inside of the folder, be warned!), but I love the result. I added an extra coat of gold acrylic, as the beer bottle lid was a slightly dull gold, and I didn't want anything dull in my circus!

The part I really wasn't sure whether I would be able to realise from the pictures in my head was the 'tent' itself. I knew the shape I needed (and if I hadn't been sure, I had the stamp right there to remind me!), and the woven frame was a big help with that.
But I knew trying to get the right shape to the papers, the right number, and trying to get them to stay in place wasn't going to be easy.
 I also wanted the 'walls' at different lengths, but I wasn't sure how that would look. I was delighted when I came up with the brainwave of rolling the strips - like canvas rolled up, but also creating a whole extra set of circles in the edges of the rolled parts (you can see what I mean in some of the photos above - particularly the acrobatic clown). It also meant I could get each strip to the right length to reveal whatever lay behind or to either side.
 I'm really over the moon with the result - although again I've created a project it's pretty difficult to capture in photographs!
The bunting is made from more of the handmade papers (the turquoise numbers paper from K&Co is the only one I didn't create myself), stamped with the Artistic Outpost bunting stamp from their Whimsical Melange set. All the stamping is done is done in Cobalt Archival ink from Ranger.
 So, I'll leave you with one final view - from below, where you get lots of those lovely circles, including the main one on which the whole thing hangs... literally!
Long, loooong post today, and many, many pictures, but I really wanted to share this one fully - "give'em the whole three-ring circus", as they (almost) say in the musical! It wasn't in any way easy, but I stayed in pursuit of the idea my imagination had conjured up and I really hope you've enjoyed the razzle-dazzle of it.
Thank you so much for dropping in today and, if you've lasted this long, a huge thank you for sticking with it! And if you'd like to leave a comment letting me know what you think, there won't be room on the page for the size of the thanks!!
Do hope to see you here again some time soon, and in the meanwhile have a glorious time, whatever it is you're doing.
I'm entering this in the following:
Simon Says Stamp and Show's challenge this week: No Rules
The Artistic Stamper, where the July challenge is Circles
It's All About Circles over at Top Tip Tuesday too
The Stamp Man is on an Anything Goes with Summer Colours challenge
Frilly and Funkie would like to see some Altered Metal
I think that That Craft Place will allow me one more entry to their Anything Goes challenge
Creative Inspirations would like Altered Art/Anything but a Card... I think this qualifies!
And one more for LEJ Designs and their Anything Goes challenge
Keep the circus going inside you, keep it going, don't take anything too seriously, it'll all work out in the end.
David Niven
Just 'cause you got the monkey off your back, doesn't mean the circus has left town.
George Carlin