I'm travelling into a new way of working, a new country, a new language, and a new hobby which I'm passionate about. Come with me for some of the journey...

Saturday, 7 July 2012

Why do birds sing?

Because music is an unstoppable life force - they can't help themselves!  Hello again, and welcome (back) to Words and Pictures.  I've been playing with my brand new Artistic Outpost stamps, just arrived in CZ from the good old US of A, and I'm in love!  With the stamps, that is (in case that wasn't clear)...

I bought several sets because, let's face it, if you're going to pay the postage, you might as well get your money's worth.  And, besides, I couldn't decide between them all.  I'll be going back for more as soon as the next pay check comes in.  

I was just playing around with them to see what arose, and I found myself (you'll never guess) working my way towards the browns and blues.  I guess I start from where I'm comfortable and then, as I find out more about the stamps, I'll begin to explore more adventurously!  But here's where they've taken me so far...
Those who've been attending closely may remember that I've already altered one of these nasty plastic white frames for an earlier project. A quick before and after:

The Artistic Outpost stamps come as unmounted red rubber sheets.  I've mentioned these kinds of stamps before, and this time I kept a little photo diary of the process, so I'll post that some time soon for those who've no idea what all that's about.  

Again, those who are old hands at this are free to ignore that day's nonsense!  

The sets I chose will make absolute sense to anyone who's been following my journey so far.  They centre around music, the search for serenity, rural images of solitude and peace, and lots of words, quotes and phrases.  


This project uses stamps from the sets Whimsical Melange, Serenity and Old Grist Mill, and really grew very organically out of my explorations with the stamps, trying them out in different colours and inks on different surfaces.  I pretty quickly realised things were gathering towards something three-dimensional.  So I grabbed another frame...


The external walls are covered with a paper from DCWV's Tattered Time Mat Stack, and it's edged with the lovely rich Walnut Stain Distress Ink. 


For quite a long time I was playing with the notion that the same paper would be on the front edge of the frame, but - as you'll see - things change of their own accord when you're crafting!


The internal walls, floor and 'ceiling' are covered using a sheet taken from an old music book.  I've covered it with a wash of Picket Fence Distress Ink which gives a lovely muted, whitewash effect, and added the little criss-cross checkered stamp from Whimsical Melange for additional texture.


Let's get a proper look at that Songbird stamp and quote, instead of all these oblique angles!  It's simply glorious.


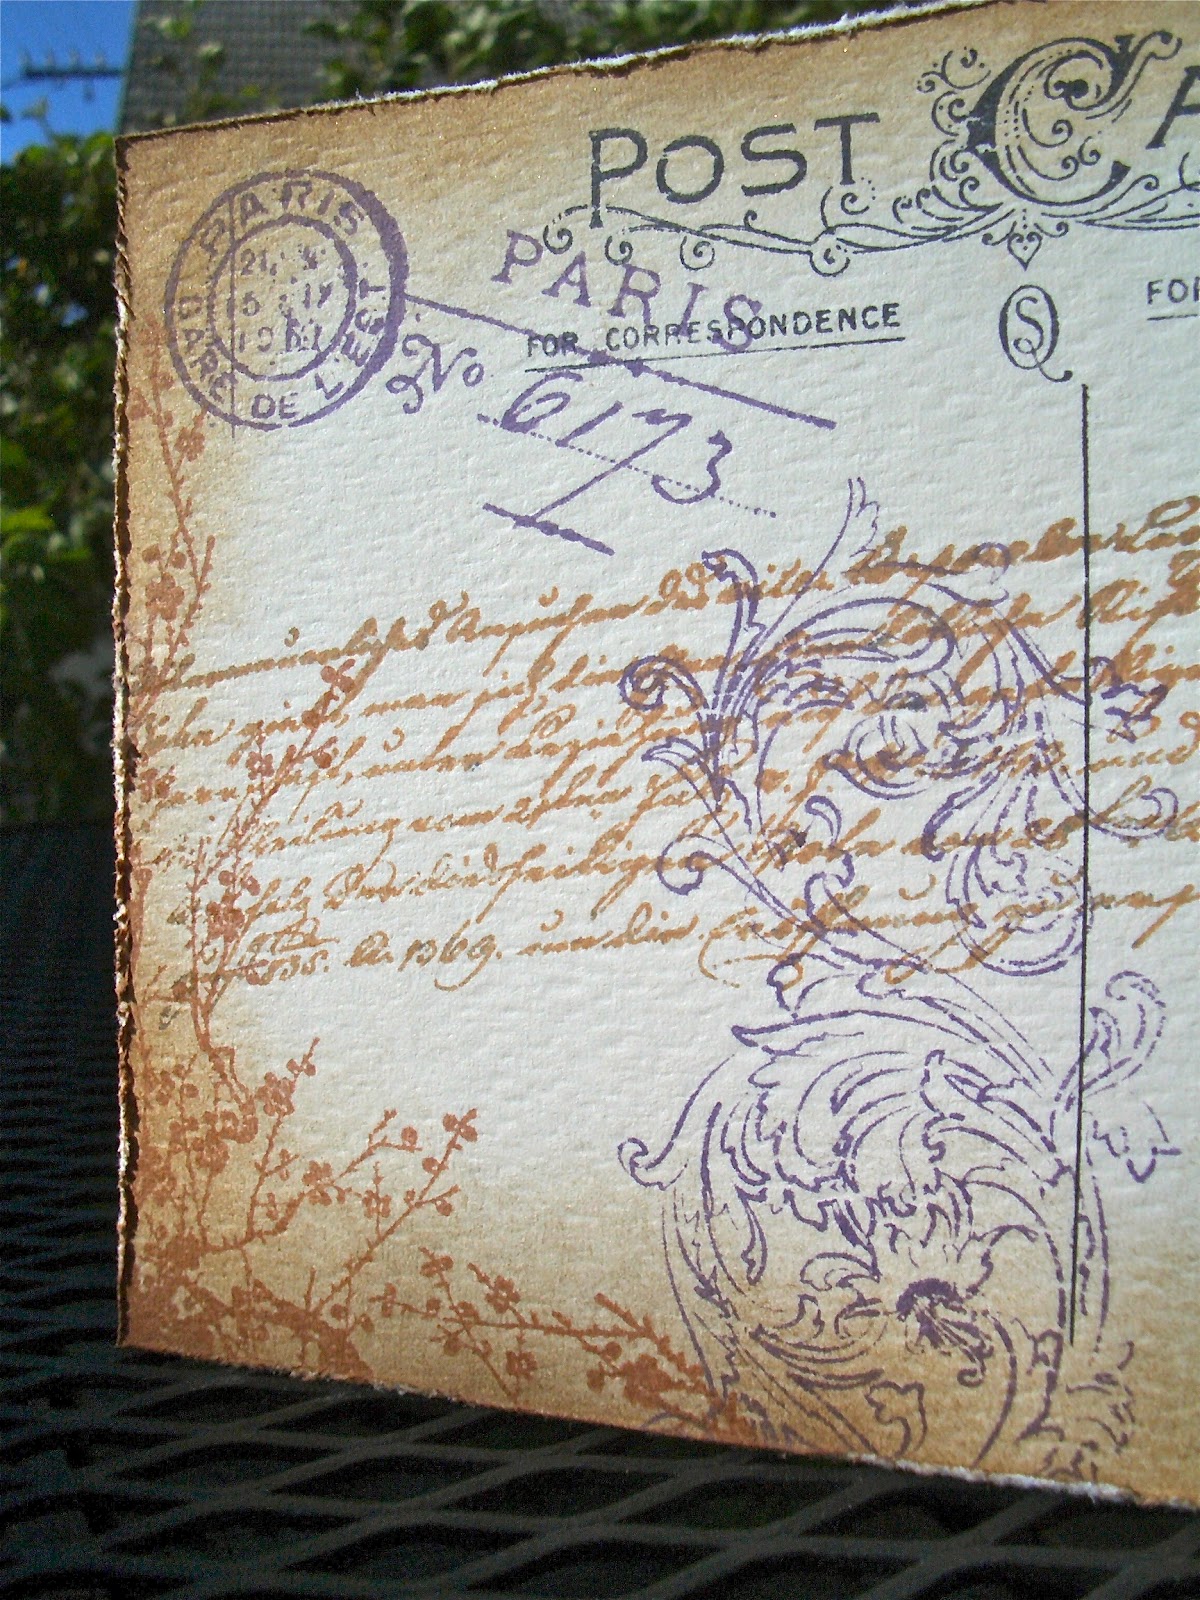
It was always destined to be love at first sight with this stamp.  It's incredibly beautiful.  It's stamped here onto a lovely text-based patterned paper from K&Co's Best Of selection.  

I've used my much-loved combination of Stormy Sky and Chipped Sapphire Distress Inks blended on the stamp. 

And just look at these twirling vines, birds and butterfly - so pretty... and the sentiment obviously strikes a strong and beautiful chord with me.


For the background, I wanted to have a go at combining some of the techniques I'd been learning (Tim Holtz tutorials here, and his Compendium of Curiosities book - so great; as well as loads of great crafting tutorials on youtube) and playing with one by one.


So, using the lovely leaf stamp from the AO Old Grist Mill set (just wait til you see the Mill itself!), I stamped randomly over a piece of A4 kraft paper using acrylic paint.  

I kept them well-spaced because I knew there'd be other versions to come.


I then blended various ink colours over the top (you can probably list them yourselves by now) with a blending tool.  

The acrylic paint provides a resist effect, so that with a spritz of water on some paper towel, you can wipe the ink away to reveal the leaf beneath.

I tried some water-stamping - Versamark or embossing ink onto the stamp, then a spritz of water, then stamp it onto the inks - and if you look closely you'll see a couple of very ghostly images, but either my ink colours weren't dark enough or they'd soaked into the paper too much for this to work terribly well.  I've had much more success on a smoother surfaced cardstock.  

Then there are some clear-embossed leaves, and some simply stamped in Chipped Sapphire.  The whole thing then got a few spritzes of Perfect Pearls Mist in Pearl to give it the shimmery gleam.  I'm deliriously happy with the result - hence all the pictures you're getting to look at!!


This one, going across from left to right, has the paint leaf, embossed leaf, and stamped leaf in close-up.


In the end, as well as using this as the background, I decided it deserved a foreground position too, and so now it adorns the front edges of the whole piece.  


The little house-shaped stamp is another early favourite - so adorable, with another couple of favourite motifs: the ruler and the butterfly.  


It's printed, like the main quote, on the K&Co paper.  In keeping with the musical theme of the sentiment, I've added my lovely Memory Box treble clef die, this time cut in scrunched wax paper, giving it a lovely textural quality.


The whole thing's backed on to chipboard to give it some body.  I found I wanted a little extra something, so gave it the wax paper 'fringe' down the inside edge.


I added a little Weathered Wood to the bunting using a TH Distress Marker, and then got up to my old tricks with the Stormy Sky, Chipped Sapphire and then a Versamark/UTEE re-stamping of the leaf. 

I'm still in love with the enamel effect this gives.  Don't expect it to disappear as a combination any time soon!


The Harmony stamp from the AO Serenity set is stamped in Walnut Stain on to another piece of the music sheet, then clear-embossed.  I attached it to a bit of 'tattered faux-leather' I had hanging around.  I learned this technique from a great tutorial from J Ann B Designs.  

It's brilliantly messy fun to do, and you go around looking like a terminal smoker with horridly stained fingertips, but I do like the end result.


And the little twig heart was from one of my 'silly' bargains on ebay: a bag of 25 hearts in several sizes for 1 penny (with free p+p!)... now that's my kind of shopping!  I made the tiny scroll out of the K&Co paper, and ripped and distressed the edges with the help of a bit Walnut Stain.  The scroll is tied with a little strip of wax paper.  

You can get another look at the stamped music paper here too.

Mulberry paper roses add the final touch to the piece.

Well, so far I'm deeply enamoured of these stamps - they're everything I hoped they'd be when I held my breath and crossed my fingers that they would reach me here in the Czech Republic!  

I'm entering this in Artistic Outpost's July challenge which is 'Anything Goes' (as long as you use AO stamps, of course!).  And given you can enter as many times as you like, I'm guessing that - as I continue playing - there may be more to come!


I'm also entering it for Frilly and Funkie's challenge to Show Some Texture (I'm taking them at their word that the added twist of using material is optional, unless faux leather counts!), and the current challenge, Make It Sentimental at Moving Along With The Times, where they'd like the sentiment to take centre stage.


Thanks so much for spending some time here at Words and Pictures.  It's always great to hear your comments, and if you'd like to join up, it would be lovely to have you on board.  Enjoy the rest of your day, whatever it may bring, and see you again soon.


Use those talents you have. You will make it. You will give joy to the world. Take this tip from nature: the woods would be a very silent place if no birds sang except those who sang best.
Bernard Meltzer

Thursday, 5 July 2012

Hopeless Romantic

Okay, alright... it turns out that I am a hopeless romantic after all!  My latest project is a dead giveaway - I give in... no more denials.


I really didn't plan for it to turn out this way.

I just wanted to see what the gesso was like to work with (fabulous - it gives such a lovely feel, and a shabby chic surface to die for!), and as I covered the box with it, ideas started to gather in my head of stamps and stencils I might use to complement this lovely whitewash effect.

I'd like to point out that this is a before-and-after situation of the highest order.  


Here's the 'before' - I warn you, you may need your sunglasses.


Now there may be people who like the lurid tropical look, but regular readers will know by now that I ain't one of'em!

So the box went through a number of stages.  First a rapid coat of acrylic so that I could look at it as an object without all that interference noise from the shiny lime-green, acid yellow and shocking pink combination.


Then I got the gesso on to it, and straight away knew I wanted some script running across it, so I layered it in.  I stamped some with a fully loaded stamp of  Frayed Burlap (yes, that would be Tim Holtz Distress Ink I'm talking about), and some as a 'second printing' so that they came out at different intensities.


It was at this point that the pinkness first arrived.  It just felt like it wanted some Tattered Rose (TH) in there... so I lightly swept some in using a blending tool (Inkssentials by Ranger, so pretty much TH as well!) being quite random about it.

I think I've said before, I'm a fan of the higgledy-piggledy and skewiff.


The next set of layers I wanted to build up using my lovely Tattered Angels Glimmer Screens (essentially a template or stencil set - the terms seem to be interchangeable as far as I can tell, but if I work out a subtle but telling difference I'll let you know), a set called Timeless Romance.  You have seen them in action with one of the matching stamps in this album.


On the lid, the large keyhole heart is done using the stencil with 'watercolour'.  


I blended some Tattered Rose from an ink pad and some Victorian Velvet Distress Marker and a spritz of water onto my acrylic block (yup, the stamping block - I use it as a palette too), and used a blending tool to apply it, holding the stencil firmly in place.  


The two small hearts on the lid I did with a thick application of acrylic paint, using a wodge of paper towel to apply it, trying to keep the texture. I then did an extra little bit of patterned stencil over the top of each of them.

I've seen a method using stencils and Liquid Modelling Paste, which goes on like clay and dries like stone... I'm so going to give it a go as soon as I can lay my hands on some, but in a village in the middle of South Bohemia, it's not so easy!

I really like the two different effects overlapping each other, but the colouring is so subtle and pale that it's quite hard to get a good picture of it!  It's worth clicking for close-ups on this project.


Then the stamp I've used, again in layered Frayed Burlap, is the lovely thorny one from the Stampology Silhouettes set.


Round the sides, I've done the same, using different stencils (or bits of stencils) and slightly different paint/ink colours as I went.


The flower on the lid is handmade, following the instructions I've seen on lots of blog tutorials.

I don't have the Tattered Florals die so I hand drew and cut my flower shapes, gave them an acrylic coat, and script stamping to tone in with the box.  Then it's a lot of fiddly twisting and squeezing and twirling and tweezing until you have the flower head you want.

Finally I spritzed it with some Perfect Pearls Mist in Pearl, for that vintage glimmer.


I'll tell you this: there are some very patient people out there in Craftyland - I used quite a lot of 'interesting' language before I achieved my single bloom!  


So, now you've got a box... what are you going to put in it?


I suppose the question was already being answered in my subconscious with all that text all over the outside.  I think one of my quotations from an earlier post was also still going round in my head.  In case you missed it, it's worth repeating - such an amazing thought from Jean-Jacques Rousseau: To write a good love letter, you ought to begin without knowing what you mean to say, and to finish without knowing what you have written.


So, if this was to be a box for love letters, or perhaps a correspondence box, it needed some stationery.  I created 6 mini "vintage" postcards (using the same TH stamp as here), 6 mini envelopes (plain cream to start with, but stamped and inked), and 6 small sheets of writing paper (parchment, stamped and inked; one rolled as a scroll).  


I wanted to tie them with ribbon, but the only gauzy one I had was in white, so I pressed one end tight against the Tattered Rose stamp pad with my thumb, and pulled the whole length through, several times.  I ended up with a ribbon in a beautifully delicate shade and a very pink thumb!  I used the ribbon to decorate the rose on the lid too.  

And the final touch?  The rose inside the box; a paper rose which I altered from its rather too vibrant salmon pink to a faded tattered pink with a coat of acrylic, leaving some colour showing through.  

Ah well, much for the cynical veneer; I guess the cat's out of the bag... I'm a romantic through and through, a lost cause.  But at least I've got a pretty correspondence box to show for it!


I'm entering this in the following:
Simon Says Stamp and Show's current challenge Spritz, Spray or Stencil
Vintage Udfording's July challenge Anything Goes (as long as it's vintage!)
The Allsorts Challenge, to include flowers to qualify for In Bloom
The Crafty Cardmakers, who want us to Create Our Own Flowers
The Crafty Bloggers July challenge, which is another Anything Goes affair


Thanks for taking the time to drop in.  It's always lovely to hear your comments - it reassures me that I'm not just talking to myself the whole time!  If you're a hopeless romantic too, and a fan of the shabby chic, do join up as there will undoubtedly be more to come.  But I haven't lost my grungy side entirely I promise, so watch this space.  


Romance is the glamour which turns the dust of everyday life into a golden haze.
Amanda Cross

If she means 'glamour' as in a spell or enchantment, then she's in some ways in agreement with dear Oscar (I'm afraid I do just need a little salt with all this sweetness!):


When one is in love, one always begins by deceiving oneself, and ends by deceiving others.  That is what the world calls a romance.
Oscar Wilde

Wishing all of you all the love, romance and happiness you could desire...

At last, it's the end (or Colours of the Rainbow 3)


The Never-Ending Rose Album!


Remember this?  Yes, I know it was a while ago, but we're finally going to see the last few pages of the Rose Album.  If you want a recap, please have a look here and here - we'll wait here for you...

Okay, all up to speed?  So here we go, final act.  (Romance warning - it's really pretty girly stuff, so if you prefer your scrapping a little grungier, try these pages instead!  But do check out today's quotes at the bottom of the post before you go.)


As you'll recall (since you've only just been there, right?), I enjoyed myself on this album by adding extra layers of images to some of the papers I was using.  

This double-page spread was especially fun to do as, for some reason, I find birdcages really enjoyable to stamp.  Thankfully, it seems plenty of other people do too, as birdcages of all shapes and sizes seem to crop up pretty frequently in stamp sets.  Or maybe that's just the ones I'm drawn to...?


The pages are trimmed with the Tim Holtz Scallops On the Edge die.  The paper to the left in the picture is from Paper Cellar, with my elaboration; the one to the right is from Prima's Fairy Belle 6x6 pad, with one extra birdcage from me.


Right from the start, as one of my first acquisitions, the Tim Holtz bird on a branch stamp has been an absolute favourite.  He's stamped here in Stormy Sky Distress Ink.  I used my Tattered Rose Distress Marker on the rose (makes sense, I suppose) to give it some colour, and to tone in with the flowers on the opposite leaf.

As well as the lovely Pink Paislee birdcage (from the London Market stamp set) in the top left corner and on the Prima page, I've also added the fabulous Kaisercraft tall birdcage on the inner edge.  I'm in love with this stamp: it's elegant, ethereal, perfectly proportioned... just delicious!


I like how it looks as though the fairy is reaching up towards it, perhaps to release the spring and let out whoever's inside, whilst keeping her eye on the mischievous butterflies, of course.


This page also feels quite close to home.  My first love was ballet; I was headed that way for quite a while when I was young... and the dancing fairy is balanced on a mushroom - fungi are one of my mother's passions... fungus forays galore in the Czech Republic!


Here, I've added the shabby chic frame (TH) and some additional script to the right-hand page, to complement and mirror the left-hand side.   


I love the gentle blue-lavender shades of these two papers.  The edges of each set of pages are distressed using inks that tone in, so here I think I applied Weathered Wood with a blending tool.  I think it just gives a lovely sense of definition to the pages to give them that edging.


For this next double page spread, I wanted to add some extra interest.  I created a half-page insert in translucent paper (you try getting it to stay still for a photo on a windy day!), stamped with another of my favourite TH stamps, and edged in blended Bundled Sage and Forest Moss.  


The On the Edge dies used are the brackets pair: the wide bracket is visible on the left page, and the wavier one echoing from the insert to the edge of the right-hand page.

The butterfly in the top left was part of the packet of Tattered Florals die-cuts I bought on ebay for an absolute song (plenty of flowers, leaves and a few butterflies to keep me going while I decide whether to invest in the dies myself), so in its original form it was just plain brown Kraft cardstock.  I gave it a coat of white acrylic, and then inked over that with Tattered Rose Distress Ink.  And where did I choose to do that?  Yes - well spotted, top marks! - in the bottom corner of that left hand page, so that I got a lovely shadow effect by using it as a stencil at the same time as getting it to the colour I wanted - gotta love a shortcut!  I then stamped the music (Pink Paislee - they're going to need a PP abbreviation soon!) on to the butterfly itself in Forest Moss.  He also has a coat of Rock Candy Crackle Paint.

So that's all, folks, as far as the Rose Album goes.  Sorry it took so long, but I hope it was worth the wait.  


If you enjoyed this album, here's a sneak peek of another you might like which will be coming up shortly.  Watch this space...


If you would like to buy or commission albums, cards or other pieces, do get in touch by leaving me a comment.


For now, I'd just like to say thank you for spending some time here today.  If you've stuck with the Rose Album this long, I think you deserve a double quote so... here's a hilarious one from, of all people, Eleanor Roosevelt:


I once had a rose named after me, and I was very flattered.  But I was not pleased to read the description in the catalogue: no good in a bed, but fine up against a wall.
Eleanor Roosevelt


... and here from Dorothy Parker, one of my favourite writers, a blend of just the right amount of romance and bittersweet acerbic wit (and it works best out loud):

One Perfect Rose


A single flow'r he sent me, since we met.
All tenderly his messenger he chose;
Deep-hearted, pure, with scented dew still wet -
One perfect rose.

I knew the language of the floweret;
'My fragile leaves,' it said, 'his heart enclose.'
Love long has taken for his amulet
One perfect rose.

Why is it no one ever sent me yet
One perfect limousine, do you suppose?
Ah no, it's always just my luck to get
One perfect rose. 


Dorothy Parker


Wednesday, 4 July 2012

Postcards from the Past

Just a quick one today, to share some of the "vintage" postcards I made a while back.


Like tags, they're a lovely way just to try out new stamps and see how they work together.


Small versions of these have become something of a signature tag in my albums as inserts for journalling. You'll see that in one of the albums coming up soon.

The vital stamp in creating these is, of course, the Tim Holtz Postcard one from the Journey set.  It's perfect.  I'm saving up to buy his Postcards set - a whole sheet of variations on the word Postcard - obsessive wordcrafter's heaven.

Really, in terms of making, these are all pretty straightforward.  I start with the Postcard in Archival Black, so that it will stay put whatever inking or spraying I decide to do afterwards, and then layer stamps in various colours according to mood and desire.  


Then, of course, I'm ageing it all with Vintage Photo and on these I used my - at that point - new TH Paper Distresser.  You get that lovely rough-hewn effect which adds a few more years to the look.


In this one, you can get a good look at the sprays of branches from the Stampology Silhouettes set.  Utterly lovely stamps to work with.  The others come from various Tim Holtz collections.


It's even closer up here - stamped in Archival Sepia, which is why it has that sharp clarity.  The script (from Kaisercraft) is in Tea Dye Distress Ink, which gives a grungier, aged look to the image.


This one's got the TH ornate curlicues from Boundless Flight, and the lovely bird on a branch stamp from the Urban Grunge set.  If I remember rightly, that's Chipped Sapphire he's stamped in, a gorgeous deep blue that I love.


And here's a variation on that card... with the Eiffel Tower embossed in black - I love that sheen, and the knobbly dimensionality the embossing gives it.


I made many other similar cards, so that I've got a store to draw on when I want one for another project.  And, as I say, I've been making smaller versions as journalling cards in albums, and also as an insert on a birthday card I made for my sister-in-law just recently.


If you'd like to buy a set for your crafting projects, or just to use as notecards for your correspondence (go on, send someone you love some real snailmail for once - it's so lovely to receive!), just let me know via a comment.

I'm entering these postcards in the Danish site Vintage Udfordring challenge Anything Goes (except it still has to be vintage!).  


Just before I go, since we're on stamping collages, I wanted to share with you the book I decorated for myself for my Czech language notes as I'm learning.  


It was just a plain brown notebook.  I used the Tim Holtz large book cover stamp with Sepia Archival.  You can also see one of the other Stampology Silhouettes branches - slightly thornier this one, as Czech's a pretty thorny language to learn - and the butterfly and lacy corner are from Pink Paislee's London Market set.  


The butterfly has the word theatre (amongst others) as part of his distressed text effect, which connects in to another part of my world, and so pleases me greatly.


Thank you for taking the time to come by.  It's lovely to hear what you think, so do leave a comment if you've enjoyed looking at today's pictures.  And remember - send someone something lovely through the post; you'll be giving more pleasure than you can imagine.


To write a good love letter, you ought to begin without knowing what you mean to say, and to finish without knowing what you have written.
Jean-Jacques Rousseau


Monday, 2 July 2012

Song in Your Heart


Hello, and welcome!  I've had several projects on the go at once for the last few days.  A couple of them stalled because I was waiting for some gesso which I'm planning to experiment with on them.  A friend had promised to bring a little pot over from his supply, as I'm not sure where you'd get it in the little villages round here, but kept forgetting to put it in his bike basket.  I've got it now and, given what I've seen on some of the amazing crafty blogs around, I'm looking forward to seeing what it can do.


In the meantime, the two other things I was playing with somehow amalgamated themselves into one on my craft table.  As with many of the other lucky accidents which happen as you're crafting, the serendipity of this one has come together into an end result which I think is probably nicer than either of the other two things I had planned!

With this card, I think I'm starting to feel my way towards finding out what 'my' style is.  I'm pretty new to this stuff, and there's been so much to see and learn and explore (ongoing - as I suspect it always will be!), and I'm trying out lots of different things, but I'm discovering the elements which keep bubbling to the surface as I play.

For this project, I've come back to the words and music which have been at the centre of my 'other' life, so perhaps that's part of why this project feels so right to me.  


Having the words, the sentiment, at the centre, guiding what was happening, made complete sense to me.  And it's a quote I've always loved, since singing and music are really important to me, as are - of course - my friends, old and new.  


Kraft paper is never far away when I'm playing... there's something so pleasurably earthy about it.  And I like throwing that into the mix when things get too flowery or girly!  


Once I'd painstakingly stamped the quote, letter by letter, I was planning to cut it out as a plain old rectangle, but as I looked at it on the page, it started whispering 'heart shape' to me.  


I doodle hearts all the time, not because I'm a hopeless romantic (although looking at this card, you'd be forgiven for thinking so!), but because it's a pleasurable shape to swoop round, so for once, faced with some freehand drawing, I wasn't completely fazed.


The treble clef is another of my constant doodles when my pencil is wandering.  I had to learn to do it for Music Theory when I was a schoolgirl, and there's a real precision required when you're doing it on the stave.  


I used to take great pains and pride in getting all my swirly bits on the right line.  But it's also really pleasing to draw, as well as to look at.  This Memory Box Die is going to get plenty of use, I can see.  It's so delicate and fragile, and beautifully formed.


The vintage look has been at the centre of all the crafting I've been doing, whether grungy or, as here, shabby chic.  And layering seems to recur again and again in the pieces I like best (whether mine or other people's).  


I adore papers!!  There are so many amazing ones out there I could spend a fortune.  Most of these are K&Company from their large 'Best Of' selection, while the music notation is from DCWV's Tattered Time Mat Stack.  Again I'm often drawn to the papers with music and with script or text on.


I'm also discovering that dimensionality really excites me, so the ripping and tearing not only fulfils the aged, vintage look, but gives that texture and life to the paper.  


I could have edged all these with my adored Tim Holtz Vintage Photo Distress Ink, but for once I wanted the white edging to ping out, creating the border between these pinky-brown papers.   


And yes, I know that it's pink and brown rather than my out-and-out favourite blue and brown, but sometimes a girl's just gotta do what a girl's gotta do.


I also enjoyed finding out recently how simple it was to curl a paper-ribbon, and I love how this animates the piece, giving that 'fluttering in the wind' look.  

I made sure that the ribbon at the front had the words visible... such a pretty font.  And with the ribbons, I did indulge myself with a bit of inking - Frayed Burlap though, not VP.


And here's another Memory Box Die, the Madera Corner.  If there's been a surprise to me in all this, it's how drawn I am to the delicate and fragile elements and embellishments, and to the florals (although they do have to be vintage, cottage florals not huge great tropical things - so far, anyway).  


I guess I'll just have to accept that there is, after all, a girly-girl in the personality mix too!


And who doesn't like to receive a bouquet from time to time?  I made the little conical wrap, and tucked in some of the lovely Mulberry paper roses I got from Malaysia (via eBay, of course).


So, these are some of the things which are starting to be part of 'my' style, but I'm so new at this that I'm not going to pin myself down yet, or maybe ever.  The last project that really got me going was the complete opposite, and the other thing I do know about myself is that I love contradictions!


I'm entering this one in the following:

La-De-Dah's My Mojo Monthly summer challenge to discover 'Your Style'
The Daring Cardmakers' challenge Papermania, where they'd like us to use 6 or more patterned papers on a card
The Little Red Wagon challenge Sentimental You, where they'd like us to have the sentiment at the centre of things
The Craftroom Challenge, whose theme is Friendship
Take a Word's new challenge - the word this week is Music
The Cupcake Craftroom's July challenge, which is Layers

I hope you enjoyed taking a look at this shabby chic style card.  I've also been playing with my photo editing a bit today.  It has a 'Vintage' option, which seemed appropriate.  I'd like to share it with you because I think it's rather nice.


Thanks so much for taking the time to drop in.  It's always fantastic to hear your feedback, and if you'd like to see more, do join our merry band of followers!  For now, have a great day, and I hope to see you again soon.


You don't make friends, you recognise them.
Isabel Paterson