I'm travelling into a new way of working, a new country, a new language, and a new hobby which I'm passionate about. Come with me for some of the journey...

Showing posts with label jumbo tag. Show all posts

Friday, 5 October 2018

Autumn Splendour


Hello all!  It's new theme time at A Vintage Journey and the amazing Sara Emily, our host this month, is looking for lots of Autumn Splendour.

You can find all the challenge details as well as lots of inspiration from my brilliant fellow Creative Guides over at A Vintage Journey, and here's my offering for you.

Although I most often work in muted tones and soft neutrals, I adore the fiery rainbow of autumn when the trees start to turn, especially when those burnished golds and browns and rust colours are seen against a vivid blue sky.

That's what I was aiming to capture with this giant tag, and I don't mind saying the results make me very happy indeed.  There are just a few step-out pictures, but mostly just lots of eye candy to capture the splendour of autumn.

It's a huge tag and there's a lot to see... so grab yourself a pumpkin-spice latte (another of the splendours of autumn!) and enjoy the view...


I've been in the countryside in the Czech Republic for the last ten days or so, and the weather has been incredible.

Cloudless skies, beautiful sunshine (and pleasantly warm too, for the most part - just a couple of those really chilly autumn days), and just in the last few days the trees have properly started their colourful journey into autumn.


So everywhere I look I'm seeing elements of this tag in real life!

This is one of the Gigantags from That's Crafty.  It's huge - 15 x 7.5 inches.  If you saw my Curiouser and Curiouser tag, you'll recognise that this is a sort of partner piece to that one.


I'd had these Gigantags in my stash for ages, as well as some of Tim Holtz's large Etcetera tags, and could somehow never seem to get started with them... probably through worrying about messing up and wasting the tags.


So when we were deciding in advance what to work on, I requested the large tags as our substrate for the shared Skype craft session the other week with Brenda and Nikki (if you missed it, read all about it by visiting Curiouser and Curiouser) so that I could try to crack open my crafter's block about them.


But then as soon as I'd made that request, even before we Skyped, I knew what the first step had to be with this next Gigantag... it was to lay this fabulous twig wreath (it's been in my stash for ages - I probably found it in a cheapy shop) across the blank tag, add the acorns, and pop the seated boy into position.  And there it had to pause while I went off and did lots of other things.


But each time I walked past the MDF tag with its twiggy wreath, I got a clearer picture of how I wanted it all to be.  And it definitely found its way to where I wanted to go... and then went a few steps beyond that to somewhere even better than I'd originally imagined!


Here's a quick look at some of those background layers.  There's crackle, of course, and some Cobalt Teal Hue DecoArt Fluid Acrylic, applied randomly with lots of water.


Then some Distress Paints got involved - Broken China and Stormy Sky, I'm fairly sure, and maybe some Faded Jeans too.


And I think there may have been some Distress Sprays too, flicked on with a paintbrush or direct from the unscrewed nozzle.  I forget... it's quite a while ago now.


Next, I needed to create some autumn leaves in all their splendour.  I spent some happy inky messy time creating these pages of wrinkle-free distress technique with Distress Inks and Oxides.


I love how the formulation of the Oxides means you can continue to layer colours on and still keep them distinct... perfect for the mottled rainbow of a changing leaf.


You can get some really great contrasts of colour, and also contrasts between the translucent glow of the Inks and the chalky opacity of the Oxides.


Then it was time for lots of die-cutting.  I used the large Layered Leaf Bigz die...


... but without running it through its embossing folder.  I didn't feel the leaves needed it for this particular make.


There are some medium-sized leaves cut with the Mini Tattered Leaves Movers and Shapers dies...


... and some other shapes made with the Fall Foliage Thinlits.

The wheat stem was cut from some other card, spritzed with a couple of Distress Sprays - maybe Wild Honey and Scattered Straw? - for that ready-to-harvest look.


And by the end I'd also added some tiny leaves cut out of all the leftover bits of inky card using Tim's Maple Leaf punch.


Can you tell I make a habit of grabbing any foliage dies (and stamps) I happen to find on offer?!


At the heart of each of the two main leaf clusters are some glossy acorns.  This is definitely the only time of year you'll find me voluntarily using orange, but I love these!


I added some natural fibres in amongst the leaves too, for some added movement.


The irresistible cobwebs from Tim's new Tangled Webs set add some glistening detail to the background.

They're stamped in Hickory Smoke and clear-embossed, trying to get the look of morning dew glistening on the fibres.


With the wreath, the boy, the large leaves and the acorns, I thought I was almost there, but things were about to get a whole lot more interesting.

I wanted to add a little more structure, and also to ground the wreath somehow... a little tricky, given it's floating in the middle of the blue sky.


But I think I found the solution in some layered ephemera.

The straight lines and strong verticals and horizontals work in contrast to the circle of the wreath and the organic shapes of the leaves, and to my eye they give the whole piece a stronger, more focussed look.


And with those straight lines in place, I was able to find the perfect homes for the Quote Chips I wanted to use, both above and below the wreath.

I added the fibres, and it was getting better, but even with all that arranged on my giant tag, I still felt there was further to go.


So the pinecones came out to play...


... nestled in around the two main clusters of leaves, above and below.


And this is when I started punching the tiny leaves out of my leftover bits of inky card, and adding them both to the wreath, and to the cascade of leaves fluttering down through the sky.

I loved the extra movement and the additional colours, so we were definitely almost there.


The very final touches were some white spatter (of course), and some lovely blue-green seed beads...


... glued down in and around the ephemera layers...


.... glinting in the sun to draw the eye.


They give a lovely touch of additional texture, as well as catching the light.  And they lead the eye towards the Quote Chips. 


The words are optimistic overall, but they do have a touch of autumn melancholy underneath them.  After all, we wouldn't need that reassurance if we weren't feeling troubled.


The falling leaves are gathering in heaps at the foot of the tag - just right for shushling through on a crisp autumnal walk.


Some natural raffia and twine top things off at the other end.


And there had to be some inking around the edges - done with Archival for longevity - drawing the eye inward and catching all that scrumptious texture.


I do hope the rather solemn looking boy can take some joy from all the colours surrounding him, and find hope in the autumn sunshine.

I'm certainly enjoying a lift in the spirits from seeing the landscape changing colour under cloudless blue skies - and I'm grateful for every moment of it.


This delicious dimensional tag will have to find a home on a wall somewhere - probably next to the Curiouser and Curiouser tag.

And I've got a strong feeling that now I've broken my resistance to these large tags, there will be more coming to join the set.

I really love having the larger space to play with, and the sturdiness of the MDF allows for lots of dimensional structures.  Watch this space...

Thanks so much for stopping by today.  As I said, there's lots more Autumn Splendour inspiration for you over at A Vintage Journey, and we hope we'll see you on the journey somewhere down the road this month.  Happy crafting all!


Life starts all over again when it gets crisp in the fall.
F. Scott Fitzgerald

Everyone must take time to sit and watch the leaves turn.
Elizabeth Lawrence

I'd like to play along at the Simon Says Stamp Monday Challenge where the theme is Tag It!
Tag Tuesday are playing Autumn/Halloween, so I'd like to join in there too
At Stamps and Stencils they are having Spooky Fun with an Autumnal Twist - if Halloween isn't your thing, then autumn colours are allowed 
At Country View Challenges things are looking Plant-tastic... who could resist?!
At More Mixed Media they're playing Anything Goes with an optional twist of Orange
I'd also like to join in at Creative Artiste where, as always, it's Anything Mixed Media Goes

Friday, 21 September 2018

Curiouser and Curiouser


Hello all!  I'm here today with the results of a lovely day last week spent Skype-crafting with Brenda of Bumblebees and Butterflies and Nikki of Addicted to Art.

We've all been feeling a bit out of the swing of things and struggling for mojo, so it was fabulous to loosen up, get messy and laugh a lot together, thanks to the magic of the internet.

We each worked on a large surface - either a giant MDF tag or a large panel - and we are all sharing our creations simultaneously today.

If you hop around the whole trio, you'll see how differently they each turned out, even though we were all following the same process steps.  Here's mine...


I had such a lovely time with this project, and I have no doubt that the company and the process helped with that.

We took it in turns to suggest what the next layer or technique should be - keeping the instructions fairly loose, so that there was a bit of flexibility built in.


I was working on one of That's Crafty's Gigantags (whose name was invented by Nikki when she was on the DT there), so it's huge - 15 x 7.5 inches... lots of space to play on.


So what did we do?  Grab a cup of coffee and read on...

The first instruction was Brenda's - and she very sensibly suggested that we should seal the substrate with gesso.  Nikki was next, and hers was "use some texture paste in any way you wish".


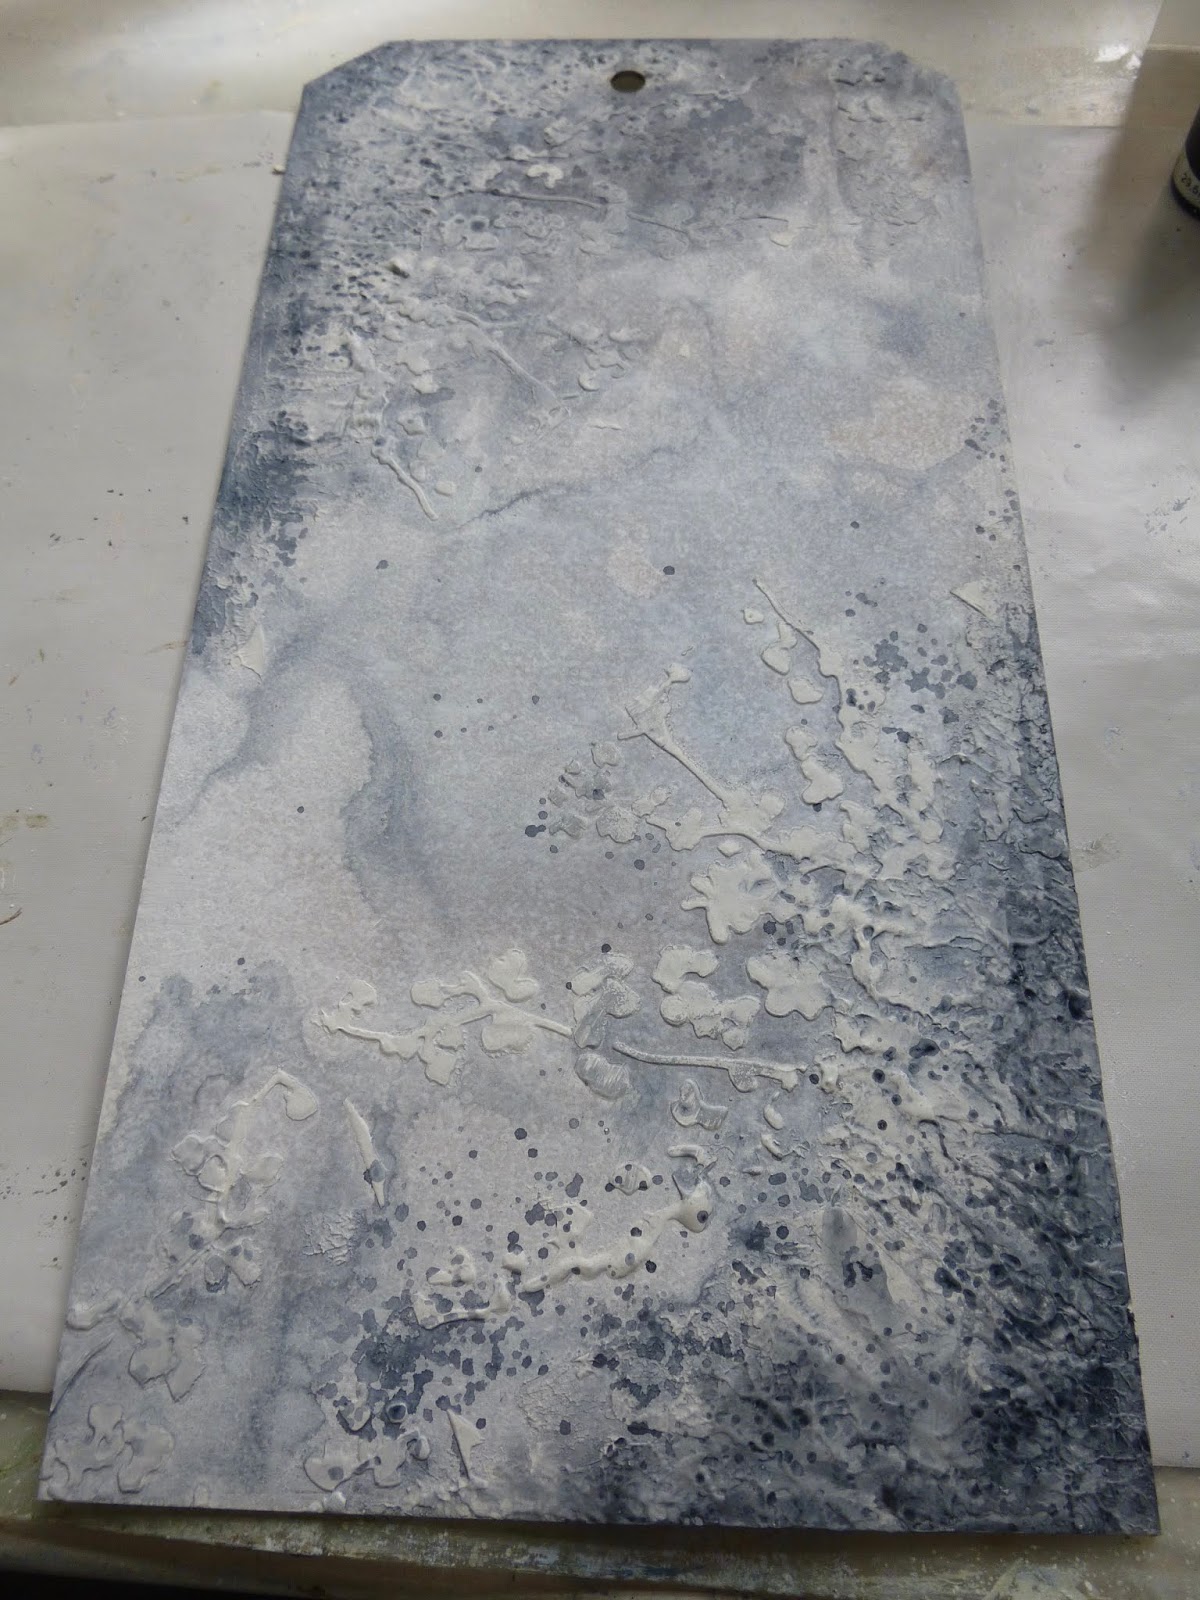
I sponged on my gesso, and added some Finnabair Plaster Paste just with a palette knife in opposite corners, and then from there I "grew" some plant tendrils by adding some more of the paste through a stencil.


For my turn, I offered "dilute some paint and apply it in any way you wish".  I used DecoArt Media Fluid Acrylic in Payne's Grey to add a wash of colour.  I put some on the craft mat and gave it a few spritzes of water before splodging it onto the textured corners of the tag.


I then spritzed that with more water and allowed it to run in a very diluted wash up and down the rest of the tag.  And finally I did a bit of splatter with what was left over on the craft mat.


Next up was adding crackle in any way you want (B).  This was the only bit that went a little awry for me.  My DecoArt One Step Crackle, usually utterly reliable, simply didn't get the time it really needed to do its thing properly.

There ended up being a bit of crackle at the thinner edges, and I found a way to cheat the uncrackled parts later...


We did try to leave time.  Rather than an individual suggestion, we all agreed that, to give the crackle time to dry, next we should spend some time gathering potential embellishments.  

And then to continue to allow crackle-drying time, we did some altering of those embellishments... adding texture to one or more of them (N), and then colour to one or more of them (me).


This is when I started to build my shelf.  It's just a couple of layers of cardboard packaging, cut to size and then embossed with the gorgeous Lumber 3D Texture Fade.

I added colour to it with Distress Stains and Crayons until I had a weathered look that I liked.  I don't seem to have a progress shot of that bit...


... so here's how it was by the end.  As it turned out, I had to pull apart the two original pieces and stick another bit of cardboard in between to create a thick enough shelf, edged with plain tape to disguise the corrugate.


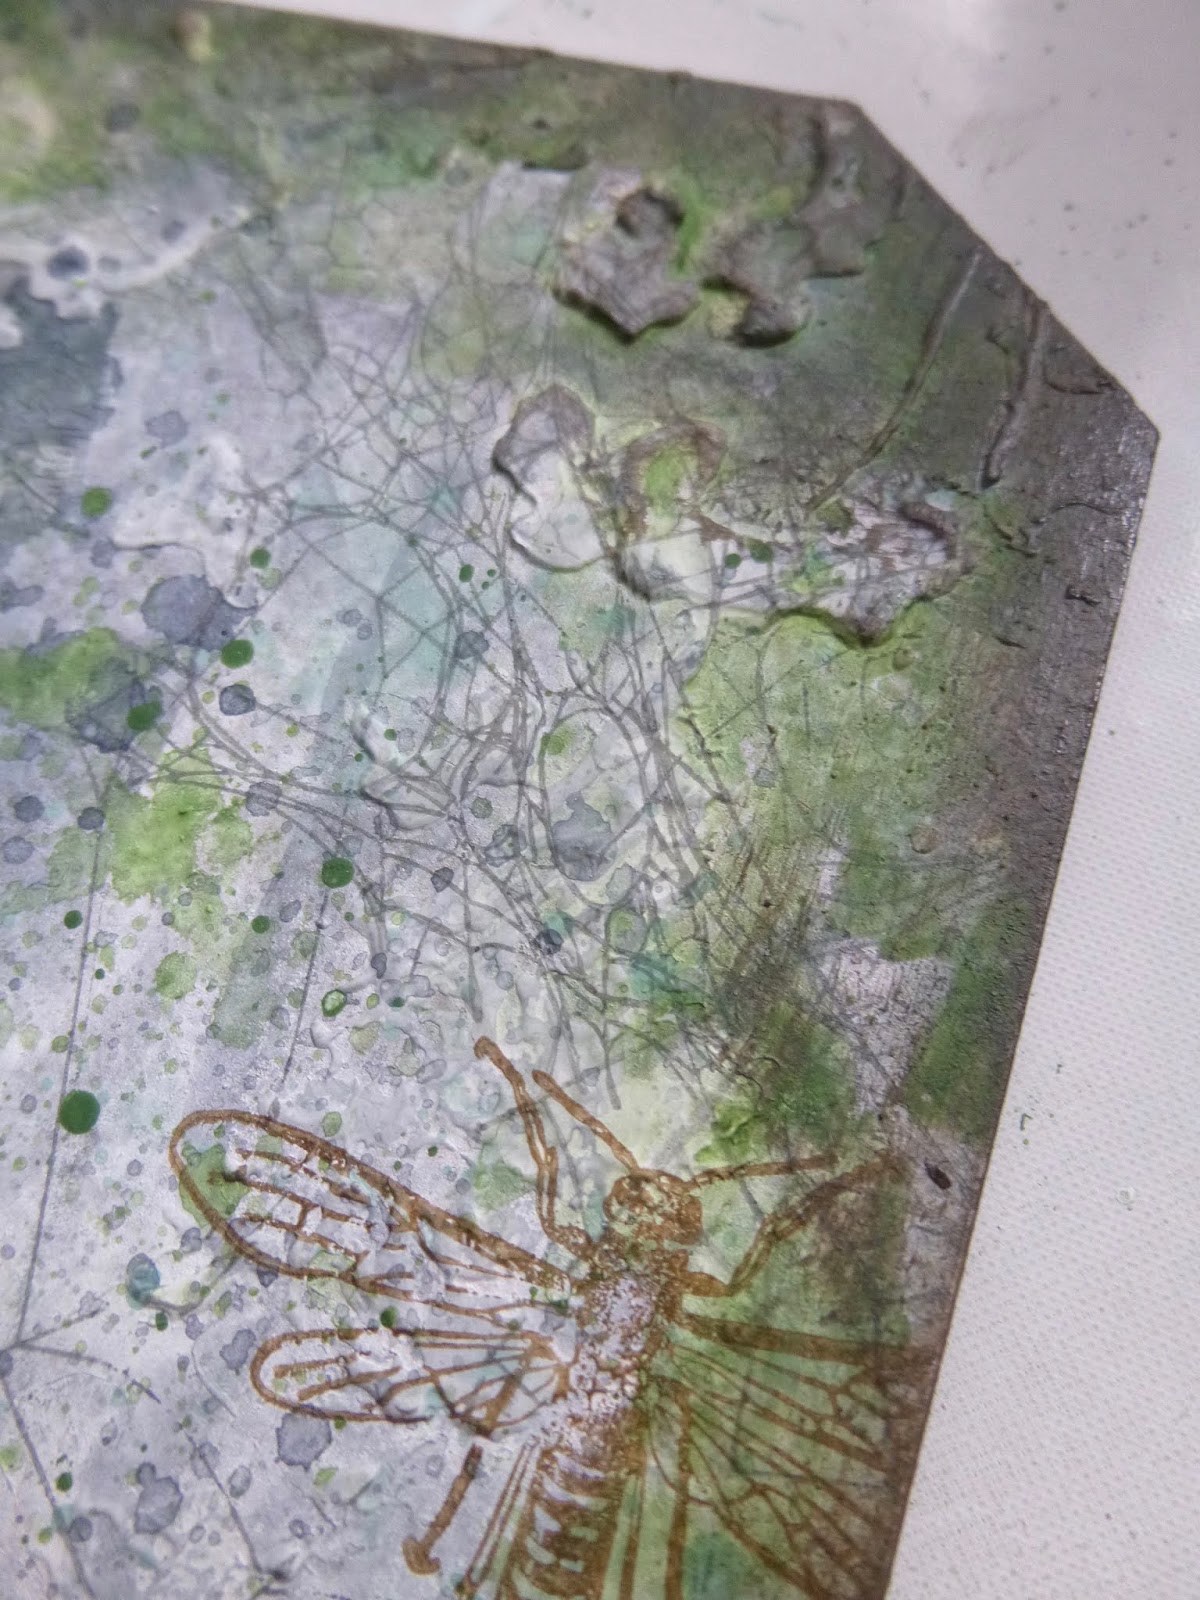
I also die-cut, embossed and inked the dragonfly at this point.  (Brenda had just discovered a pile of them in her stash that she'd cut for a workshop and not used, and as soon as I saw her waving them around, I wanted to use one - so there's an element that might not have made the cut if not for this Skypeing inspiration.)


Next step was "create a panel to use in building layers" (B).  You can see from the embellishments I was starting to arrange on the table beside the craft mat that I'd already planned to use some pre-made panels and frames on my tag, so now I decided to create an additional one which would add some more "wood" to echo the bookshelf.


I glued some more bits of cardboard together, die-cut them to an oval and went through the same steps as for the shelf.  You can see it taking its place in the upper left-hand corner as I continue to play with composition.

(And you can also see from the shine that the crackle is still annoyingly wet at this point.)


Now for some more colour... "apply a coat of paint to the background in any way you like" (N).  I added some Vintage Effect Wash in Patina, sponging it on and spritzing to let it pool and spread.

I then added some more vivid greens in the same way - a mixture of Fresco Hey Pesto and Hyde Park.


My paint layers were interspersed with my own next suggestion - background stamping.  I wanted to ink up my scrumptious new cobwebs from Tim Holtz.  I think they look stunningly delicate in Watering Can Archival.


And a few Potting Soil insects from the Entomology set also crawled their way into position.


For the next layer - dip, drip and dry some watery washes (B, of course!) - I used the same paint colours as were already present - some Payne's Grey, some of the Patina and a touch of the greens.


Since the tag is rigid, and there's the texture paste creating a dimensional barrier, I wasn't able to press right down into the paint on the craft mat, so more often than not I just got little dots of paint - which I loved... they looked like splatter!  So I added extra water to some of them, but not all (sorry, Brenda!).


Nikki invited us to "edge the base in whatever way you want".  I think all of us went for darkening it to draw the eyes inwards.  I certainly did - using some Archival Inks and Distress Crayons in the darkest browns.  It has the added benefit of bringing some of the texture into sharper focus.

I was busy playing, so all these photos come at pretty much the end of that whole batch of suggestions.


I was next up, and I really needed some time to work on what was really going to go on over the top of the background (which I very much loved by this point).

So my offering was for us to take some time working out the composition and design and finalising any embellishments we wanted to add.  For instance, I decided I wanted a lot more ephemera collaging in the background.


There followed a lovely period of quiet, intense, focussed work.  All you could hear were the occasional rustles of people searching for extra bits and bobs, or sanding or inking the final additions, and then working to arrange them on the substrate.

My little boy had been at the heart of things all the way from the start, but now I needed to make sure he had everything he needed for his collections.


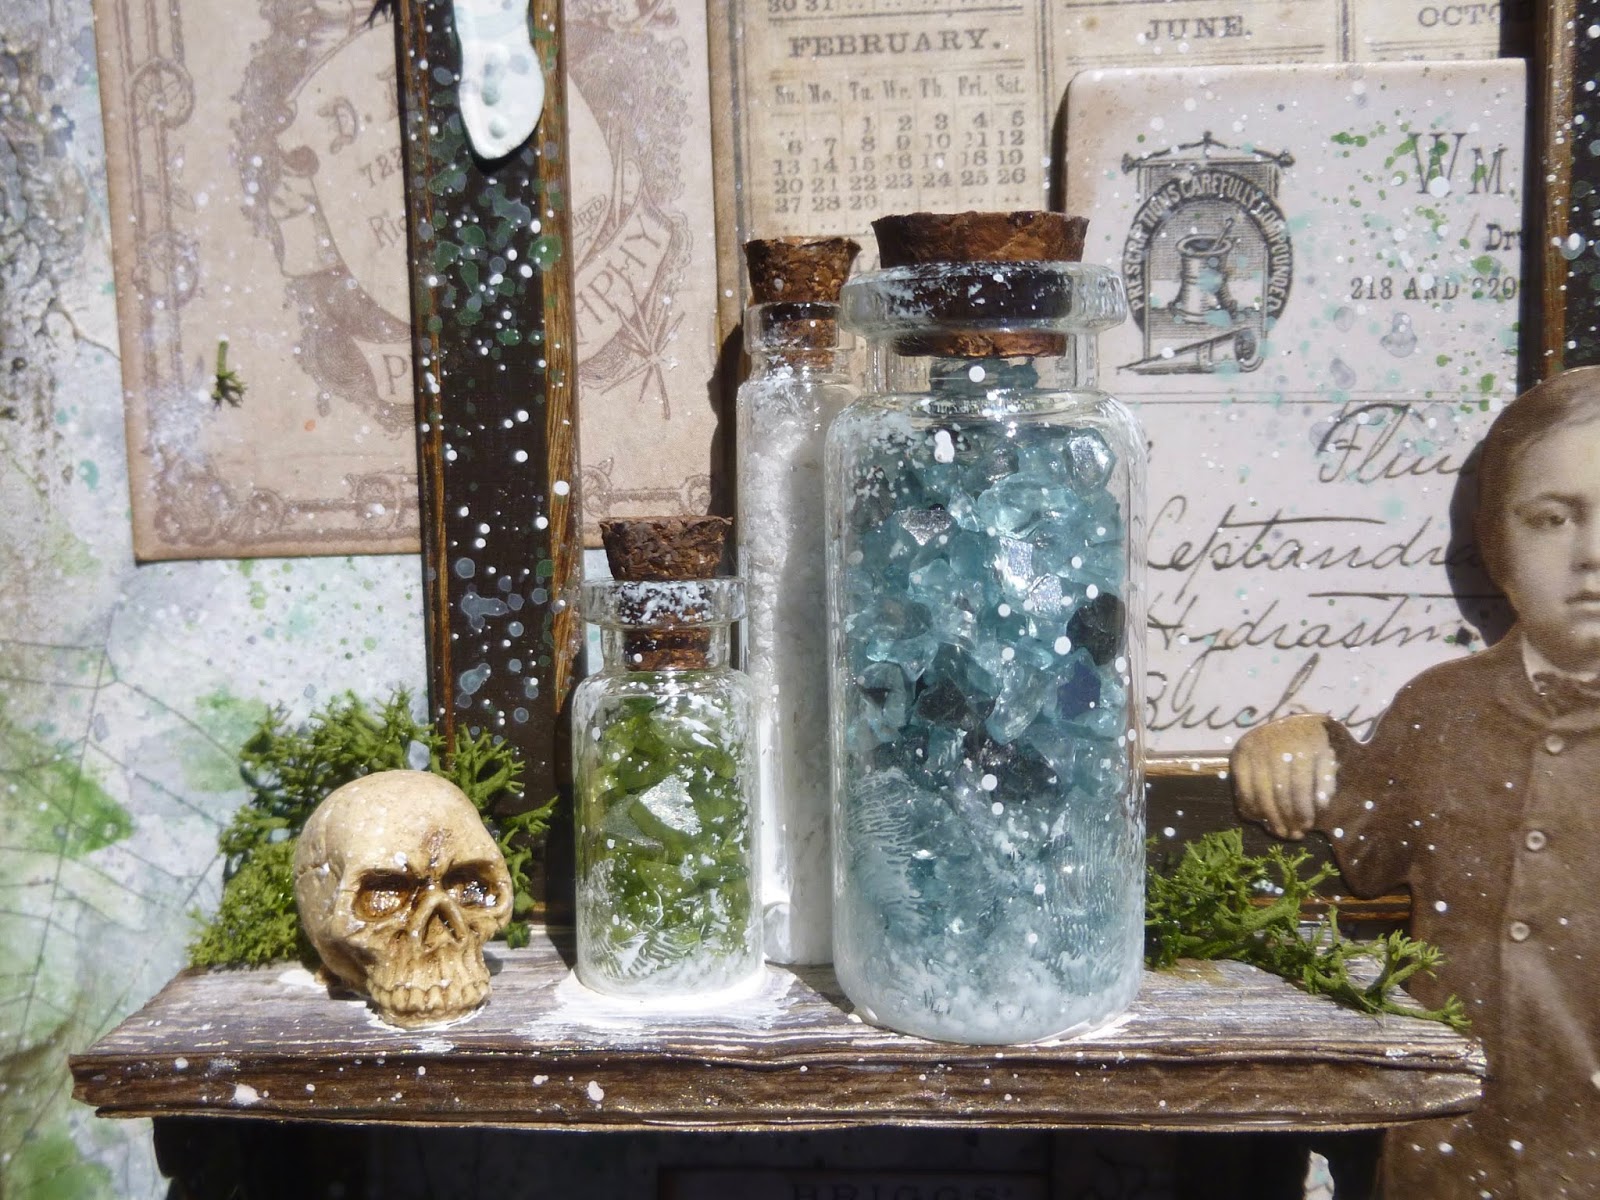
I needed to fill the jars and vials... some glass chips and sand from a certain Swedish furniture store, funnelled in through a twist of paper.

I also decided to add a touch of gesso to the jars for a shabbier look, and dyed the corks a little darker with some Distress Stain.


As I was arranging them on the shelf (lying down still at that point, as I hadn't started gluing anything down), I suddenly realised that what it "needed" was one of the Tim Holtz skulls for the boy's collection.


And I also realised that I'd completely forgotten about the one element I'd been thinking of using even before we started the whole process... some moss.  So, as I started gluing down all the layers of ephemera and the panel boards and the frame, I had a lovely time tucking bits of greenery here and there.


It occurred to me that the jars might be a bit heavy for my cardboard shelf, and I was thrilled with my brainwave for the shelf brackets... two of those ornate metal corner decorations from Idea-ology - perfect!


I solved the lack of crackle by adding some more background stamping (from the earlier instruction, so not cheating!) - using a crackle stamp over the areas where there wasn't much going on.

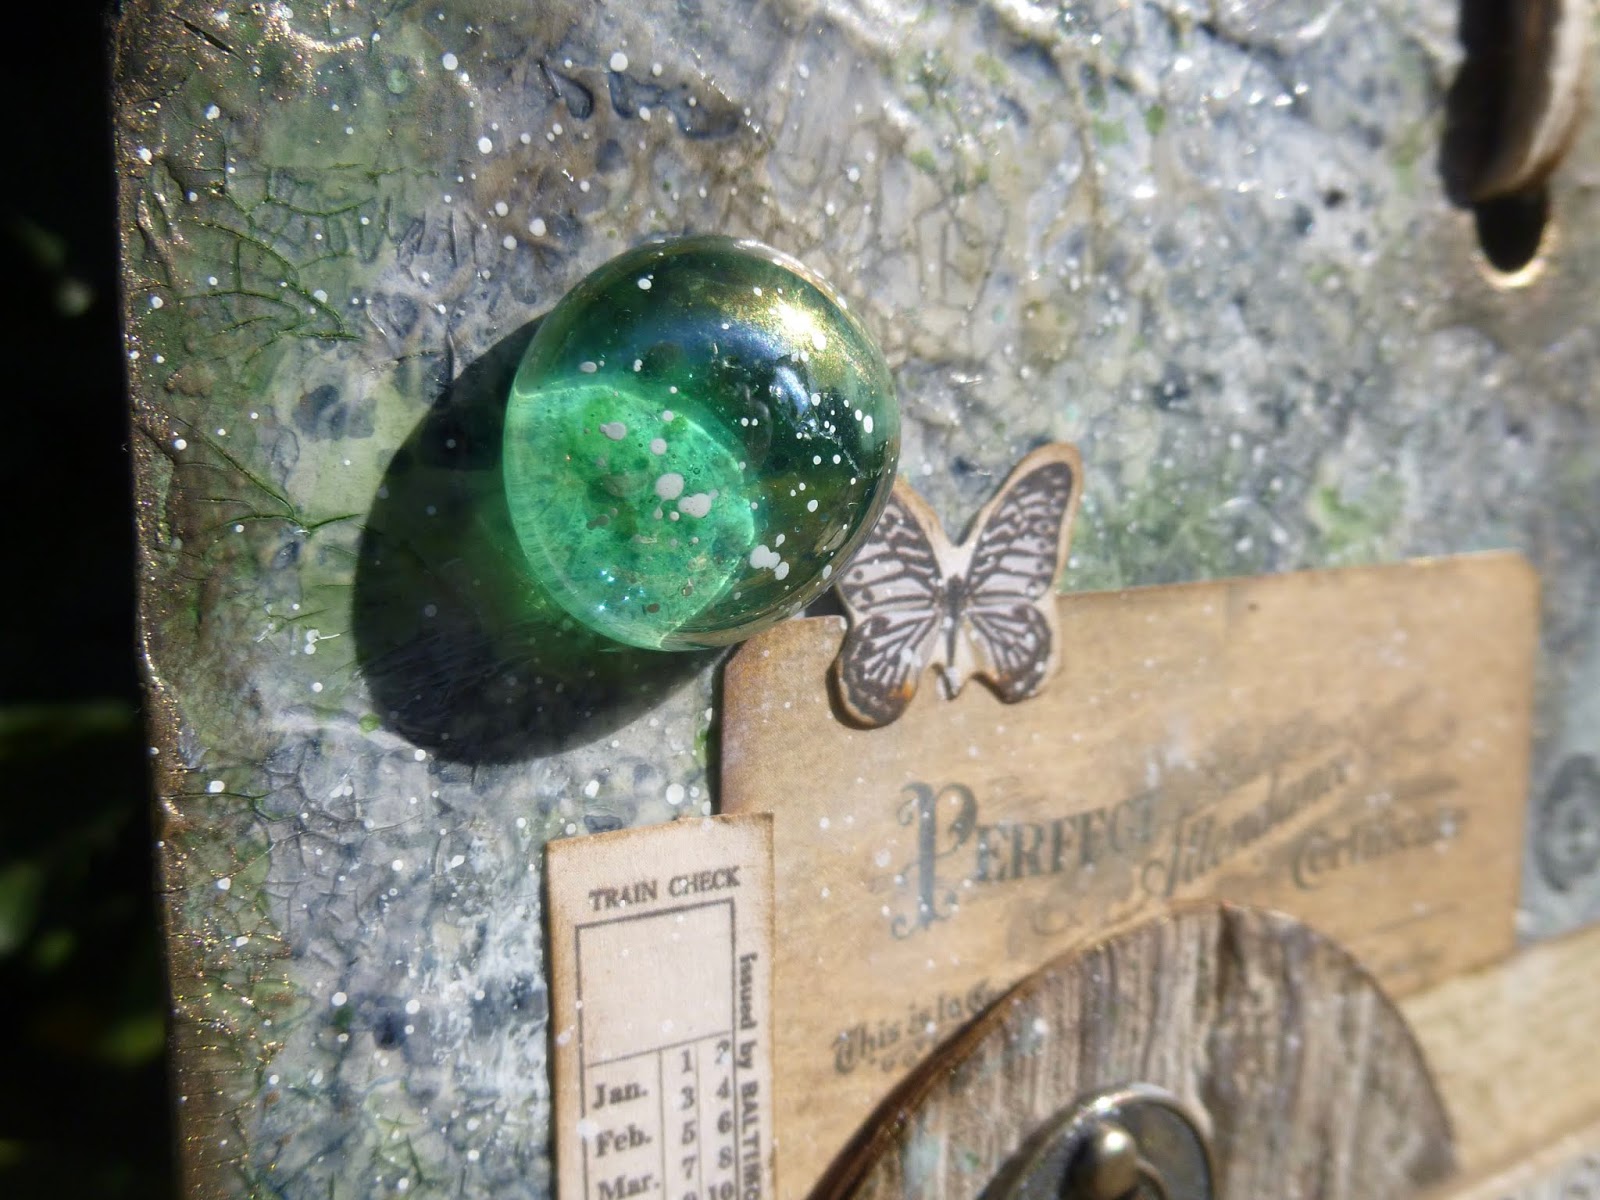
If you look closely, you can see there is some actual crackle too, round the tag hole.


The glass pebbles also put in an appearance at this point.


I love that they are the perfect colour to go with everything around them, and how they catch the light.


Brenda saved me some trouble by making her final instruction: "Do an Alison and add some words"!  I'd known for some time that I wanted some Quote Chips, and had planned to make words my next addition, so that was great.


The choice of words was obvious for this boy and his collections, and all the ephemera which clearly show his curiosity about nature and the world around him.


Nikki's last offer was to "add a touch of gold".  I said could it be "add a touch of metallic" as I thought something silvery might work better with my colour tones.  She generously agreed, and then I ended up using gold after all in any case!

It is the Treasure Gold White Fire, so it's a silvery gold, but still... it turns out Nikki was completely right (though she couldn't have known that!) - the gold brings a lovely warmth.


And no guesses what my final suggestion was... yup, splatter!  I find it very hard to live without a touch of white splatter these days, but I left the colour of splatter open so that the other two could go wherever they needed to for their projects.

I heard Brenda adding some cheeky last minute rub-ons, and was inspired to do the same.


Then it was time for the big reveal, as we each held up our creations for the others to see.

And it was so much fun to see where these process steps had taken each of us.

I have to say it was a little unsatisfactory peering at the slightly blurry Skype screen (divided into three for the group call, so each camera shot was a third of the size of the iPad itself.

I can't wait to see the proper photos over at Bumblebees and Butterflies and Addicted to Art today.


Craft and art-making is usually a solitary activity for me, and I do like it that way - but this was a great way to free up the mojo a bit.  Bouncing ideas around with like-minded creatives, and sharing the burden of deciding what to do next, and also having a little less control at times, all contributed to the joy of this make.  We plan to do it again!

Thanks so much for stopping by today.  I hope you've enjoyed this journey even half as much as I did.  And I hope you'll all find ways to release your own creative mojo this weekend.   Happy crafting all!


When shall we three meet again?
From Macbeth by William Shakespeare (I know it's meant to be unlucky to quote from "The Scottish Play" - but it was irresistible)

I'd like to share this in the Anything Goes theme It's Been A While over at Stamps and Stencils
The Creative Artiste Mixed Media Challenge are playing Anything Mixed Media Goes
At the Mix It Up Challenge Blog they are playing Anything Goes with an optional twist of Layering
They're asking us to Slap It On at Try It On Tuesday - done!