

I promised a proper look at my Hot Picks samples, so here's a sprinkling of Christmas cheer - much earlier than you'd usually find such things here at Words and Pictures. I try to confine my Christmas crafting to December as far as possible, but when you've got new stamps to play with...
All these are created with stamps from HPXM08 and HPXM09.

Glasses of Glühwein at the ready?
I really love the new Fresco paint colours (you can see the full set in Monday night's post at PaperArtsy), and two of them were in our colour palette for these Christmas creations. The full list was Professor Plum, Captain Peacock, Mermaid, Moonlight, Concrete and Chalk.

Now some of those are old favourites, but I'd never played with them in a combination like this, and I felt a bit too pink and purple to start with... but then I got into the swing of things with some kraft card, and from there I never looked back.

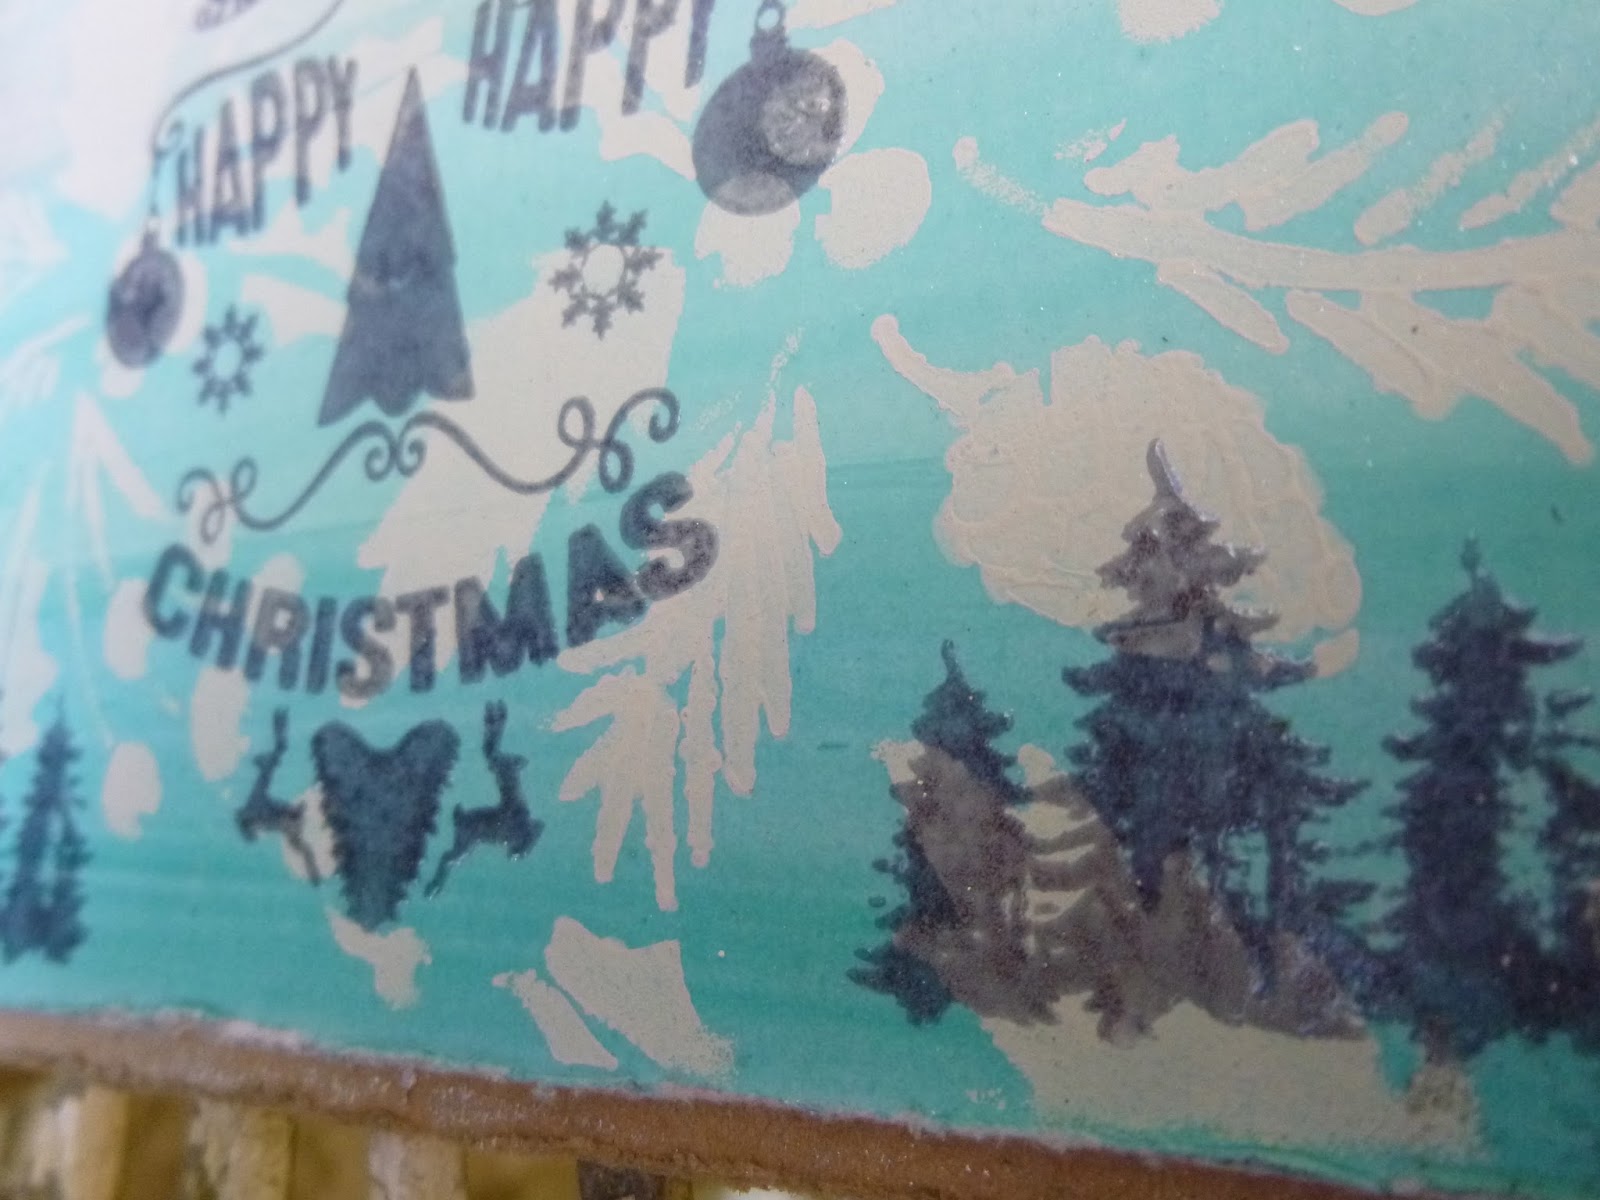
I had great fun creating dynamic structure on the card using a credit card (well, not an actual credit card - a fake one somebody sent me to advertise something at some point), and I think it really shows off the colours too.

This 7 x 5 panel includes several layers all drawing you towards the little tree at the centre, embossed in Vanilla White powder.

The festive sentiment stamps in these sets are really decorative. As I said on Monday, you can really make them the focal image of a piece.

This one is clear-embossed against a paint-scraped background. (I think it was stamped in Hydrangea Archival.) I love the icy sheen you get.

I layered up the tiny trees to create quite a forest underneath.

I thought it was perfect putting the sentiments on tags, as that's what you could actually do with them - they'd make great accents on some gift wrapped presents.

Here I applied the paint with a broad brush, shading from colour to colour, and then did some stencil-bumping with Tim's new Snowflake layering stencil.

More tiny trees in the corner...

The sentiment, with its marvellous tree and attendant reindeer, is embossed in Vanilla White, and then I applied some diluted Captain Peacock to create shading down one side of it, to echo the stencilling.

I'm really pleased with the texture of the embossing powder and how the colours play together here.
My tags mostly seemed to keep happening in pairs, but it takes about the same amount of time to make two as one after all. I had some thick ovals lying around from die-cutting frames months ago, and they looked just perfect for another of the small trees.

The background is created using Tim's Holly Bough layering stencil - done first in Moonlight, and then with accents added in Professor Plum and Captain Peacock on the berries and leaves respectively.


I shaded the paints onto the ovals, ombre-style, one as a sunset and one as a sunrise... and then stamped the tree a couple of times in Aquamarine Archival on either side before embossing my central trees in Vanilla White.


More Vanilla White embossing powder makes the "Cinerama " Merry Christmas stand out against the stencilling.

A couple of simple cards next - done on ombre backgrounds with stencilling in Snowflake Fresco done through the Holly Bough stencil again.

One card travels from Professor Plum to Moonlight, the other from Captain Peacock to Mermaid, both finishing with a touch of Chalk at the top.

I stamped the greeting in Blue Violet and clear embossed it, and added some more of the tiniest trees done the same way, to balance it out.
The wooden stars everywhere are Calico Craft Parts. I do like the effect of the layers here...

Because some of the images are adorably teeny, they're just perfect for smaller gift tags - these are just about ATC-sized.

There's a trio using the same credit card technique as for the 5 x 7 panel. Then the stamping is done in Versamark with the Vanilla White embossing powder.

These are the only ones I didn't take a distressing tool to - I thought they looked sleeker with these sharper, more modern clean edges.
I'm completely in love with this little twirly tree.

This extra little pair use the Father Christmas greeting again - you can see that the chevrons here pick up on the designs in the July Hot Picks release.
Paint layers, stamping, lots of splatter and they're pretty much done - that's the kind of quick make you need at Christmas!

Some more fabulously twirly trees appear on the next pair of tags.

These started with a crackle base - Chalk and Concrete over a background of Captain Peacock and Professor Plum.

I spent some time debating the best colours to stamp in - there's Aquamarine Archival and I think the other is Versafine Imperial Purple.

In any case, in both tags I clear embossed the trees and accompanying deer, and left the sentiment stamp "naked".

I used the paints in very watery washes to create the "sky blue pink" backgrounds...

... and there are more Calico Craft Parts Primitive Stars lighting up the sky, edged with Pewter Treasure Gold, as are all the tags.
And finally here's probably my favourite pair (though the ovals run them pretty close) where I used the Tim Holtz die Carved Ornaments #2.

Again, I ombred my way through Captain Peacock - Mermaid - Moonlight - Professor Plum in either direction and stamped my trees in Versamark before adding the Vanilla White embossing powder.

The spiralling trees are already in a trio...

... and I stamped my favourite tree three times to get the effect of it continuing around the bauble. Honestly, size-wise these tree stamps and these baubles could have been meant to be!

I painted the hooks of the baubles with Brushed Pewter Distress Paint and added some Pewter Treasure Gold.

While I was at it, I added some of the T.G. to the edges of the baubles too to help with that vintage glass look.

The background has some more stencil-bumped snowflakes and repeat stamping of maybe my favourite of the sentiment stamps. I love the font and the little snowflake floating up above.
So, there's my mammoth Christmas sampling, three months before its proper time, but I suppose if you're hand-crafting your Christmas you have to get started early. If you're visiting Ally Pally or one of the other shows you may well see some of these up on display.
Oh, and by the way, if you'd like to WIN TICKETS to visit Ally Pally just leave a comment telling me so ON THIS POST. I'll be drawing the winner(s) on Sunday.
I'll be back soon to share my Halloween samples - now after all that, is that a promise or a threat do you think?! And don't forget that at 7pm every evening this week there are more new treats over at PaperArtsy!
Christmas makes me happy no matter what time of year it comes around.
Bryan White