I'm travelling into a new way of working, a new country, a new language, and a new hobby which I'm passionate about. Come with me for some of the journey...

Showing posts with label Artistic Stamper GD. Show all posts

Wednesday, 2 October 2013

Come buy, come buy!


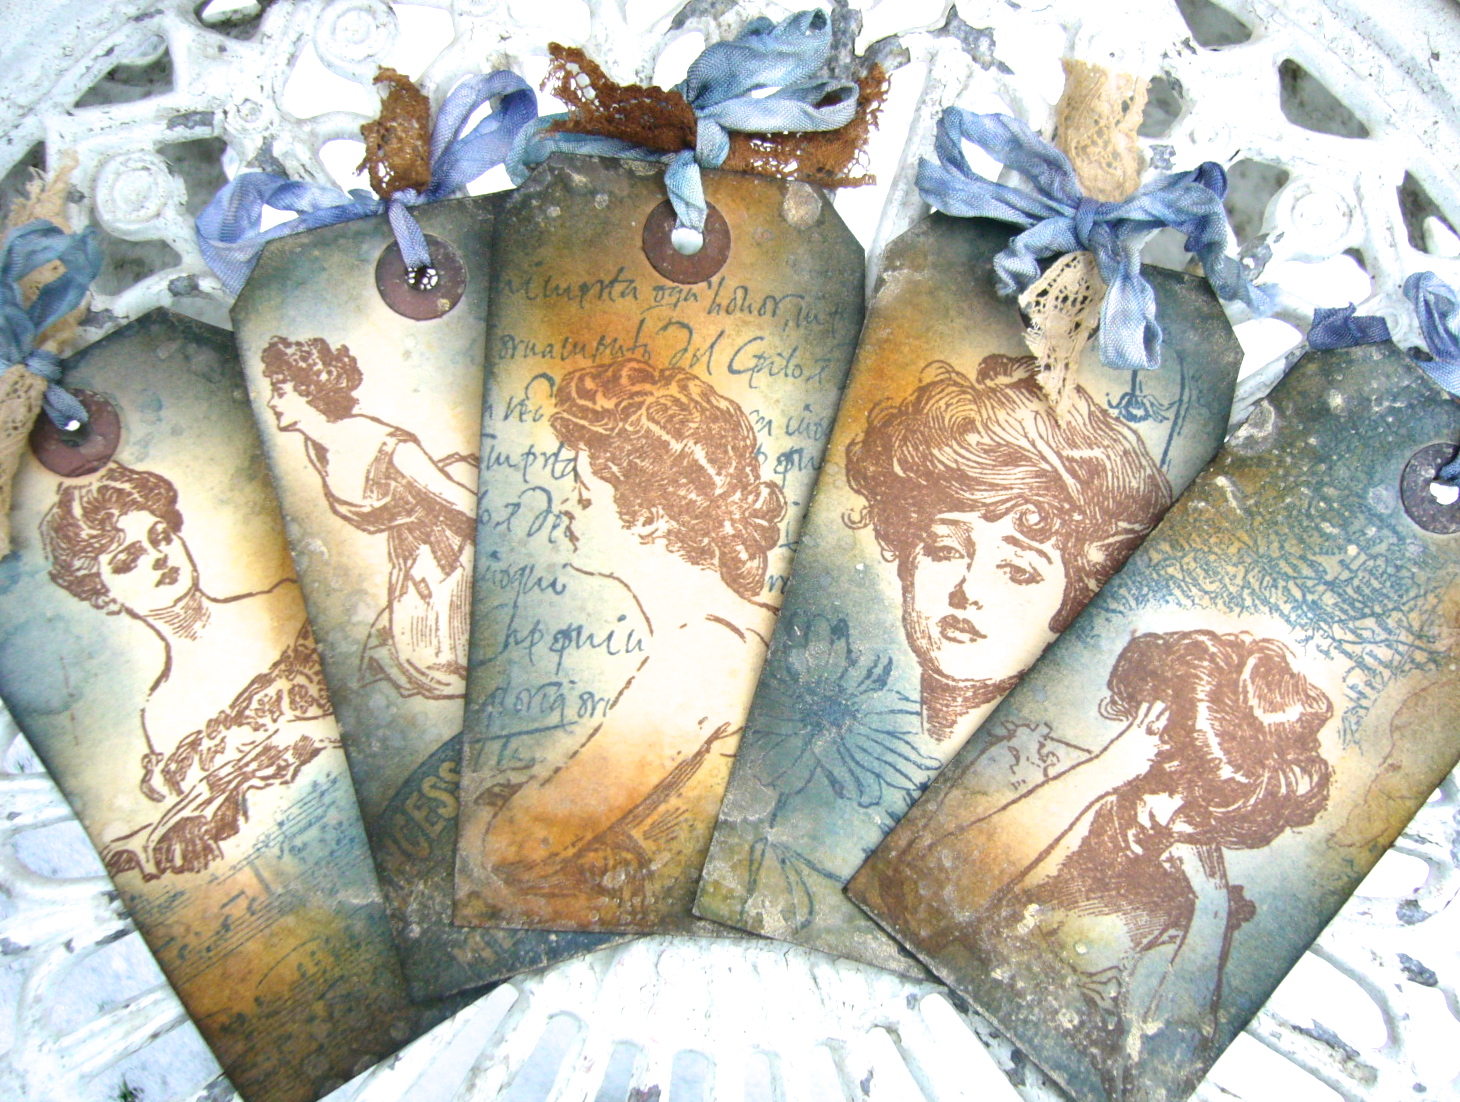
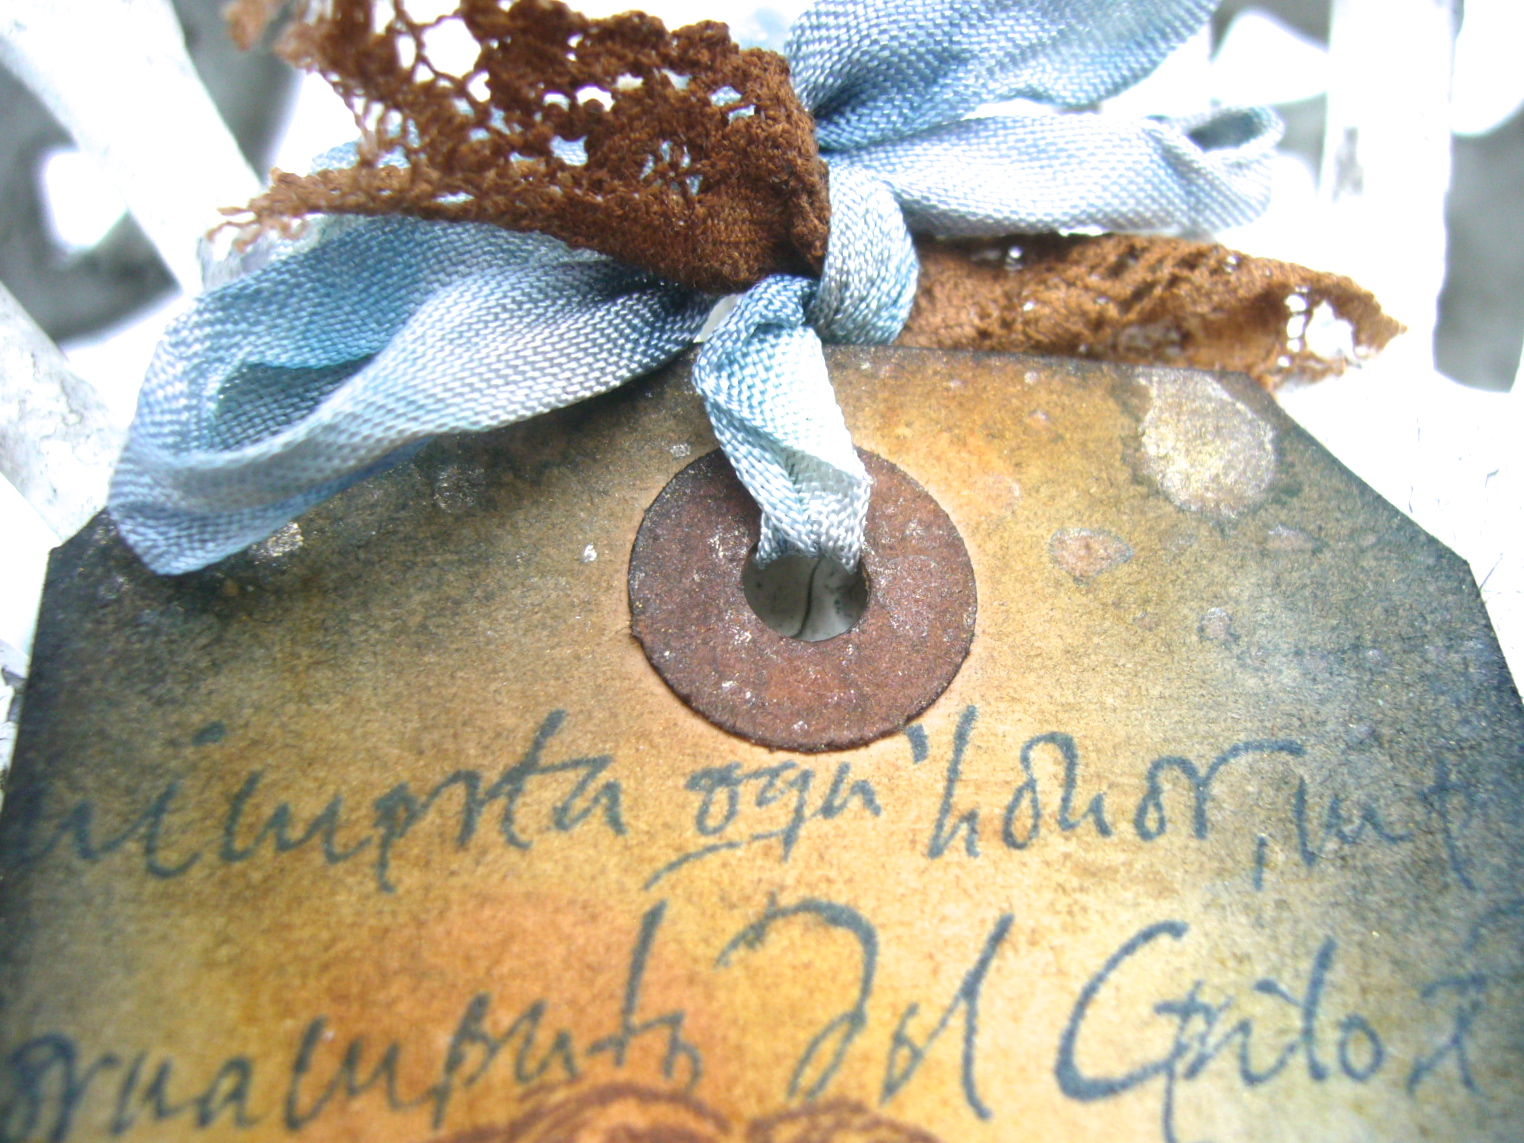
Hello everyone! What with all the house-moving shenanigans, it's pretty quiet at my craft table at the moment... though the quiet was interrupted with some squealing when I found my Bluesy tag had been pinned by a certain Mr Tim Holtz!!

In any case, I thought I'd do a catching-up post today, as I continue to gather some of my GD projects together under the one roof.  So please don't feel you have to comment again...

This was my final project as Guest Designer for The Artistic Stamper in February.   As you know, I'm now thrilled to be a regular member of their team!

But here's what I offered up at the end of February, earlier this year...


So, I promised you something simpler for my final piece (in the hope of writing a post shorter than War and Peace for once)... and I did make something simpler, but I ended up making it in two different versions!


I knew I wanted to work with the glorious Victorian advertising bills - they are so much fun: fantastically detailed in their wording, with brilliant cartoons.  They are simply wonderful pieces of print ephemera that rocket me back in time when I look at them.


My first thought was that I wanted to stick them on a wall; a grimy, crumbling wall in a forgotten alleyway, with these three ancient posters still clinging on.  So I had to create a wall background... 


Lots of ways to do that - you could use the Decorative Strip Die by Sizzix, or some texture paste through a stencil.  I used an embossing folder, Tim Holtz's Bricked Texture Fade on a large tag (running it through twice to emboss the whole thing).


Then I set about it with some inks - Vintage Photo, Pumice Stone, Black Soot and Aged Mahogany - until I had a suitably grungy look.  


I used the Paper Distresser on the edges, and then ran the Black Soot DI pad around them to give it a good strong inky edging.

For the posters themselves, I did a bit of TH's wrinkle free distress technique using Old Paper and Antique Linen DIs - not too much ink, as I wanted age spots rather than a complete change of colour. 


I'd already done one version with darker inks, very beautiful, but once I'd stamped the images, they didn't really look like posters.

So with this new, paler version, I stamped the three adverts in Black Archival, and then did lots of distressing - ripping, rolling, using the TH paper distresser, and adding Vintage Photo to some of the tears and creases.  It's one of my favourite things to be able to age a piece of paper like this!


Simple enough then to stick the bills on the wall (hope I don't get prosecuted), all in a row, and add some trimmings.  

And you can read what you like about Victorian society into those trimmings: it's raffia, inky twine and some leather all tied up with a beautiful shiny satin black ribbon.


I was pretty pleased with that, but I still had those spare stamped images still sitting on my desk, stamped on the darker inky paper (two sets in fact, safety in numbers you know).  I started shuffling them around, thinking that they'd look pretty good in a slightly grungier version of the tag.


I grabbed some corrugated card, and added Distress Stains and thick gesso to it randomly and roughly.  

I created a background like this for a recent project and really liked it, so it was fun to resurrect it.  It creates a fantastically grungy, textural mess - no other word for it really.


I gave my three posters the distressing treatment again, and started positioning them on the tag.  They seemed to want to go in the other direction for this one, so I let them.


It was crying out for some metalwork, but I didn't want to go too smart...


... so I used some black alcohol ink to grunge up a key and some pen nibs from my stash, as well as an Idea-ology clock.

I like the grimy look of this - like the soot-ridden London streets of the nineteenth century.


I particularly love how the clock looks, with the black face and the figures sanded back to reveal the gold underneath.


I've always sort of thought that I was born in the wrong century, and I'd love to go back in time and visit, but looking at these images did just make me wonder whether my historical glasses are a little rose-tinted... were they really the "good old days"?

So I added a little slogan at the bottom asking just that question... stamped in black on paper inked to match the advertisements.


Again, I added some varied trimmings: string, raffia and some black paper string to tie them together.  

So there are my two variations on a theme using these fabulous little stamps, and I think I've brought it in under the 10,000 word mark!

Thanks so much for taking the time to stop by, and Happy Crafting!


Ingredients:
Stamps: Goose Grease, Phineas Pinchbeck and Squaretoes Continuous Lunch
Distress Inks: Vintage Photo, Aged Mahogany, Pumice Stone, Black Soot
Distress Stains: Vintage Photo, Walnut Stain, Old Paper, Antique Linen
Ranger Archival: Black
Alcohol Inks: Pitch Black
Gesso
Idea-ology: Time Pieces, Game Spinners
Decorative Strip Die Brick Wall (as an alternative to Bricked Texture Fade)
Tim Holtz Paper Distresser

Remembrance of things past is not necessarily the remembrance of things as they were.
Marcel Proust


Sunday, 2 June 2013

Journey towards yourself

Hello everyone - it's another catch-up post here today... collecting in another of my projects from my February stint as Guest Designer at The Artistic Stamper, so that I have it safely in my virtual scrapbook here at Words and Pictures.  

So, again, please don't feel you have to comment all over again - I'm so grateful for your warm support already over at Artistic Stamper.  This was the second piece I created... a philosophical suitcase!


Lots of inky fun in making this one, Distress Inks, Perfect Pearls, Distress Stains galore, and gorgeous stamps from several different Artistic Stamper plates, with the main focus on the glorious Gibson Girls.  (All the ingredients are at the foot of the post, with links to take you straight to them.)


Despite all the fun, the project has ended up having a slightly melancholy, or at least contemplative, "story" to it, which wasn't where I'd planned for it to go at all.  

But these creations sometimes have a mind of their own it seems.


I've always loved Charles Dana Gibson's drawings of turn of the century American girls, it wasn't until I was stamping and looking in detail at these particular images that I realised that, for me, they also have a definite sadness within them.


I started with the fabulous Vintage Valise die from Tim Holtz, cutting the main body of the suitcase from the Kraft Resist sheet of the world map.  

I daubed Distress Stains in various blues along with Picket Fence direct onto my craft map, and swept the kraft resist paper through it until I liked the look of it.


Using the Picket Fence means that the blues keep their colour integrity better than if you use them on kraft by themselves, which can make them look slightly greeny.  

The strappings were cut from Kraft-Core, sanded and inked, and I used tiny brads to attach the strap holders (which I used the other way up to get the plain kraft side, inked).


The luggage label comes from the AS Labels plate, and encourages journeys of all kinds: Seek, Question, Explore the outside world, and the inside one.


I wanted to be able to put things "inside" my suitcase, so - having done two virtually identical cases - I had to work out a way of creating a pocket, preferably one stable enough to allow the suitcase to stand up...


Let's hear it for ice lolly sticks (that's popsicles if you're here from across the water) - one of the most useful things to have in any craft stash! 


I used two (one cut in half) to form a framework inside the suitcase, glued with Glossy Accents, and left overnight to be sure of a good firm hold.


At this point, I was thinking that I would fill the case with tags depicting a young girl travelling the world, exploring, discovering and generally having a fantastic time.  

But, as I said, as I stamped the various images, they started to tell me a very different story.  And the voyage became less an actual journey, but a journey of exploration into the girl's inner self.


So there are two sides to each tag... the front, which just shows you the surface, the exterior, and then - when you turn over - the interior questions bubble to the surface, revealing what's going on behind the eyes.  

I honestly didn't try to think up any of these phrases; they arose as I was inking each tag - they seemed to come from the girl(s) themselves.


I started with luggage labels which had previously been stained with tea and coffee, which gives them a wonderful vintage feel straight away.  

Once the images were stamped, I blended Chipped Sapphire, Stormy Sky, Vintage Photo and Wild Honey Distress Inks onto the tags.  

I've been careful to leave at least the faces un-inked by extra colour, so that they stand out at the centre of each tag.


I spritzed and flicked with water after inking, and then finally added some gilding by spritzing Perfect Pearls Mist in Heirloom Gold onto the mat and splodging the tags onto it - again avoiding the faces, so that you'd be able to "read" what's going on inside.


And each tag has some additional stamping to complement the story of that particular Gibson Girl.


So there's the woman reading her letter...  I stamped her in Coffee Archival both on the tag and on a separate piece of paper so that I could cut a mask.  

And then I stamped the Calligraphy Mat around her, using Cobalt, to represent the letter she's reading.

I haven't examined the Italian in close detail but in my "story", it's a love letter from an Italian count, approved by the girl's parents as a suitor to her hand.  Everything is tumbling forwards towards the wedding at great speed.


But in the angle of her head and the weight of her shoulders it's clear that for her it's not so clear cut, and so on the opposite side the question reveals itself, lurking in the corner, in the depths of her mind:  Yes, but do I love him?


The woman with the book - to me it seems like a musical score; she's holding it at exactly the angle to read or sing from as a performer - has a look as though she's just heard something, but is not sure what.  

On the reverse, we see that this is not the first time:  Sometimes I wonder... Does no-one hear the same music I hear?


She's masked again, and this time it's music which is floating in her mind.  

The music stamp isn't the AS one, I'm afraid, but they do have a marvellous music manuscript background so I've popped a link to that at the foot of the page.


The girl with the glorious hair piled high has a look which you could mistake for arrogance or disdain, but when you look again, there's a pain and a defensiveness somewhere at the heart of it... the chin just a little too lifted, the eyelids just a little too hooded, hidden.


She shares her secrets with us on the reverse, surrounded by flower images from Botanical Plate #1: My beauty is not all there is to me.


The utter dejection and exhaustion is easy to read in the girl resting her head on her hands.  

She's probably the one who started me off looking more closely at the others.  Again I cut a mask so that I could stamp the Europe Map Background around her.


I positioned it so that you actually get a slightly removed masking effect - the thoughts hover a little way away from the main image of the thinker.  

Her question is clear... in all the travelling, in all the bustle of society events, where does she belong, how does she fit in:  Where is my home?


And finally the wonderful image of the girl seated on the floor, her skirts pooled around her, in a moment's respite from the social whirl of arrival at a new hotel (the beautiful vintage hotel stamp again from the Labels plate, dining, dancing).


There's such a yearning in the angle of her body, leaning forward, listening intently as though to catch the meaning of life, the universe and everything, on the brink of discovery:  Sometimes I can almost understand why.


For the tag trimmings I used Chipped Sapphire and Stormy Sky Distress Stains to tint lots of seam binding, and Vintage Photo and Antique Linen to alter the slightly pinkish tones of some lace from my stash.  

I knew these would all be peeking out of the top of the case, so they needed to tone with the suitcase colours too.


Wow... a longer post than ever - sorry!!  I planned to come up with something very simple for my final project at the end of February... two photos max!  But it didn't quite work out like that - though it wasn't such a marathon as this.  It'll be along soon here at Words and Pictures.

Thank you so much for taking the time if you've made it this far, and I hope you've enjoyed the journey.

Your visions will become clear only when you can look into your own heart.  Who looks outside, dreams; who looks inside, awakes.
C.G. Jung

Click to go shopping:
Ingredients: Gibson Girls Plate #1Calligraphic Mat #19Europe Map BackgroundMusic BackgroundBotanical Plate #1LabelsVintage Valise dieKraft Resist Paper StashKraft-Core;  Distress Inks: Chipped Sapphire, Stormy Sky, Vintage Photo, Wild HoneyDistress Stains: Antique Linen, Chipped Sapphire, Picket Fence, Stormy Sky, Vintage Photo; Archival Inks: Cobalt, Coffee; Perfect Pearls Mist: Heirloom GoldSeam binding;

Sunday, 19 May 2013

Float like a butterfly


Hello all!  

This post is for me rather than all of you, I'm afraid!!  Many of you have already seen this project, which was my first piece as Guest Designer for The Artistic Stamper in February of this year, and I was so thrilled with all your amazing comments and feedback.

However, when you post your pieces you can only put a sneak peek on your own blog and since I use this place as a sort of virtual scrapbook of what I've made and how I did it (hence the massively long posts the whole time!), I asked if it would be okay to post the full thing on Words and Pictures at some point in the future.

And this is that day... so please don't feel you have to comment all over again!!  This is just so that I can get all my work "under one roof"...


Now my "crafty" name of Butterfly was pretty much an accident as anything else - I've never really been much of a lepidopterist, but having adopted the name, I do seem to be drawn to them, craftily at least, quite often.


I'd seen quite a few "specimen cabinet" projects on my travels, and when I decided to work with the amazing Insects and Butterflies plate that was sort of what I was thinking of trying.


But in the end, I couldn't bear to pin them down, and so I decided to try to find a way to let them fly free - why do we create these difficulties for ourselves?!?


It all started with a little floristry frame I bought in the Czech Republic.  I got three of them at the time, and last time I used one - for the Semi-Controlled Mayhem of my Big Top Circus - it gave me headaches, so I knew the chances were it would go that way again!


I experimented with stamping the butterflies and dragonflies and colouring them in various ways, but it wasn't really taking off for me, so I decided to try it the other way up and create my colours first.

I did lots of wrinkle free distress technique with a mixture of Distress Stains in blues, greens and turquoises.


I also added Cosmic Shimmer sprays and Glimmer Mists both to the craft mat and onto the paper as I was drying it so that I could create lots of iridescence within the colours.


Then I got busy stamping...  I used Archival inks, mainly in Cobalt, Olive and Library Green - either individually or blending them on the stamp...


...and occasionally I even zhuzhed it up a bit with some Aquamarine!


Then there was lots of fussy-cutting - absolutely NOT my favourite thing to do!  

Some of the images are virtually symmetrical, so those I was planning to glue back to back and colour any edges that were still showing.


But others were too asymmetrical for that.  I toyed with stamping on tissue and using the reverse, but in the end I decided to go for something more abstract.

I used my Viva metallic paints - one in Turquoise and one in Golden Green - to paint the backs of the asymmetrical insects.  These are some of the most beautiful iridescent paints I've ever seen!


I used the lovely Calligraphic Mat stamped in either Library Green or Cobalt Archival to provide some decoration across the gleaming paint.


Then it was UTEE time!  And this was where I had one of my accidental brainwaves.

As I was adding the UTEE - great for protecting vulnerable antennae, and adding beautiful glossiness, as well as having the effect of intensifying the colours - I realised that it made the wings mouldable.

So once everything was safely coated on both sides, I went through again, heating lightly and shaping the wings for flight.


Let's skip over the part where I tried all sorts of ways to string'em up - raffia, twine, gold wire - and go straight to the elegantly simple solution: ribbon.

Not only easier to thread onto than most of those others, but also they were all far more prepared to sit nice and perkily with just the folded ribbon holding them in flight... no need for knots beneath each insect, or glue.


Still fiddly - don't get me wrong! - to get them all threaded in the right order, the right way up, balancing the different insects and heights.  But eventually I was pretty happy...


Once the "flying" insects were sorted, I needed to have some perching ones, some who'd just alighted for a moment on top of the mobile.  

Cue lots of fun and swearing as I attempted to glue minute portions of glossy butterfly to a single twig within the frame at exactly the angle required.


And then a couple just balancing on the upright tower part at the centre... more angling, more bad words, and a bit of cheating by tucking bits of dragonfly into the weave of the twigs!


Thank you for sticking with me through one of my trademark lengthy posts.  I've tried to give you some idea of the journey and some idea of the finished piece... 

Of course the real joy lies in the movement as the butterflies and dragonflies flutter in the breeze.  (Not when you're trying to take photographs of it in a biting wind, though - it was February at the time!)  

Thank you for dropping in today... and indulging me in this little revisitation.  

I hope whatever you're up to today brings you joy, and I hope to do some catching up in Craftyblogland over the next few days.


Happiness is a butterfly, which when pursued, is always just beyond your grasp, but which, if you will sit down quietly, may alight upon you.
Nathaniel Hawthorne